You love the freedom of the open water, but reeling in that elusive bass can be a challenge. Get ready to revolutionize your bass fishing game with 9 essential tips that will transform your approach.

From mastering the art of seasonal bait selection to adapting to changing weather conditions, you’ll gain actionable insights that will elevate your fishing experience.

Discover the impact of water clarity, the importance of sharp hooks, and the effectiveness of utilizing shredded worms. Explore the significance of fishing around cover and learn the art of tying proper knots.

Whether you’re a beginner or a seasoned angler, these data-driven tips will leave you wishing you had known them earlier. It’s time to catch more bass and make the most of your fishing trips.

Key Takeaways

  • Adjust bait selection based on the season and weather conditions
  • Fish during early morning or night for increased bass activity
  • Consider water clarity when choosing lure colors
  • Sharpen hooks and use proper knots for better hook penetration and line strength retention

Seasonal Bait Selection

During different seasons, you should adjust your bait selection when fishing for bass to match the changing behavior and preferences of the fish. Bass behavior changes with the season, impacting their feeding habits.

In summer, bass swim deeper to avoid heat, so using deeper baits is crucial. As they become sluggish and pickier with food during winter, adapting your bait selection becomes essential.

Early morning and night are ideal times for bass feeding, as they’re more active during low light levels. Adapting to weather conditions is also important. Bass are lazier on sunny days, so using more attractive baits is beneficial.

Consider the water clarity too. In clear water, use natural colors, while bright greens and yellows work in foggy water.

Adapting to these changes will significantly increase your chances of a successful bass fishing experience.

Optimal Fishing Times

To maximize your chances of catching bass, it’s essential to choose the right time to go fishing, especially during early morning and night when bass are more active and feeding. Bass feeding habits and the best fishing locations play a crucial role in determining the optimal fishing times. Check out the table below for a quick reference on the best times to catch bass.

Time of DayActivity LevelBest Fishing Locations
Early MorningHighNear shallow areas
DaytimeLowNear cover and structure
EveningHighTransition areas
NightHighNear the banks
Late NightLowDeeper waters

Adapting to Weather

When fishing for bass, adjusting your bait selection based on the weather conditions can maximize your chances of success.

Different weather conditions require different techniques.

On sunny days, bass tend to be lazier, so using more attractive baits to entice them is recommended.

Conversely, on cloudy days, bass are more active. Taking advantage of lower light levels and using baits that mimic natural prey can be effective.

Keep in mind that bass may respond differently to baits based on the weather, so adapting your bait selection is crucial.

Water Clarity Considerations

Consider the color of the water when choosing your bait, using natural colors in clear water and bright greens and yellows in foggy water to adapt to different water clarity conditions.

Understanding Water Clarity:

  1. Choosing bait colors: Select natural colors like green pumpkin, watermelon, or brown for clear water. In foggy or stained water, opt for brighter hues like chartreuse, yellow, or white to enhance visibility.

  2. Effects of water temperature on bass behavior: Warmer water temperatures increase bass metabolism and activity, making them more receptive to a wider range of bait colors. In colder water, bass are less active and may respond better to subtle, natural bait colors.

Understanding these nuances and adapting your bait choices based on water clarity and temperature can significantly improve your bass fishing success.

Importance of Sharp Hooks

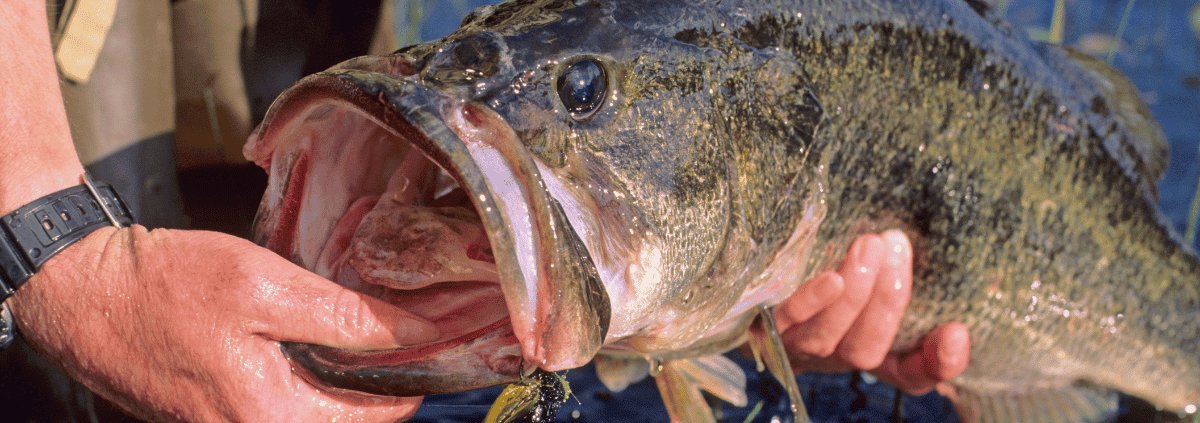
Sharpening your hooks before fishing is crucial for landing bass successfully. The importance of hook maintenance can’t be overstated. Bass have bony jaws, and without sharp hooks, you risk losing your catch.

Research shows that bass behavior is directly impacted by hook sharpness. When hooks are sharp, they penetrate the bass’s mouth more effectively, increasing your chances of a successful catch. Dull hooks not only decrease your hook-up ratio but can also injure the fish, leading to decreased survival rates post-release.

To maintain sharp hooks, use a fishing hook file to sharpen them before each fishing trip. Additionally, tying a Snell Knot allows for deeper hook penetration.

Utilizing Shredded Worms

Maintain sharp hooks for successful bass fishing and consider utilizing shredded worms as an effective bait option.

Shredded Worm Variations

  1. Color Variety: Experiment with different colored shredded worms to see what attracts bass in your area.
  2. Texture Modification: Try cutting the shredded worms into different lengths to see which size entices more bites.
  3. Depth Adjustment: Utilize various weights to control the sink rate of the shredded worms, appealing to bass at different depths.
  4. Scent Infusion: Enhance the shredded worms with attractant scents to make them even more enticing to bass.

Techniques for Using Shredded Worms

  • Subtle Movements: Utilize gentle twitches and slow retrieves to mimic wounded prey.
  • Targeted Areas: Cast near cover or structure where bass are likely to hide.
  • Observation: Pay attention to the bass’s response and adjust your technique accordingly.
  • Patience: Allow the bass time to strike before setting the hook.

Fishing Around Cover

When fishing around cover, target areas with rocks and other structures where bass are likely to hide. Utilize fishing techniques that involve casting your bait close to the cover and retrieving it slowly, mimicking the movement of prey. Look for bass habitats near submerged logs, overhanging branches, or aquatic vegetation, which serve as natural cover.

When using lures, opt for weedless options to prevent snagging. Try different retrieval speeds and patterns to entice bass hiding within the cover. Experiment with various bait types, such as jigs or plastic worms, to find what works best.

Proper Knot Tying

When fishing around cover, it’s crucial to also pay close attention to properly tying knots to prevent snapping and increase line strength retention. Mastering knot tying techniques and using the right knot tying tools will improve your bass fishing experience.

Here are some essential tips to help you tie the perfect fishing knot:

  1. Choose the right knot for the job. Different knots serve different purposes, so select the most suitable knot for your specific fishing needs.

  2. Use reliable knot tying tools. Invest in quality tools such as a good pair of clippers and a reliable knot-tying tool to make the process easier and more efficient.

  3. Practice makes perfect. Regularly practice tying fishing knots to ensure you can tie them quickly and effectively when out on the water.

  4. Check your knots. Always double-check your knots for any weaknesses or imperfections before casting your line.

Mastering these knot tying techniques will give you the confidence to tackle even the toughest bass fishing challenges.

Using Smaller Bait

To increase your chances of catching bass, consider using smaller bait to entice these elusive fish. Using smaller bait can be a game-changer when the bass are finicky or when your larger bait keeps getting stripped. Downsizing your tackle and using lighter line can also complement your smaller bait.

Lighter line allows for better presentation and can increase the sensitivity of your setup, helping you detect more subtle bites. Downsizing tackle and using smaller bait can mimic natural forage more accurately, making it more appealing to bass.

Frequently Asked Questions

What Are the Best Techniques for Casting and Retrieving Lures When Bass Fishing?

For casting and retrieving lures when bass fishing, choose lures based on water clarity and conditions. Use topwater presentations during low light. Vary retrieval speeds and pauses. Experiment with different casting angles and depths for successful bass fishing.

How Can I Effectively Locate Bass in Different Types of Water Bodies, Such as Lakes, Rivers, and Ponds?

To effectively locate bass in various water bodies, pay attention to bass behavior and water temperature. Bass tend to swim deeper in warmer water, so adjust your bait selection accordingly. Look for them around cover for better chances of success.

What Are Some Common Mistakes to Avoid When Trying to Catch Bass?

When trying to catch bass, avoid common mistakes like using ineffective techniques and improper handling. Survival tips include adapting to weather conditions and timing your fishing trips. Practice proper bait selection and sharpen hooks for better success.

What Are the Best Types of Fishing Lines and Rods to Use for Bass Fishing?

For bass fishing, consider a medium power rod with a fast action and a reel with a high gear ratio for quicker retrieval. Use a 10-12 lb line diameter to withstand bass fights. Opt for a 7-foot rod for versatile bait presentation.

How Can I Properly Handle and Release Bass to Ensure Their Survival After Catching Them?

To properly handle and release bass for their survival after catching, ensure you support their weight, avoid harming gills, and release them gently. Utilize catch and release techniques to conserve bass populations and practice responsible fishing.

Conclusion

Now that you’ve mastered these 9 bass fishing tips, you’ll be reeling in those big bass like a pro.

Remember, timing is everything – just like hitting the sweet spot in baseball.

Keep your hooks sharp, adapt to the weather like a seasoned sailor, and don’t be afraid to get creative with your bait.

With these practical tips in your arsenal, you’ll be well on your way to becoming a bass fishing legend.

Happy fishing!

Ready to hit the trails? Wondering how far you can trek in a day? Let’s explore the average hiking distance and factors that influence it.

Consider the terrain, trail conditions, and your personal limits. For instance, on well-maintained trails, hikers cover about 10-12 miles in a day. If you’re a beginner, understanding your stamina and the impact of weather is crucial. Experienced hikers can push their boundaries while being mindful of fatigue.

Whether you seek a leisurely stroll or a challenging adventure, knowing the average distances and factors affecting your hiking capacity is essential.

So, lace up your boots, and let’s dive into the details of how far you can hike in a day and the key elements to consider for an unforgettable wilderness journey.

Key Takeaways

  • The average hiker can hike about 2-3 miles per hour, resulting in a distance of 16-24 miles in a full day of hiking.
  • Most people max out at about 15 miles per day to avoid excessive stress on their body.
  • Terrain, elevation change, trail condition, weather conditions, and average pace all affect the distance you can hike.
  • Beginners should aim for 6-8 miles in a day, while hikes longer than 8 miles can be considered long hikes and may require overnight camping.

Average Hiking Distance

You can typically hike an average of 16-24 miles in a day, considering a pace of 2-3 miles per hour over an 8-hour period. However, elevation and trail difficulty greatly influence your hiking distance.

Uphill climbs and steep terrain can slow down your pace, reducing the distance you can cover in a day. On the other hand, flat trails enable faster hiking and the possibility of covering more miles.

It’s essential to consider the trail conditions, such as fallen logs or mud, which can significantly affect your hiking speed. For beginners, aiming for 6-8 miles in a day is reasonable.

Factors Affecting Hiking Distance

Factors affecting hiking distance include terrain, elevation changes, trail conditions, and weather, all of which can significantly impact your hiking pace and the distance you can cover in a day.

  1. Elevation Challenges

    • Uphill climbs can slow your pace and reduce the distance you can cover.
    • Steep descents require caution and may also affect your speed.
  2. Weather Impact

    • Hot weather can lead to fatigue and dehydration, affecting your hiking speed.
    • Cold and windy conditions may demand more frequent breaks, impacting your pace.
  3. Trail Conditions

    • Rocky or uneven paths can slow you down and require careful navigation.
    • Muddy or slippery trails can reduce your pace and affect your distance.
  4. Average Pace

    • Your typical hiking speed determines the distance you can cover in a day.

Considering these factors can help you better estimate the distance you can hike and plan your outdoor adventure accordingly.

Terrain and Trail Condition

When hiking, it’s important to consider how the terrain and trail conditions can impact your pace and overall hiking distance. Rocky trails demand cautious, slower hiking to prevent falls and injuries, potentially reducing your overall distance. In contrast, flat trails allow for quicker hiking, enabling you to cover more miles within the same time frame.

Trail reports from apps like All Trails and insights from other hikers can enlighten you about the terrain and trail conditions. Factors such as fallen logs, mud, or detours can impede your speed, emphasizing the significance of checking trail conditions beforehand.

Understanding the trail’s condition is vital in planning the distance you can comfortably hike. So, whether you’re navigating rocky or flat trails, being well-informed will help you make the most of your hiking experience.

Beginner Hiking Distance and Long Day Hike Definition

For a beginner, aiming to hike 6-8 miles in a day is a reasonable starting point as it allows for a fulfilling experience without overwhelming physical exertion. When setting out on a long day hike, it’s essential to define what constitutes a long hike and understand the recommended hiking distance for beginners.

Here’s a breakdown to help you understand long day hikes and beginner hiking distances:

  1. Beginner Mileage: Aim for 6-8 miles to start.

  2. Hiking Duration: This distance can take 4-6 hours for beginners.

  3. Long Hike Definition: Anything over 8 miles is considered a long hike.

  4. Preparation: Longer hikes require more time and preparation.

Keeping these points in mind will help you gauge your capabilities and ensure an enjoyable hiking experience.

Determining Hiking Limits

To determine your hiking limits, listen to your body and pay attention to signs of fatigue, pain, hunger, or feeling off. Your hiking endurance is unique, so be mindful of signals your body sends. Pushing through fatigue can lead to injury or exhaustion.

If you notice signs of fatigue, it’s crucial to take a break, refuel, and hydrate. Overexerting yourself can diminish the enjoyment of the hike and impact your overall experience. It’s essential to recognize your physical limits and respect them.

Building endurance takes time and consistent effort. By gradually increasing your hiking distance and pace, you can improve your stamina. Understanding your body’s signals and honoring your limits will contribute to a safer and more fulfilling hiking experience.

Increasing Hiking Speed

To increase your hiking speed, focus on strengthening your legs and core while also improving your cardio fitness. Here are some training techniques to help you hike faster:

  1. Strength Training: Incorporate exercises like lunges, squats, and deadlifts to build leg and core strength.

  2. Cardio Workouts: Engage in activities such as running, cycling, or swimming to enhance your cardiovascular endurance.

  3. Interval Hiking: Alternate between periods of brisk walking and short bursts of high-intensity hiking to improve speed and stamina.

  4. Hiking Techniques: Learn efficient techniques like using trekking poles, maintaining proper posture, and taking shorter but quicker steps to increase your hiking speed.

Elevation and Its Impact

You can expect elevation to significantly influence your hiking pace and endurance. When hiking at higher elevations, the air becomes thinner, making it harder for your body to take in the oxygen it needs.

To acclimatize, start at lower elevations and gradually work your way up. This allows your body to adjust to the changes in air pressure and oxygen levels.

Proper footwear is essential when hiking in elevation to provide stability and support on uneven terrain. Invest in sturdy, ankle-supporting boots with good traction to navigate steep ascents and descents.

Taking these measures will help you adapt to high elevation and ensure a safer and more enjoyable hiking experience.

Weather Conditions

Weather conditions impact your hiking experience in significant ways.

  1. Hiking Gear Essentials: Proper clothing and footwear are crucial for varying weather conditions.

  2. Importance of Hydration: Stay hydrated, especially in hot weather, to prevent heat-related illnesses.

  3. Temperature and Humidity: Hot and humid weather can slow you down, while cold weather requires additional layers.

  4. Weather Forecast: Check the forecast to anticipate any changes and plan your gear accordingly.

Your gear essentials, including proper clothing and footwear, are vital for tackling different weather conditions.

Hydration is key, particularly in hot weather, to avoid dehydration.

Keep an eye on the temperature and humidity levels, as they can affect your pace and comfort.

Lastly, always check the weather forecast before your hike to make necessary adjustments to your gear.

Trail Reports and Insights

Considering trail reports and insights is essential for planning a successful hiking trip. When preparing for a hike, trail reports from apps like All Trails and reviews from other hikers can provide valuable information about the terrain and trail conditions. They offer insights into trail maintenance, such as recent storms or natural events that may have damaged parts of the trail, fallen logs, mud, or detours that could slow you down.

Understanding Hiking Fatigue

To understand hiking fatigue, pay attention to your body’s signals and signs of exhaustion during your hike. It’s crucial to prevent hiking fatigue by managing your energy levels effectively. Here are four essential strategies to help you prevent hiking fatigue and maintain your energy levels:

  1. Pace yourself: Find a sustainable pace to avoid burning out too quickly.
  2. Take regular breaks: Rest and refuel to keep your energy levels up.
  3. Stay hydrated and fueled: Drink water and eat nutritious snacks to maintain stamina.
  4. Listen to your body: Pay attention to signs of fatigue, pain, or discomfort, and adjust your hiking pace or take necessary breaks.

Tips for Hiking Preparation

Prepare for your hike by ensuring you have the essential gear and supplies. Hiking gear essentials include:

  • Sturdy footwear
  • Moisture-wicking clothing
  • A backpack
  • Navigation tools
  • First-aid kit
  • Extra food and water
  • Sun protection
  • A multi-tool

Prioritize safety with these hiking safety tips:

  • Research the trail and weather conditions
  • Inform someone of your hiking plans
  • Bring a map and compass
  • Stay hydrated
  • Pace yourself
  • Adhere to Leave No Trace principles

Additionally, consider carrying:

  • A whistle
  • An emergency blanket
  • A headlamp

It’s important to check and maintain your gear regularly. By being well-prepared and equipped, you can mitigate potential risks and fully enjoy the freedom and adventure of hiking.

Frequently Asked Questions

What Are the Best Hiking Trails for Beginners in the Local Area?

For beginners in the local area, consider trails with low difficulty offering scenic views. Research trail conditions for an informed decision. Engage in shorter, flat hikes to build stamina and confidence. Happy exploring!

What Are Some Essential Items to Pack for a Day Hike?

When going on a day hike, essential gear like a map, water, first aid kit, and food should be packed. Safety tips include checking the weather, wearing proper footwear, and informing someone of your plans.

Are There Any Local Hiking Groups or Clubs to Join for Guided Hikes?

You can find local hiking events and guided trekking experiences through hiking groups or clubs. These groups offer opportunities to explore new trails, meet fellow hikers, and gain insight from experienced leaders.

How Do You Navigate and Stay Safe on a Hiking Trail, Especially if You’re Hiking Alone?

When hiking solo, always bring navigational tools and know emergency protocols. Plan your route, inform someone of your plans, and stick to well-marked trails. Stay safe by following safety precautions, and trust your instincts.

What Are the Best Practices for Leaving No Trace and Preserving the Environment While Hiking?

When hiking, remember to leave no trace, respect wildlife, and maintain trails. Reduce your environmental impact by picking up trash, staying on marked paths, and avoiding disturbing plants and animals. Your efforts help preserve nature.

Conclusion

So, lace up those hiking boots and hit the trails with confidence! With the right preparation and understanding of the factors that influence hiking distance, you can conquer any outdoor adventure.

Remember, the sky’s the limit when it comes to exploring the great outdoors, so go ahead and push your boundaries – the world is your oyster!

Ready to tackle the great outdoors? Did you know that over 44 million Americans go hiking each year?

Hiking up a mountain isn’t just about reaching the summit – it’s an opportunity to challenge yourself, connect with nature, and experience the thrill of conquering new heights. As you lace up your boots and prepare to ascend, you’ll discover the exhilaration of navigating rugged trails and embracing the beauty of the wilderness.

From essential gear to mental preparedness, this article will delve into the essence of mountain hiking and equip you with the knowledge to embark on this empowering adventure.

So, embrace the freedom of the trails and get ready to uncover the true meaning of hiking up a mountain.

Key Takeaways

  • Hiking up a mountain involves starting at a lower elevation and making your way to the top, following a trail that winds along the mountainside.
  • The duration of a mountain hike can range from one day to several weeks, depending on the peak.
  • Different terms such as summiting, climbing, and trekking are used interchangeably to describe the activity of hiking up a mountain.
  • The gear required for mountain hiking varies based on the duration of the hike, but essentials include food, water, navigation tools, and a first-aid kit. Additional gear may be needed for specific conditions, such as winter hiking gear or personal locator beacons.

Understanding Mountain Hiking

Understanding mountain hiking involves careful preparation and a willingness to embrace the challenges of ascending rugged terrain. To master mountain hiking techniques, it’s crucial to choose the right gear and understand the trail you’re tackling.

Some of the best mountain hiking destinations include the majestic Rockies in North America, the stunning peaks of the Swiss Alps, and the diverse terrains of the Himalayas. Researching the trail’s difficulty, length, and elevation gain is essential.

Along with proper gear and clothing, it’s important to be mentally prepared for the physical demands of the hike. By immersing yourself in the natural beauty of these destinations, you’ll find a sense of freedom and adventure that only mountain hiking can provide.

Embrace the challenge and embark on a journey that will reward you with breathtaking views and a newfound appreciation for the great outdoors.

Essential Gear for Mountain Hiking

To begin your mountain hiking journey, you’ll need the essential gear to ensure your safety and comfort on the trail.

  1. Backpack: Choose a sturdy, comfortable backpack with proper support and ample space for your gear.

  2. Footwear: Invest in high-quality, waterproof hiking boots with ankle support for stability on rugged terrain.

  3. Navigation Tools: Carry a map, compass, or GPS device to stay on course, especially in remote areas.

  4. Clothing: Dress in moisture-wicking layers and pack extra clothing for changing weather conditions.

When packing gear, prioritize lightweight and versatile items to minimize your load.

Additionally, consider taking a course in advanced mountaineering techniques to enhance your skills and ensure a safe and enjoyable mountain hiking experience.

Tips for Hiking a Mountain

When hiking up a mountain, ensure you are well-prepared for the terrain and potential challenges by following these essential tips.

Tips for Hiking a Mountain
Preparing for Altitude
– Acclimate to high altitude gradually.
– Stay hydrated and eat high-carb, low-fat meals.
– Recognize symptoms of altitude sickness.
– Descend if symptoms worsen.
Hiking with Kids
– Plan shorter routes suitable for kids.
– Bring plenty of snacks and water.
– Pack extra layers and sunscreen.
– Engage kids with games or challenges.

Preparing for altitude is crucial to avoid altitude sickness, while hiking with kids requires extra attention to their needs. These tips will help make your mountain hike a safe and enjoyable experience.

Health Benefits of Mountain Hiking

You should appreciate the numerous health benefits of mountain hiking. When you hit the trails with the right mountain hiking equipment and gear, you’re in for a transformative experience.

Here’s how mountain hiking benefits your health:

  1. Cardiovascular Health: The challenging terrain and varying inclines provide an excellent cardiovascular workout, improving heart health and stamina.

  2. Stress Reduction: Connecting with nature and disconnecting from technology helps reduce stress, leaving you feeling refreshed and rejuvenated.

  3. Mindfulness: The serene surroundings of the best mountain hiking trails offer the perfect environment for mindfulness and mental clarity.

  4. Physical Fitness: Engaging multiple muscle groups while navigating through rugged terrain contributes to overall physical fitness.

Hiking Resources and Platforms

Amid your mountain hiking journey, rely on platforms like The Hiking Helper for valuable trail recommendations and gear advice. When comparing hiking resources, look for platforms that offer comprehensive trail information, gear suggestions, and firsthand experiences.

The Hiking Helper stands out as a go-to resource, providing detailed trail insights and essential gear recommendations.

Additionally, finding hiking partners can enhance your mountain hiking experience. Look for forums, social media groups, or local hiking clubs to connect with like-minded individuals. Hiking with a partner not only adds a sense of security but also offers opportunities for shared experiences and mutual support.

Choosing the Right Mountain Trail

During your mountain hiking journey, consider factors such as trail length, elevation gain, and terrain when choosing the right mountain trail.

  1. Trail Length: Opt for a trail length that matches your fitness level and time availability.

  2. Elevation Gain: Prepare for elevation changes by gradually increasing your endurance and acclimatizing to higher altitudes.

  3. Terrain: Choose a trail with terrain suitable for your hiking experience, whether it’s rocky, forested, or alpine.

  4. Finding Hiking Partners: Seek out hiking partners who share similar fitness levels and goals, enhancing safety and enjoyment.

By preparing for elevation and finding hiking partners, you’ll ensure an enjoyable and safe mountain hiking experience.

As you embark on this adventure, remember to embrace the freedom that comes with immersing yourself in nature, and enjoy the breathtaking views that await you.

Preparation for Mountain Hiking

When preparing for mountain hiking, it’s essential to carefully consider the gear and supplies you’ll need for a safe and enjoyable experience. Ensuring mountain hiking safety is paramount. Here’s a helpful breakdown of the essential gear and supplies to prepare for your adventure:

GearSupplies
Hiking bootsWater
BackpackFood
Weather-appropriate clothingNavigation tools
HeadlampFirst-aid kit
Trekking polesSun protection

Proper preparation for mountain hiking is crucial for a successful and enjoyable journey. By having the right gear and supplies, you can ensure your safety and comfort while immersing yourself in the freedom of the great outdoors. Be mindful of the mountain hiking preparation, and get ready to embrace the challenges and rewards that come with hiking up a mountain.

Mental and Emotional Aspects of Mountain Hiking

Exploring the mental and emotional aspects of mountain hiking can enhance your overall outdoor experience and personal well-being.

When you connect with nature during mountain hikes, you feel a sense of tranquility and peace that comes from being surrounded by the natural world. It allows you to escape the hustle and bustle of everyday life and find solace in the beauty of the mountains.

Practicing mindfulness and meditation during hikes enables you to be fully present in the moment, appreciating each step and the breathtaking scenery around you. It creates a space for introspection and self-reflection, offering a chance to clear your mind and gain mental clarity.

Engaging in these practices can lead to a profound sense of fulfillment and rejuvenation, leaving you with a renewed perspective and a deeper connection to yourself and the world around you.

Safety Measures for Mountain Hiking

How can you ensure your safety while hiking up a mountain?

Safety precautions are crucial when embarking on a mountain hike. First, familiarize yourself with the trail and its difficulty level. Ensure you have essential gear such as a first-aid kit, extra clothing, and navigation tools. Check the weather forecast and be prepared for changing conditions.

It’s also wise to hike with a partner and inform others of your plans. Carry ample water and high-energy snacks to stay nourished. Additionally, knowing basic first aid tips can be invaluable. Consider taking a first aid course to prepare for any potential emergencies.

Frequently Asked Questions

What Are Some Common Myths or Misconceptions About Mountain Hiking That Hikers Should Be Aware Of?

Common misconceptions about mountain hiking include underestimating the physical demands, overestimating one’s abilities, and neglecting safety precautions. It’s important to be aware of the environmental impact and show cultural awareness while hiking.

How Can Hikers Minimize Their Impact on the Environment While Hiking up a Mountain?

To minimize your impact while hiking up a mountain, practice Leave No Trace principles. Respect wildlife and plants, stay on marked trails, and dispose of waste properly. Embrace sustainable practices to preserve the environment for future hikers.

Are There Specific Cultural or Historical Considerations Hikers Should Be Aware of When Choosing a Mountain Trail to Hike?

When choosing a mountain trail to hike, be aware of cultural etiquette, historical significance, indigenous traditions, and ecological awareness. Respect local customs, historical sites, and the natural environment to honor the mountain’s significance.

What Are Some Lesser-Known Safety Tips or Precautions That Hikers Should Take When Hiking up a Mountain?

When hiking up a mountain, it’s crucial to prioritize safety gear, stay hydrated, and be aware of altitude sickness. Additionally, having emergency communication is essential for unforeseen situations. Always be prepared for the unexpected.

How Can Hikers Support and Contribute to the Preservation and Maintenance of Mountain Trails and Ecosystems?

To support and preserve mountain trails and ecosystems, hikers can practice leave no trace principles, volunteer for trail maintenance, and support conservation efforts. By being environmental stewards, you can ensure these natural wonders remain for future generations.

Conclusion

So, lace up your hiking boots and get ready to conquer the world!

Hiking up a mountain isn’t just a walk in the park – it’s a test of your strength, endurance, and determination.

But the rewards are unmatched – breathtaking views, a sense of accomplishment, and a connection with nature like no other.

So, go ahead and challenge yourself to reach new heights, both literally and figuratively, on your next mountain hiking adventure!

Curious about how long it takes to hike 3 miles? Factors like your skill level, trail conditions, and the need for breaks can all influence your hiking time.

Understanding these factors is key to planning a successful trek. This article delves into seven key factors that affect the time it takes to hike 3 miles, giving you valuable insights to better prepare for your outdoor adventure.

Whether you’re a seasoned hiker or new to the trails, learning about these factors empowers you to make informed decisions and optimize your hiking experience.

Key Takeaways

  • Varying skill levels, walking paces, tolerances for hiking, and health conditions make it difficult to determine an exact hiking time
  • Elevation gain along the trail can significantly affect hiking speed, with a general rule of adding about 30 minutes for every 1,000 feet of elevation gain
  • Trail conditions such as snow, rocks, exposed tree roots, and downed trees can slow down hikers
  • Taking breaks along the trail, waiting time for hiking partners, and additional stops for sightseeing or viewpoints can increase the overall hiking time.

Varying Skill Levels and Health Conditions

When hiking 3 miles, the varying skill levels and health conditions of hikers can significantly impact the time it takes to complete the trail.

The effect of physical fitness on hiking speed is crucial. Those with higher fitness levels may cover the distance more quickly than those who are less physically fit.

It’s essential to consider the importance of trail difficulty ratings when assessing the impact of varying skill levels. A trail rated as difficult will naturally take longer to hike, especially for individuals with lower fitness levels.

Additionally, hikers with health conditions may require more frequent breaks or a slower pace, resulting in a longer overall hiking time.

Understanding these factors is key to planning an enjoyable and successful hike, allowing hikers the freedom to tailor their experience to their individual abilities.

Impact of Elevation Gain

Consider the elevation gain along the trail, as adding 1,000 feet of elevation can significantly impact your hiking speed and turn an easy 3-mile hike into a more challenging endeavor. Proper footwear is crucial for managing elevation gain. Sturdy hiking boots with ankle support can provide stability and reduce the risk of slipping, especially on steep inclines. Additionally, using trekking poles can help distribute some of the effort, reducing the strain on your legs and improving balance. When tackling elevation gain, pace yourself and take regular breaks to catch your breath and prevent fatigue. Utilize switchbacks if available, as they can lessen the steepness of the ascent, making it more manageable. Focusing on your breathing and maintaining a steady rhythm will also help conserve energy for the duration of the hike.

Importance of Proper FootwearStrategies for Managing Elevation Gain
Sturdy hiking boots with ankle supportPace yourself and take regular breaks
Use trekking poles for stability and balanceUtilize switchbacks if available

Influence of Trail Conditions

You might encounter various trail conditions, such as snow, rocks, and downed trees, which can significantly impact your hiking time and require extra attention to navigate safely.

  • Safety precautions on snowy trails
  • Strategies for navigating rocky and root filled trails
  • Being cautious of downed trees and obstacles
  • Wearing appropriate footwear for trail conditions
  • Allowing for additional time to navigate challenging terrain

When hiking on snowy trails, it’s crucial to take safety precautions, such as using trekking poles for stability and wearing traction devices on your hiking boots.

For rocky and root-filled trails, consider strategies like carefully choosing your steps and using hiking poles for balance.

Always be cautious of downed trees and obstacles, wear appropriate footwear, and allow for additional time to navigate challenging terrain.

Consideration of Breaks

Planning regular breaks during your hike is essential for maintaining energy and enjoying the journey.

Hydration during breaks is crucial to replenish lost fluids and keep your energy levels up. Make sure to drink water and consume snacks to refuel.

Additionally, strategize your breaks to maximize efficiency and reduce hiking time. Choose scenic spots or viewpoints as break locations to combine rest with sightseeing.

Utilize your breaks for quick stretches to prevent muscle stiffness and fatigue. Keep breaks short and purposeful to maintain momentum.

Effect of Hiking Partners

When hiking with a companion, your overall hiking time can be influenced by their pace and the need to coordinate breaks. Communication and coordination are essential as you navigate the trail together. Group dynamics and decision-making play a significant role in determining the pace and frequency of breaks.

Here’s how hiking partners can impact your trek:

  • Varying walking paces can affect overall speed
  • Coordination for breaks and rest stops
  • Group decision-making on route choices
  • Adjusting to accommodate varying fitness levels
  • Ensuring everyone feels comfortable and safe

Understanding and managing these factors can lead to a more enjoyable and efficient hiking experience with your partners.

Additional Factors to Account For

Consider seven additional factors that can impact your hiking time when traversing 3 miles.

  1. Trail difficulty ratings play a crucial role in estimating your hiking time accurately. Harder hikes with challenging terrains, such as steep inclines, rocky paths, or downed trees, will inevitably take longer to complete.

  2. Additionally, the accuracy of your estimation can be affected by the trail’s conditions. Snowy trails require more time and attention to navigate, while popular trails with heavy foot traffic may result in waiting time and slower progress.

  3. It’s important to account for these factors when planning your hike, ensuring that you have a realistic understanding of the time needed to complete your 3-mile trek.

Frequently Asked Questions

How Can I Estimate the Hiking Time for a 3-Mile Trail if I Have a Pre-Existing Health Condition That Affects My Hiking Speed?

Estimating time for a 3-mile trail with a health condition impacting your hiking speed? Consider your backpack weight, elevation gain, and overall fitness. Adjust your pace, take breaks, and be mindful of your body’s limits.

Are There Any Specific Tips for Hiking 3 Miles With a Heavy Backpack, Considering the Impact of Elevation Gain?

When hiking 3 miles with a heavy backpack, managing weight is crucial. Elevation impacts speed, so plan for longer uphill hikes. Trail conditions, rest planning, group dynamics, and health considerations all affect your journey.

What Should I Consider When Hiking a 3-Mile Trail With Rocky, Exposed Tree Roots, and Downed Trees on the Path?

Consider your hiking techniques and be cautious of trail conditions. Slow down to navigate rocky, exposed tree roots, and downed trees. Take your time, watch your step, and use proper footing to avoid accidents.

How Can I Plan for Breaks and Rest Stops When Hiking a 3-Mile Trail to Ensure I Stay on Schedule?

To plan breaks and rest stops on a 3-mile hike, consider your hiking pace, health, and the trail’s features. Strategize for regular short breaks, stay hydrated, and listen to your body’s needs. Adjust your strategy based on your comfort and energy levels.

What Are Some Strategies for Managing the Impact of Hiking Partners’ Speed on the Overall Duration of a 3-Mile Hike?

To manage the impact of hiking partners’ speed on a 3-mile hike, communicate your pace preferences, plan for potential waiting time, and consider the overall fitness levels of the group to ensure an enjoyable hike.

Conclusion

So, next time you’re planning a 3-mile hike, keep in mind these 7 factors that can impact your hiking time.

Whether you’re a seasoned hiker or just starting out, understanding these variables will help you make the most of your outdoor adventure.

Happy trails!

Ready for an epic adventure through the stunning Narrows of Zion National Park in October? Get ready to dive into the comprehensive guide that equips you with everything you need to know for an unforgettable hiking experience.

From navigating the unpredictable weather to gearing up with the right attire and equipment, this guide will help you make the most of your journey.

Embrace the breathtaking beauty of the Narrows while learning about the unique advantages and considerations that come with exploring this iconic destination in October.

Whether you’re a seasoned hiker or a first-timer, you’ll have the freedom to immerse yourself in this natural wonder while being fully prepared for the adventure that lies ahead.

Key Takeaways

  • Hiking the Narrows in October offers fewer crowds and a more enjoyable experience compared to the peak season of summer.
  • October provides comfortable temperatures, making it a great choice for hiking the Narrows.
  • It is important to check the official National Park Service website for updates on weather and closures, as flash storms and floods are more common in October.
  • When hiking the Narrows in October, it is recommended to wear sturdy, waterproof shoes, bring layers for the cooler temperatures, and use a dry pack to keep your gear safe and dry.

Weather and Conditions in October

October in the Narrows offers a unique blend of weather and conditions for hikers. The crisp fall air brings a refreshing chill in the mornings and evenings, while the days are pleasantly warm, perfect for exploring.

The stunning fall foliage paints the landscape with vibrant hues, creating a picturesque backdrop for your hike. However, it’s essential to be cautious of potential flash floods, which are more common during this time. Keep an eye on the weather forecast and heed any warnings from the National Park Service.

Despite this, the advantages of fewer crowds and comfortable temperatures make October an appealing time to visit. So, gear up with layers to stay warm, and embrace the beauty of the Narrows amidst the changing colors of autumn.

Clothing and Gear Essentials

To prepare for your hike in the Narrows, it’s essential to pack the right clothing and gear essentials to ensure a comfortable and safe experience.

When preparing for wet conditions, it’s crucial to prioritize the following gear and clothing:

  • Recommended Footwear: Opt for sturdy, waterproof, closed-toe shoes like water shoes or boots to navigate the river terrain. Neoprene socks can help keep your feet warm in the water, and it’s important to avoid hiking sandals as they don’t provide adequate protection.

  • Quick-Dry Clothing: Dress in quick-dry clothing to stay comfortable during the hike and bring layers to stay warm in the cooler temperatures of October.

  • Dry Pack: Use a reliable dry pack to keep your hiking gear safe and dry during the hike in the water.

Ensuring you have the right footwear, clothing, and gear will help you stay comfortable and safe during your Narrows hike.

Hiking Tips for October

When hiking the Narrows in October, make sure to check the weather forecast and heed any National Park Service warnings about flash floods. October offers beautiful fall foliage and fewer crowds, making it an ideal time for your adventure. Consider joining hiking tours for a hassle-free experience.

Dress in quick-dry clothing and wear sturdy, waterproof, closed-toe shoes. Neoprene socks can keep your feet warm in the water, and bringing layers is crucial for the fluctuating temperatures. Consider renting canyoneering boots or a dry suit from Zion Outfitters. Carry a dry pack to keep your gear safe and dry. Don’t forget a walking stick for stability on slippery rocks.

Be prepared for average high temperatures of 79°F and lows of 48°F. With caution, October promises an unforgettable hike through the majestic Narrows.

Temperature and Climate in October

Make sure to check the average temperature and climate conditions for October before embarking on your Narrows hike.

October in Zion National Park offers a pleasant temperature range for outdoor activities, with an average high of 79°F and an average low of 48°F.

While snowfall is uncommon in October, averaging 1.3 inches of rainfall, occasional rain showers can be expected. Flash floods are a real danger, and caution should be exercised, especially as climate changes can lead to unexpected water levels.

Be prepared for moderate rainfall and always stay informed about NPS warnings. It’s essential to stay updated on weather forecasts and pack accordingly for any climate changes, ensuring a safe and enjoyable hiking experience.

Safety Precautions for October

Ensure you have a reliable source of weather updates before embarking on your Narrows hike in October. While the fall months offer beautiful scenery and fewer crowds, it’s crucial to prioritize hiking safety and be mindful of flash flood precautions.

Keep an eye on the weather forecast and any flash flood warnings from the National Park Service. Flash storms and floods are more common in October, so caution is advised.

Be prepared with appropriate gear, including sturdy, waterproof shoes, quick-dry clothing, and layers to stay warm in the cooler temperatures. Consider renting or bringing a dry suit to stay warm in the cold river water.

Always be aware of your surroundings and follow NPS cautions regarding flash floods to ensure a safe and enjoyable hiking experience.

Visit Planning for October

To plan your visit for October, consider checking the official National Park Service website for updates on weather and closures.

Here are some key points to keep in mind as you plan your trip:

  • Enjoy the stunning fall foliage and scenic beauty during your visit in October.
  • Experience the benefits of visiting in October, including fewer crowds and comfortable temperatures for hiking.
  • Be sure to take advantage of the pleasant weather and lower water levels, making it an ideal time to hike the Narrows.

These factors make October an excellent choice for a memorable and enjoyable adventure in Zion National Park.

Keep these considerations in mind as you prepare for your visit, and make the most of your time exploring the breathtaking landscapes and natural wonders that the Narrows has to offer.

Best Timing for Park Visit

For the best timing for your park visit, consider the shoulder seasons of May-June and September-October, when you can enjoy cooler temperatures and fewer crowds.

May-June offers pleasant weather with blooming flora, while September-October showcases stunning fall foliage. These months provide an ideal balance, allowing you to experience the beauty of the Narrows without the sweltering heat or overwhelming crowds.

The fall months also present a lower risk of flash floods compared to summer, ensuring a safer and more enjoyable hiking experience. Additionally, visiting during these times allows for easier access to shuttle services and trails due to decreased visitor numbers.

Embrace the freedom of exploring the Narrows in the best possible conditions, surrounded by vibrant autumn hues and comfortably cool temperatures.

Ideal Months for Visiting

Consider aiming for visits during May-June and September-October for the most favorable conditions to explore the Narrows. These months offer cooler temperatures, beautiful fall foliage, and fewer crowds, providing an ideal hiking experience. Additionally, the shuttle schedule during these periods is more convenient, allowing for easier access to the trailhead.

  • Enjoy the stunning fall foliage while hiking the Narrows in October.
  • Take advantage of the reduced shuttle wait times in the fall months.
  • Experience pleasant temperatures and fewer crowds for a more enjoyable hike.

Preparing for Colder Temperatures

Pack at least two layers to keep warm during the chilly October mornings and evenings while hiking the Narrows. As you prepare for colder temperatures, it’s crucial to consider the possibility of rain and choose appropriate footwear. Here are some recommended footwear options to ensure a comfortable and safe hiking experience:

FootwearDescriptionRecommended
Water ShoesSturdy, quick-drying shoes designed for water activitiesHighly recommended
Neoprene SocksProvide insulation and warmth in cold waterRecommended for extra warmth
Hiking BootsSturdy, waterproof boots for added protectionSuitable for colder temperatures

To stay dry and warm, consider renting canyoneering boots or wearing a wet suit or dry suit. Additionally, it’s essential to bring a dry pack to keep your gear and belongings safe from water. With the right clothing and footwear, you’ll be well-prepared to tackle the Narrows in October.

Crowd Comparison by Season

When hiking the Narrows in October, it’s important to note the crowd differences by season.

  • Crowd Comparison by Month
  • Summer: Peak season with the highest number of visitors.
  • October: Offers fewer crowds compared to summer, providing a more enjoyable experience.
  • Winter: Lowest crowds in the park, but colder temperatures.

Visiting the Narrows in October has its benefits, including fewer crowds compared to the peak summer season. This means you can enjoy the beauty of the Narrows with more space and less wait time for shuttles and trails.

Additionally, the comfortable temperatures in October make the hiking experience more pleasant, allowing you to soak in the stunning fall foliage without the sweltering heat of summer.

Ideal Hiking Months

Choose the optimal months for hiking the Narrows based on weather and crowd conditions.

While summer and early fall are prime times, October offers a balance of warm weather and fewer crowds, making it an ideal month for your adventure. The fall foliage adds a stunning backdrop to your hike, creating a picturesque and memorable experience.

Hiking tours are available to ensure a hassle-free exploration of the Narrows. With temperatures in the 70s and lower water levels, October provides a more comfortable and enjoyable experience compared to the peak summer season. Flash storms and floods are more common, so exercising caution is essential.

Embrace the beauty of the fall season and enjoy the Narrows with fewer crowds and pleasant temperatures.

Hiking Difficulty and Recommendations

For a successful hike of the Narrows in October, it’s important to be aware of the potential challenges and necessary preparations. The hike is generally considered moderate in difficulty, but the ever-changing conditions of the river and the rocky terrain can pose challenges. To ensure a safe and enjoyable experience, here are some recommended gear and tips for tackling the hike:

  • Wear sturdy, waterproof, closed-toe shoes like water shoes or boots.
  • Bring layers to stay warm in the cooler temperatures of October.
  • Don’t hike the Narrows without a walking stick.

Proper footwear, layered clothing, and a walking stick are essential for navigating the varied terrain and changing weather conditions. These items will provide stability, warmth, and protection, enhancing your overall hiking experience.

Frequently Asked Questions

What Are the Best Spots for Viewing Fall Foliage in Zion National Park in October?

For the best fall foliage photography spots and hikes in Zion National Park in October, head to the Riverside Walk, Weeping Rock, and the Canyon Overlook Trail. These areas offer stunning views of the vibrant autumn colors.

Are There Any Special Events or Festivals in Zion National Park During the Month of October?

In October, Zion National Park features special events and festivals that celebrate the fall season. Enjoy stunning fall foliage at the best spots while partaking in cultural and outdoor activities that make your visit memorable.

Can You Swim in the Virgin River While Hiking the Narrows in October?

You can swim in the Virgin River while hiking the Narrows in October. Be cautious of the river current, as it can be strong. The water temperature ranges from 41°F to 53°F, so wearing a wet or dry suit is recommended for safety.

Are There Any Wildlife Viewing Opportunities in Zion National Park During the Fall Months?

When visiting Zion National Park in fall, you’ll discover abundant wildlife for photography. Keep an eye out for mule deer, foxes, and wild turkeys. Animal encounters make for captivating experiences and stunning photo opportunities.

Are There Any Specific Photography Tips for Capturing the Fall Colors in Zion National Park in October?

To capture the vibrant fall colors in Zion National Park in October, consider photography techniques that emphasize color contrast and landscape composition. Utilize the natural beauty of the park to create stunning images.

Conclusion

So, as you gear up for your October hike through the Narrows, keep in mind that the average temperature in Zion National Park during October is around 60°F, making it a pleasant time to explore the stunning beauty of the canyon.

With over 30,000 visitors in October, you’ll have the opportunity to experience the Narrows with fewer crowds compared to the peak summer months.

Get ready to embrace the cooler temperatures and enjoy a memorable adventure in this iconic destination.

Considering that 60% of hikers venture out despite feeling under the weather, it’s essential to know when to stay home and rest instead. When you’re thinking about hitting the trails with a cold, practical considerations are crucial.

This guide provides you with tips to help you make informed decisions about hiking while sick, including recognizing symptoms to avoid, weighing the benefits and risks, and specific precautions for hiking with a cold.

By understanding when it’s best to stay home and when it’s okay to venture out, you can ensure your well-being while still enjoying the freedom of the great outdoors.

Key Takeaways

  • Hiking with a cold is possible, but caution is necessary
  • Times to avoid hiking with a cold include feeling excessively tired, having symptoms below the neck, having a fever, having the flu or worse, feeling lightheaded or dizzy, not being able to keep anything down, and having intense, painful, or nonstop coughing
  • Benefits of hiking while sick include exercise helping you feel better, fresh air being beneficial for sickness, hiking distracting your mind from symptoms, and listening to your body and resting when needed
  • Risks of hiking while sick include the potential for your sickness to worsen due to strain on your body, discomfort during the hike, the risk of spreading germs to others on busy trails, and the suggestion to choose less crowded trails to minimize the risk of getting others sick.

Symptoms to Avoid Hiking With

Avoid hiking if you experience symptoms below the neck or severe symptoms, as they indicate the need for rest and recovery. These red flags include intense coughing, flu symptoms, fever, dizziness, and the inability to keep anything down. Hiking with these symptoms may worsen your condition and prolong recovery.

Listen to your body and prioritize rest when needed. It’s essential to recognize the benefits of exercise and fresh air while sick, but it’s equally important to understand the risks.

Consider choosing less crowded trails to minimize the risk of spreading germs to others. Always assess yourself before and during the hike for any signs of worsening symptoms.

When feeling unwell, take breaks, stay hydrated, and be mindful of your body’s limits. Remember, it’s okay to adjust your plans and prioritize your health.

Benefits and Risks of Hiking While Sick

When sick, hiking offers potential benefits and risks that should be carefully considered. Managing sickness on the trail requires weighing the following factors:

  • Exercise and Fresh Air: Hiking can help you feel better and provide the benefits of fresh air.

  • Mind Distraction: The activity can divert your focus from symptoms, but be cautious.

  • Risk of Worsening Sickness: Strain on your body during the hike could exacerbate your illness.

  • Spreading Germs: There’s a risk of infecting others, especially on busy trails. Take safety precautions while hiking sick, including being aware of your body’s limits and the potential strain on your health.

Rest when necessary and consider choosing less crowded trails to minimize the risk of getting others sick.

Tips for Hiking When Sick

If you decide to go hiking while sick, it’s important to know your limits and understand how your body handles exercise in that condition. Assess your fitness level before setting out, and be mindful of any dizziness, lightheadedness, or nausea during the hike. It’s crucial to manage your symptoms and rest when needed. Keep an eye on your physical cues and don’t hesitate to turn back if your symptoms worsen.

When feeling unwell, take plenty of breaks, maintain hydration, and consume nutritious snacks to keep your energy levels up. Additionally, choose less crowded trails to minimize the risk of spreading germs to others. Remember, it’s okay to take longer than usual to finish the hike when you’re not feeling your best.

Specific Considerations for Hiking With a Cold

To ensure your comfort and well-being while hiking with a cold, consider the specific considerations for your condition and make adjustments accordingly.

  • Preventing Sinus Pressure: Avoid excessive elevation changes to prevent building up pressure in your sinuses.

  • Staying Warm in Cold Weather: Keep yourself warm in cold weather to aid in a faster recovery.

  • Hydration and Nutrition: Stay hydrated and energized with water and nutritious snacks.

  • Adjust Pace and Take Breaks: Take plenty of breaks and allow for a slower pace when feeling unwell.

Additional Recommendations for Hiking With a Cold

Consider packing extra layers of clothing to ensure you stay warm and comfortable during your hike while dealing with a cold. In addition to dressing appropriately, it’s essential to bring along the right hiking gear and make cold weather preparations. Here are some additional recommendations to help you have a safe and enjoyable hiking experience while under the weather:

Hiking GearCold Weather Preparations
Extra layers of clothing for warmthPack a hat, gloves, and a scarf to protect exposed skin from cold temperatures
Insulated, waterproof hiking bootsBring hand warmers or foot warmers for added comfort
Lightweight, moisture-wicking base layersCarry a thermos of hot tea or soup to keep warm and hydrated

These recommendations will help you stay comfortable and prepared for your hike, ensuring that your cold doesn’t dampen your outdoor experience.

Summary of Hiking With a Cold Guidelines

You should prioritize your safety and well-being by being mindful of the guidelines for hiking with a cold.

  • Benefit from outdoor exercise to help you feel better and get your body moving.

  • Prevent the spread of germs on hiking trails by choosing less crowded trails and being mindful of others.

  • Stay aware of your body’s limits and adjust your hiking pace and distance accordingly.

  • Listen to your body and rest when needed, and be mindful of symptoms below the neck or severe symptoms.

Frequently Asked Questions

Can I Take Over-The-Counter Medication Before Hiking With a Cold?

You can take over-the-counter medication before hiking with a cold, but be strategic about timing. Consider medications that provide long-lasting relief. Prioritize hydration strategies, like drinking water and consuming nutritious snacks, to support your body during the hike.

Are There Any Specific Types of Nutritious Snacks That Are Recommended for Hiking While Sick?

When hiking with a cold, opt for easily digestible snacks like nuts, dried fruits, and granola bars. They provide sustained energy without weighing you down. Prioritize trail nutrition to support your body while sick.

Should I Bring a First Aid Kit With Me While Hiking With a Cold?

Yes, bring a first aid kit with essentials for hiking safety. Precautions are important while hiking with a cold. Include items like bandages, antiseptic wipes, pain relievers, and any personal medications you may need.

Is It Safe to Hike With a Cold if I Have a History of Asthma or Other Respiratory Conditions?

Hiking with a cold, especially if you have a history of asthma, poses risks to respiratory health. Consider managing asthma symptoms and cold symptoms carefully before heading outdoors. Prioritize rest and recovery for optimum wellness.

How Can I Prevent Spreading My Cold to Others While on the Trail?

To prevent transmission of your cold while on the trail, stay hydrated to boost your immune system and carry nutritious snacks to keep your energy up. Take care to cover your mouth and nose when coughing or sneezing to minimize spreading germs to others.

Conclusion

So, after considering all the symptoms and risks of hiking with a cold, it’s clear that staying home is the best choice for your health.

It may be disappointing to miss out on the trails, but taking the time to rest and recover will ultimately benefit you in the long run.

Remember, there will always be more hikes in the future, so don’t push yourself too hard now. Your body will thank you later.

Planning a hiking trip? You might not know that wearing jeans could hinder your freedom on the trails. ‘Hiking in Jeans: 7 Reasons Why You Should Avoid It’ dives into the drawbacks of denim for outdoor adventures.

From the weight and lack of stretch to the discomfort of soaking wet fabric, this article sheds light on why opting for quick-drying, lightweight hiking pants is a better choice.

Discover how jeans can restrict your movement and pose risks on rugged terrain. Gain valuable insights into the importance of breathability and personal comfort while exploring the great outdoors.

Get ready to make an informed decision and ensure a more enjoyable hiking experience.

Key Takeaways

  • Heavy material and lack of stretch restrict movement and add unnecessary weight
  • Jeans take a long time to dry when wet and lack breathability, leading to discomfort and overheating
  • Jeans are prone to tearing and damage on rugged terrain, increasing the risk of injury
  • Lightweight hiking pants provide comfort, ease of movement, quick-drying fabric, durability, and breathability for a more enjoyable hiking experience.

The Weighty Disadvantage

When hiking in jeans, you’ll find yourself weighed down by the heavy material, impeding your mobility and comfort. Unlike leggings, jeans lack the flexibility and stretch needed for navigating rugged terrain.

The choice of fabric is crucial for a comfortable hiking experience. Opt for lightweight, quick-drying materials that offer flexibility and durability. Jeans, on the other hand, retain moisture and become heavier when wet, causing discomfort and potential chafing.

When faced with the decision between jeans and leggings for hiking, choosing the right fabric is paramount. Prioritize freedom of movement and comfort by selecting pants made from breathable, stretchy, and quick-drying fabrics.

Soaking Wet Woes

Navigating rugged terrain in jeans, you’ll find yourself facing the discomfort and added weight caused by their slow-drying nature when soaked. When the rain pours down or you accidentally step into a stream, your jeans will become a burden, weighing you down and hindering your movement.

The wet fabric will cling to your skin, causing chafing and discomfort, amplifying the challenges of your hike. As you struggle with the soaking wet denim, your freedom to enjoy the natural surroundings becomes restricted, and your focus shifts to the unpleasant sensation of waterlogged clothing.

Moisture management is crucial for a liberating outdoor experience, and hiking in jeans only amplifies wet weather worries, robbing you of the joy of the journey. Choose the freedom of quick-drying, lightweight pants to avoid these soaking wet woes.

Movement Restriction

How significantly does the lack of stretch in jeans impact your ability to move comfortably during a hike? The absence of flexibility in jeans significantly impedes your movement, restricting your ability to navigate challenging terrains and obstacles with ease. Below is a comparison between the movement restrictions of jeans and the benefits of stretchy pants:

Movement Restriction in JeansBenefits of Stretchy Pants
Limited flexibilityProvides freedom of movement
Impedes agilityAllows unrestricted motion
Hinders comfortable stridesEnhances comfort and flexibility

The importance of flexibility cannot be overstated when hiking. Opting for stretchy pants ensures you have the freedom to move comfortably, maintain agility, and navigate diverse terrains without hindrance. Prioritizing flexibility in your hiking attire is essential for an enjoyable and uninhibited outdoor experience.

Rugged Terrain Risks

To mitigate the risks of rugged terrain while hiking, prioritize durable and flexible pants that enhance your mobility and protection.

When facing rugged terrain risks, it’s essential to consider the potential for injury and discomfort. Being unprepared for the challenges of rugged terrain can lead to avoidable injuries and setbacks. Factors such as uneven ground, sharp rocks, and unexpected obstacles increase the risks of injury.

Choosing appropriate footwear is crucial for maintaining stability and support on rugged terrain. Inadequate footwear can result in slips, trips, and falls, posing a danger to your safety.

Prioritizing durable and flexible pants, along with suitable footwear, is essential for minimizing the risks and ensuring a safe and enjoyable hiking experience.

Breathability Blues

Consider wearing lightweight and breathable pants for your hiking adventure to avoid the discomfort and overheating caused by lack of breathability in jeans. When choosing the right fabric for your hiking pants, opt for materials such as nylon, polyester, or spandex, which offer breathability and moisture-wicking properties. These fabrics allow air to circulate and prevent sweat build-up, keeping you cool and comfortable during your hike. Additionally, consider alternatives to jeans, such as hiking pants made from technical fabrics designed specifically for outdoor activities. These pants often feature quick-drying and stretchy materials, providing flexibility and comfort on the trails. Prioritizing breathability in your hiking attire ensures that you can fully enjoy the freedom and natural beauty of the great outdoors without feeling weighed down or overheated.

Lightweight and Breathable Pants
NylonPolyesterSpandex

Embracing Lightweight Options

When hiking, you should opt for lightweight and breathable pants to enhance your comfort and mobility on the trails. Embracing lightweight options offers numerous benefits, including:

  • Freedom: Lightweight alternatives allow you to move freely and with ease, providing a sense of liberation on the trails.
  • Comfort: Moisture-wicking fabrics keep you dry and comfortable, preventing chafing and discomfort during your hike.
  • Adaptability: Lightweight pants made from moisture-wicking fabrics adapt to various weather conditions, ensuring that you remain comfortable and dry throughout your journey.

Choosing lightweight alternatives and moisture-wicking fabrics for your hiking pants empowers you to hike with freedom and comfort, enabling you to fully embrace the natural environment without limitations.

Weather and Terrain Considerations

As you head out for your hike, factor in the weather and terrain conditions to ensure a comfortable and enjoyable experience. When considering weather and clothing, opt for moisture-wicking, quick-drying fabrics that will keep you dry and comfortable. Lightweight, breathable clothing is essential, especially in hot weather, to prevent overheating and chafing. Additionally, choosing appropriate footwear is crucial for tackling various terrains. Look for sturdy, supportive hiking boots with good traction for rugged trails, while lightweight hiking shoes are suitable for less demanding paths. Here’s a helpful comparison:

Weather and ClothingChoosing Appropriate Footwear
Opt for moisture-wicking, quick-drying fabricsSturdy, supportive hiking boots for rugged terrain
Choose lightweight, breathable clothingLightweight hiking shoes for less demanding paths
Prevent overheating and chafingEnsure good traction and support for comfortable hiking

Prioritizing Personal Comfort

To prioritize your personal comfort while hiking, choose lightweight and breathable clothing that allows for ease of movement and ensures dryness in various weather conditions.

When choosing appropriate attire for hiking, consider the following:

  • Lightweight and breathable materials provide freedom of movement and prevent overheating, enhancing your overall comfort.
  • Quick-drying fabric ensures that you stay dry and comfortable, even in challenging weather conditions, allowing you to focus on the journey ahead.
  • Comfortable alternatives such as moisture-wicking and stretchy pants offer a liberating experience, allowing you to fully embrace the freedom of the outdoors.

The Benefits of Suitable Hiking Pants

Choosing suitable hiking pants can significantly enhance your outdoor experience by providing comfort, flexibility, and protection from environmental elements. Opt for moisture-wicking fabric to keep you dry and comfortable, especially in wet conditions. The right fit ensures ease of movement and prevents chafing or discomfort during long hikes.

Look for pants with durable yet stretchy materials that adapt to various terrains and obstacles, reducing the risk of tearing or ripping. Breathable designs prevent overheating and ensure you stay cool and comfortable throughout your adventure.

Frequently Asked Questions

Can I Wear Jeans for a Short and Easy Hike?

You shouldn’t wear jeans for a short and easy hike. They’re heavy, slow to dry, and restrict movement. Instead, opt for proper hiking attire like lightweight, quick-drying pants that offer comfort, flexibility, and breathability for a better experience.

What Should I Do if I Don’t Have Lightweight Hiking Pants?

If you don’t have lightweight hiking pants, consider DIY solutions like converting old trousers or layering with athletic leggings. This will provide flexibility and comfort while minimizing the downsides of hiking in jeans.

Are There Any Specific Brands or Types of Hiking Pants That Are Recommended?

You should consider brands like Columbia, Patagonia, and The North Face for recommended hiking pants. Look for features like quick-drying, stretchy materials, and breathability. For women, consider specific fits. For men, durable options are available. Budget-friendly choices exist too.

How Can I Prevent Chafing and Discomfort While Hiking in Any Type of Pants?

To prevent chafing and discomfort while hiking in any pants, opt for moisture-wicking fabrics and consider skin protection. Choose comfortable attire that allows freedom of movement and breathability. Prioritize your comfort for an enjoyable experience.

Are There Any Alternatives to Traditional Hiking Pants That Still Provide the Necessary Comfort and Functionality?

Looking for alternative options to traditional hiking pants? Consider comfortable leggings, utility shorts, and convertible pants made from moisture-wicking fabric. These alternatives provide the necessary comfort and functionality for a more enjoyable hiking experience.

Conclusion

So, next time you gear up for a hiking adventure, remember to leave those jeans behind. Opt for lightweight, quick-drying hiking pants instead.

Just like you wouldn’t wear a tuxedo to a beach party, wearing jeans on a hike is simply not the right fit. Choose comfort, mobility, and breathability over the weighty, restrictive nature of denim.

Your hiking experience will thank you for it.

Looking to fuel your hiking adventures with the power of proper nutrition? Uncover 7 essential tips to keep you energized and healthy on the trail in 2023.

From planning your pre-hike meals to selecting balanced snacks and optimizing post-hike recovery, you’ll gain actionable insights to support your body’s needs.

Whether you’re a seasoned hiker or just starting out, prioritizing your nutrition can elevate your overall experience. Embrace the freedom to make informed decisions about what to eat and drink while hitting the trails.

With a focus on practical strategies, you’ll be equipped to maximize your hiking performance and enhance your well-being through smart nutrition choices.

Get ready to conquer the trails with sustained energy and muscle recovery!

Key Takeaways

  • Pre-hike nutrition should include a balanced meal with protein, carbohydrates, and fats, and allow enough time for digestion before starting the hike.
  • During hiking, pack lightweight and compact foods that provide sustained energy, including a mix of carbohydrates, protein, and healthy fats.
  • Post-hike nutrition should focus on recovery with a well-rounded meal including vegetables, protein, and carbohydrates, and proper hydration to replenish fluids lost during the hike.
  • Hydration during hiking is crucial, and regular water intake should be maintained, while avoiding sugary or caffeinated drinks that can dehydrate you.

Pre-Hike Meal Planning

Prepare for your hike by focusing on a balanced pre-hike meal that incorporates essential nutrients for sustained energy and optimal performance. Start your day with proper pre-hike hydration – drink water or electrolyte-enhanced beverages.

Choose portable breakfast options like granola bars, fruit, or yogurt to fuel your body without weighing you down. Consider foods that provide a mix of carbohydrates, protein, and healthy fats to keep you energized throughout the hike. Avoid heavy or greasy meals that can cause discomfort while on the trail.

Prioritize foods that are easily digestible and won’t cause bloating. Remember, the goal is to nourish your body for the adventure ahead. By paying attention to pre-hike nutrition, you can ensure that you have the energy and stamina to fully enjoy the freedom of the great outdoors.

Balanced Snack Selection

When planning your hiking snacks, include a variety of nutrient-dense options that provide sustained energy and are easily portable for your outdoor adventures. Consider trail mix variations with a mix of nuts, seeds, and dried fruits to keep you fueled and satisfied on the trail.

Portable protein snacks like beef jerky or nut bars are great for refueling and supporting muscle recovery during your hike. Look for snacks that combine carbohydrates, protein, and healthy fats to keep your energy levels stable.

Prioritize lightweight and compact options that don’t require refrigeration or cooking, making it convenient to carry and consume while on the go. By choosing balanced and portable snacks, you can stay energized and focused throughout your hiking journey.

Post-Hike Recovery Nutrition

How can you optimize your post-hike recovery nutrition to support muscle repair and replenish essential nutrients? Post-hike fueling is crucial for muscle recovery and replenishing energy stores. Nutrient timing plays a vital role in maximizing these benefits. Consider consuming a well-rounded meal within 30 minutes to 1 hour after your hike, focusing on protein, carbohydrates, and healthy fats. This will aid in muscle repair and glycogen replenishment. Hydration is equally important to replace fluids lost during the hike. Here’s a simple guide to help you make the most of your post-hike nutrition:

Post-Hike Recovery NutritionTiming and Nutrients
Well-rounded meal within 30 minutes to 1 hourProtein, carbohydrates, healthy fats
HydrationReplenish lost fluids with water or electrolyte-enhanced beverages

Nutritional Considerations for Hiking

Prioritize a balanced and portable diet to sustain your energy levels during hiking. Hiking fueling strategies and nutrient timing play a crucial role in keeping you energized on the trail.

Before your hike, focus on a meal that includes carbohydrates, proteins, and fats, adjusting portion sizes based on timing. Opt for easily digestible breakfast options and ensure proper hydration.

During your hike, pack lightweight, compact, and convenient foods. Choose snacks that provide sustained energy, combining carbohydrates, protein, and healthy fats.

Post-hike, concentrate on recovery nutrition with a well-rounded meal to replenish nutrients and promote muscle repair. Remember, adequate hydration is crucial for optimal performance.

Hydration Strategies on the Trail

Make sure to hydrate regularly with water during your hike to maintain your energy levels and prevent dehydration. When hiking in hot weather, it’s crucial to have a hydration strategy in place to replenish lost fluids and electrolytes. Consider using a hydration bladder or reservoir for convenience and easy access to water. Additionally, carrying electrolyte-enhanced beverages can help replenish essential minerals lost through sweating. To stay properly hydrated, avoid sugary or caffeinated drinks that can dehydrate you. Monitoring your urine color can also provide a quick indication of your hydration levels. Here’s a handy table to guide your hydration strategies on the trail:

Hydration StrategiesHot Weather Tips
Use a hydration bladderDrink small amounts often
Carry electrolyte drinksTake breaks in the shade
Monitor urine colorWear breathable clothing
Avoid sugary beveragesPlan hikes for cooler times
Hydrate regularly

Optimal Trail Food Choices

When hiking, your trail food choices play a crucial role in fueling your body and sustaining your energy levels. To ensure you have the best options, consider the following trail food ideas and portable nutrition options:

  • Snack Ideas:

  • Trail mix with nuts, seeds, and dried fruit

  • Energy bars with a balance of protein and carbohydrates

  • Beef jerky for a protein-packed snack

  • Meal Options:

  • Pack a wrap with lean protein and veggies for a satisfying meal

  • Consider portable and easy-to-prepare options like instant oatmeal or freeze-dried meals

  • Bring along nut butter packets for a quick energy boost

  • Hydration and Supplements:

  • Carry electrolyte-enhanced drink mixes to replenish lost minerals

  • Consider portable nutrition options like whey protein or meal replacement bars

  • Ensure you have a water purification method for longer hikes

Additional Nutrition and Hiking Tips

Enhance your hiking experience by incorporating essential nutrition and hydration strategies to ensure sustained energy and well-being on the trail.

For long-distance treks, consider nutritional supplements to support hiking performance. Supplements like whey protein, greens powder, and multivitamins can provide additional support for your body during extended hikes. These supplements can help replenish essential nutrients and support muscle recovery, which is crucial for maintaining energy levels and overall well-being during long hikes.

Additionally, it’s important to ensure that your meals and snacks are packed with a mix of carbohydrates, protein, and healthy fats to sustain your energy levels throughout the hike.

Frequently Asked Questions

What Are Some Common Signs of Dehydration to Watch Out for While Hiking?

Make sure to watch for common signs of dehydration like dizziness, fatigue, and dark urine while hiking. Prevent dehydration by drinking water regularly, especially in hot weather. Stay healthy and energized on the trail!

Can You Provide Some Tips for Managing Food Waste and Packing Sustainable Foods for Hiking Trips?

When hiking, reduce waste by planning meals effectively and packing sustainable snacks. Opt for eco-friendly packaging and consider reusable containers. Choose foods with minimal packaging and focus on sustainable, lightweight options to minimize environmental impact.

Are There Any Specific Dietary Considerations for Hikers With Food Allergies or Dietary Restrictions?

If you have food allergies or dietary restrictions, it’s vital to plan your hiking snacks carefully. Look for allergy-friendly options and consider portable, single-serve snacks to accommodate your needs without sacrificing taste or nutrition.

How Can Hikers Ensure They Are Getting Enough Protein in Their Pre-Hike and Post-Hike Meals?

To ensure you’re getting enough protein in your pre-hike and post-hike meals, focus on sources like lean meats, nuts, seeds, and legumes. Incorporate protein-rich foods like eggs, Greek yogurt, and quinoa to fuel your adventure and aid muscle recovery.

What Are Some Portable and Lightweight Options for Carrying Water or Electrolyte-Enhanced Beverages on the Trail?

When hiking, opt for a lightweight and portable hydration bladder or flask. These containers are convenient for carrying water or electrolyte-enhanced beverages, ensuring you stay hydrated and energized throughout your trail adventure.

Conclusion

So, next time you hit the trails, remember to pack your bag with sugary sodas, heavy fast food, and greasy snacks. After all, who needs sustained energy and muscle recovery when you can have a sugar crash and stomachache instead?

Just kidding! Stick to the nutrition tips in this article and fuel your body with the right foods for a healthier and more energized hiking experience.

Happy trails!

Hey there, getting ready for your next hiking trip?

You might be wondering whether to go with hiking pants or shorts. The choice between the two can really impact how comfortable and protected you feel out on the trail.

In this article, we’re going to break down the pros and cons of both options, taking into account things like the weather, potential hazards on the trail, and what you personally prefer. By weighing the advantages and drawbacks of each, you’ll be able to figure out which one suits your hiking needs best.

We’ll also cover important factors like tick protection, sunburn prevention, and staying warm in chilly weather.

So whether you’re a seasoned hiker or just starting out, keep reading to find the perfect hiking gear for 2023.

Key Takeaways

  • Hiking pants provide leg protection from scratches, poisonous plants, bugs, and sunburn, while hiking shorts offer less leg protection.
  • Hiking shorts keep you cool on the trail and allow for more freedom of movement, while hiking pants can be hot in summer and may restrict movement compared to shorts.
  • Hiking pants offer more storage options with pockets, while hiking shorts have limited storage options.
  • Wearing pants provides better protection against ticks and sunburn, while wearing shorts makes you more susceptible to ticks and sunburn.

Pros and Cons of Hiking Pants

When hiking, wearing pants offers protection from scratches, poisonous plants, bugs, and sunburn, as well as providing warmth in winter months and extra storage with pockets.

Hiking pants are designed for durability, with reinforced knees and tough, abrasion-resistant materials, making them ideal for rugged terrain.

Unlike leggings, hiking pants offer better protection against scratches and insect bites due to their thicker fabric. They also provide added warmth and insulation, keeping you comfortable during colder hikes.

Plus, the extra storage options with pockets allow you to keep essentials within easy reach.

While some may find them less form-fitting than leggings, the durability and functionality of hiking pants make them a practical choice for outdoor adventures.

Pros and Cons of Hiking Shorts

Hiking shorts offer a lightweight and breathable alternative to pants, providing you with the freedom of movement and comfort needed for warmer weather and less rugged terrain. Here’s a breakdown of the pros and cons to help you make an informed decision:

ProsCons
Comparison of breathabilityIncreased risk of bug bites
Impact on mobility and range of motionLess leg protection from scratches and sunburn
Ideal for rainy conditionsLimited storage options
Lightweight and breathableNot suitable for colder weather
Easier to pack or go ultralightRequires additional precautions in certain environments

Hiking shorts keep you cool, allow for a wider range of motion, and are ideal for rainy conditions. However, they offer less protection from scratches, sunburn, and have limited storage options. Keep in mind the trail conditions, weather, and personal comfort when choosing your hiking attire.

Factors to Consider

Consider weather conditions and temperature when deciding between hiking pants and shorts.

  • Trail Conditions and Terrain

  • Steep and rugged terrains may require pants for added protection.

  • Shorts are suitable for well-maintained and flat trails.

  • Proper footwear is crucial for stability and comfort on various terrains.

  • Personal Preference and Comfort

  • Choose gear that aligns with your hiking style and comfort level.

  • Proper footwear selection is essential to prevent blisters and discomfort.

  • Ensure your gear allows freedom of movement for an enjoyable hike.

  • Duration and Intensity of the Hike

  • Longer hikes may require pants for protection and versatility.

  • Shorts are ideal for shorter, less intense hikes in warmer conditions.

  • Choosing the right hiking gear is vital for a safe and enjoyable experience.

Tick Protection

For enhanced tick protection, wearing pants while hiking is crucial, as they provide better coverage and reduce the risk of tick bites. Tick prevention methods are essential due to the potential dangers of tick-borne diseases. Check out the table below for a quick comparison of tick protection when wearing pants versus shorts.

AspectPantsShorts
CoverageBetter coverage, reduces tick exposureLess coverage, increases tick susceptibility
Protection against tick-borne diseasesLower risk of tick bites, reduces chance of tick-borne illnessesHigher risk of tick bites, increases chance of tick-borne illnesses
ComfortCan be warm in hot weatherCooler and more comfortable in warm weather

Protecting yourself from ticks is crucial, especially in areas where tick-borne diseases are prevalent. By opting for pants over shorts, you can significantly reduce the risk of tick bites and potential illnesses.

Sunburn, Scratches, and Cold Protection

How effectively can hiking pants protect you from sunburn, scratches, and cold during your outdoor adventures? Here are the protective benefits and the importance of proper clothing to consider:

  • Sunburn: Wearing pants provides a better shield against the sun’s harmful rays, safeguarding your legs from painful burns. Applying sunscreen to exposed skin is crucial, but pants offer additional protection for long-term skin health.

  • Scratches: Pants act as a physical barrier, shielding your legs from potential cuts and scrapes when walking through brush or branches. In contrast, wearing shorts exposes your legs, increasing the likelihood of getting scratched. Carrying a first-aid kit is essential for treating any injuries on the trail.

  • Cold: Pants provide insulation, keeping you warm in colder temperatures and preventing discomfort and cold-related issues. Choosing appropriate clothing based on weather conditions is vital for comfort and safety, especially in winter.

Conclusion and Recommendations

When deciding between hiking pants and shorts, your choice should prioritize protection, comfort, and adaptability to the environmental conditions you anticipate encountering on your outdoor excursions.

Hiking pants offer superior durability, protecting you from scratches, sunburn, and potential insect bites. They also provide warmth in colder weather and extra storage with pockets.

On the other hand, hiking shorts offer exceptional comfort and breathability, allowing for greater freedom of movement, especially in warmer conditions. However, they may leave your legs more vulnerable to scratches, sunburn, and bug bites.

Consider the versatility of your hiking attire based on the specific trail conditions, weather, and personal preferences. Ultimately, a balance between protection and comfort is key to optimizing your performance and safety on the trails.

Frequently Asked Questions

What Are Some Tips for Finding Hiking Pants or Shorts That Fit Well and Are Comfortable for Long Hikes?

When finding the right fit for hiking clothes, prioritize comfort for long distance hikes. Look for breathable, moisture-wicking fabrics and consider the weather conditions. Ensure the gear allows freedom of movement and has appropriate storage.

Are There Any Specific Materials or Features to Look for in Hiking Pants or Shorts That Would Be Beneficial for Different Weather Conditions?

When choosing between hiking pants and shorts, consider the weather and terrain. Look for moisture-wicking materials and durable construction for both options. Pants offer layering options for cold conditions, while shorts are ideal for hot weather and provide freedom of movement.

How Can Hikers Best Prepare for Potential Hazards Like Ticks and Insect Bites While Wearing Hiking Pants or Shorts?

To best prepare for potential hazards like ticks and insect bites while hiking, wear proper clothing and footwear. Prevent ticks by wearing pants and protect against bug bites with insect repellent. Stay safe and comfortable on the trail!

Are There Any Specific First-Aid Recommendations for Treating Tick Bites or Sunburn While on the Trail?

When hiking, protect yourself from tick bites by using tick repellent and wearing pants. Apply sunscreen for sun protection. Have tweezers in your first-aid kit to remove ticks and use aloe vera for sunburn relief.

Can Wearing Pants or Shorts Affect a Hiker’s Agility or Performance on More Challenging Terrain?

Wearing hiking pants can provide better leg protection and warmth, but may limit agility and be hot in summer. Shorts keep you cool and offer more freedom of movement, but provide less protection against ticks and scratches. Consider terrain and personal comfort for optimal performance.

Conclusion

So, whether you’re hitting the trails in pants or shorts, it all comes down to your specific needs and preferences. Both options have their pros and cons, but ultimately, the choice is yours.

Just remember to consider factors like weather, trail conditions, and personal comfort. And who knows, maybe a combination of both pants and shorts could be the perfect solution for your next hiking adventure.

Happy trails!

Looking to experience the wonders of The Narrows in November? Get ready for a unique and tranquil adventure in Zion National Park. As you gear up for this journey, consider the cooler temperatures and refreshing water you’ll encounter. With the right equipment and preparation, you can ensure a safe and enjoyable hike through the majestic canyon walls.

Keep an eye on weather forecasts, as November can still bring the possibility of flash floods. Despite the cooler weather, the fall foliage adds to the stunning beauty, and lower water levels provide enhanced visibility. If you crave a quieter and more peaceful experience, November is the ideal time to conquer The Narrows.

So, prepare to immerse yourself in the breathtaking natural beauty of this iconic hiking destination.

Key Takeaways

  • Hiking The Narrows in November offers a unique and less crowded experience.
  • Cooler temperatures and colder water in November require proper gear and preparation.
  • Monitoring weather forecasts is essential to stay safe from flash floods.
  • November is a great time to visit Zion National Park for a quieter and cooler experience.

Hiking The Narrows in November

If you plan to hike The Narrows in November, come prepared for cooler temperatures and cold water. The fall foliage adds to the picturesque beauty of the hike, but it’s essential to be aware of temperature variations. The air temperatures can drop to around 40 degrees Fahrenheit, and the water in The Narrows can be as cold as 40 degrees Fahrenheit.

It’s crucial to have the right gear, including a drysuit, warm base layers, insulating mid-layers, gloves, a hat, neoprene socks, and canyoneering boots. Additionally, pack extra clothing and use a dry bag for electronics.

With fewer crowds and stunning autumn scenery, November offers a quieter and more tranquil experience at Zion National Park. So, prepare well and immerse yourself in the beauty of The Narrows during this less busy time.

Weather and Water Conditions

When hiking The Narrows in November, you should be mindful of the cooler temperatures and the cold water conditions. The November weather brings cooler air temperatures, with lows around 40 degrees Fahrenheit, and the water in The Narrows averaging around 40 degrees Fahrenheit.

Here are some essential tips to consider:

  1. Proper Gear: Invest in a drysuit, warm base layers, insulating mid-layers, gloves, and a hat to retain body heat.

  2. Footwear: Utilize neoprene socks and canyoneering boots for support and grip on slippery rocks.

  3. Safety Precautions: Pack extra clothing and electronics in dry bags and use a walking stick for balance.

  4. Weather Monitoring: Stay informed about the weather and water conditions to ensure a safe and enjoyable hike.

With the right gear and awareness of the November conditions, you can make the most of your Narrows adventure.

Benefits of November Hiking

Sure, here’s the first sentence for the subtopic:

Regularly, you’ll find November hiking in Zion National Park to be a quieter and cooler experience.


Benefits of November Hiking
1. Tranquil Experience4. Fall Foliage Adds to Scenic Beauty
2. Mild Temperatures5. Ideal for Exploring Other Parks
3. Minimal Crowds

In November, experience a tranquil and cooler hike in Zion National Park. With mild temperatures and minimal crowds, you can fully immerse yourself in the scenic beauty of fall foliage. Moreover, it’s an ideal time to explore other national parks in Utah, allowing you the freedom to extend your adventure beyond Zion.

Essential Gear and Clothing

You’ll often need essential gear and clothing for a comfortable and safe experience when hiking The Narrows in November. The water temperature can be cold, so it’s crucial to be prepared. Here’s what you should consider packing:

  1. Drysuit: Essential for staying warm and dry in the cold water.

  2. Warm Base Layer: Moisture-wicking to keep you dry and warm underneath the drysuit.

  3. Insulating Mid-Layer: Helps retain body heat in the chilly canyon.

  4. Gloves and Hat: Keep extremities warm and retain body heat, which escapes from the head.

Proper hiking gear will ensure you’re prepared for the cold water and lower air temperatures, allowing you the freedom to fully enjoy the breathtaking beauty of The Narrows in November.

Safety Considerations

Ensure your safety during the November hike by prioritizing proper gear and staying informed about potential weather hazards. Hiking in cold weather requires emergency preparedness. The Narrows can be enjoyed without the extreme heat of summer, but colder air temperatures and water as low as 40 degrees Fahrenheit demand proper gear. Inside the canyon walls, the air temperature may be even colder, and the water can range from low 40s to mid-50s degrees Fahrenheit. It’s crucial to come prepared with warm clothes, a drysuit, gloves, and neoprene socks. Additionally, staying informed about weather forecasts and flash flood warnings is essential for a safe hike. You should avoid hiking when water flow exceeds 150 CFS or during flash flood warnings to ensure your safety.

Safety ConsiderationsTips
Hiking in Cold WeatherWear a drysuit, warm base layers, gloves, and neoprene socks.
Emergency PreparednessStay informed about weather forecasts and avoid hiking during flash flood warnings.

November Visiting Tips

When hiking The Narrows in November, prioritize staying informed about weather conditions and ensuring you have the proper gear for a safe and enjoyable experience. The following tips will help you navigate hiking challenges and fully appreciate the scenic beauty:

  1. Stay Weather-Ready: Keep an eye on weather forecasts and be prepared for cooler temperatures and potential flash floods.

  2. Gear Up Properly: Invest in a drysuit, warm base layers, gloves, neoprene socks, and canyoneering boots to stay warm and dry in the cold water.

  3. Plan Your Visit: Consider visiting during weekdays for a quieter experience and take advantage of the fall foliage adding to the scenic beauty.

  4. Be Informed: Familiarize yourself with the specific challenges of November hiking, such as colder air and water temperatures, and fewer daylight hours to ensure a safe and enjoyable adventure.

Cold Weather Clothing Recommendations

Stay warm and dry during your November hike in The Narrows by wearing essential cold-weather gear. As the temperatures drop, proper clothing is crucial for staying comfortable and safe. Here are some winter hiking tips to help you stay warm in the cold:

ClothingDescriptionImportance
DrysuitEssential for staying warm and dry in cold waterProtects against hypothermia
Base LayerMoisture-wicking to keep you dry and warmRegulates body temperature
Mid-layerInsulating layer to retain body heatProvides additional warmth
GlovesKeep extremities warm, bring an extra pairPrevents frostbite
HatRetains body heat, a lot escapes from the headMinimizes heat loss from the body

Ensure you have the right gear to keep warm and enjoy your hike in The Narrows.

Frequently Asked Questions

You may have some common questions about hiking The Narrows in November.

  1. Does it snow in Zion in November? Snowfall is rare, with higher chances in December or January.

  2. When should you not hike The Narrows? Avoid hiking when water flow exceeds 150 CFS or during flash flood warnings.

  3. Can I hike The Narrows in winter? Yes, as long as warm and dry clothing is worn due to the cold water.

  4. Is November a good time to visit Utah? Yes, November offers favorable weather for visiting Utah’s national parks.

November is a fantastic time to visit The Narrows, offering a unique and quieter experience. However, safety precautions are crucial, especially regarding water levels and temperatures. It’s the best time to visit if you seek solitude and enjoy favorable weather conditions for exploring Utah’s national parks.

Wall Street Section

One popular section of The Narrows to explore in November is the Wall Street, located about 3 miles up the trail. This iconic section is characterized by its towering walls that narrow in on the river, creating a breathtaking and unique experience.

November is one of the best times to hike the Wall Street section due to the lower water levels and reduced crowds. The cooler temperatures also make the hike more comfortable, allowing you to fully appreciate the stunning surroundings without the extreme heat of summer.

As you navigate through this narrow passage, the towering cliffs and the mesmerizing play of light and shadows create a truly unforgettable adventure. Remember to equip yourself with proper gear for the colder conditions, and be prepared for the lower water temperatures in this section of The Narrows.

Zion Shuttle Information

When hiking The Narrows in November, it’s important to know that the Zion Shuttle operates from May to December, providing convenient transportation from the Zion Visitor Center to the Temple of Sinawava. The shuttle schedule and routes are designed to offer freedom and convenience for visitors exploring Zion National Park.

Here’s what you need to know about the Zion Shuttle:

  1. Operating Season: The Zion Shuttle operates from May to December, aligning with the ideal hiking period for The Narrows in November.

  2. Convenient Routes: The shuttle transports visitors from the Zion Visitor Center to the Temple of Sinawava, ensuring easy access to the trailhead.

  3. Freedom to Explore: Utilizing the shuttle allows you the freedom to focus on enjoying the hike without worrying about parking or logistics.

  4. Environmental Benefits: Opting for the shuttle contributes to the park’s conservation efforts by reducing individual carbon footprints and traffic congestion near the trailhead.

Solitary Hiking Experience

To experience a solitary hike in The Narrows in November, plan your visit during weekdays to avoid the weekend crowds. This allows for a more intimate connection with nature, offering a true solitude experience amidst the stunning canyon walls.

The quieter trails increase the likelihood of wildlife sightings, providing a unique opportunity to observe the natural inhabitants of the area undisturbed. Keep in mind that proper gear and preparation are still essential for a safe and enjoyable hike, despite the quieter surroundings.

With lower foot traffic, you can immerse yourself in the tranquility of the surroundings and relish the freedom of exploring at your own pace. Embrace the serenity of the canyon and enjoy the peaceful beauty of The Narrows during your solitary November hike.

Must-Do Hike in November

You’ll need to prepare for a memorable and rewarding hike in The Narrows this November. It’s a must-do hike offering unparalleled scenic beauty. Here’s what you should do:

  1. Embrace the Tranquility: November brings minimal crowds, providing you with the freedom to immerse yourself in the breathtaking natural beauty without distractions.

  2. Revel in Fall Foliage: The canyon’s vibrant fall foliage enhances the already stunning landscape, creating a picturesque and captivating setting for your hike.

  3. Enjoy Perfect Conditions: Lower water levels and higher visibility in November make it an ideal time to witness the awe-inspiring rock formations and unique features of The Narrows.

  4. Experience Comfortable Hiking: Cooler temperatures in November make the hike more comfortable, allowing you to relish the adventure without the extreme heat of summer.

Get ready for an unforgettable journey through this iconic natural wonder.

Frequently Asked Questions

What Are the Best Spots for Fall Foliage Viewing in Zion National Park in November?

For fall foliage in Zion National Park in November, head to the Pa’rus Trail for vibrant colors and photography opportunities. Take the Zion-Mount Carmel Highway for scenic drives and stunning viewpoints, capturing the park’s beauty.

Are There Any Specific Wildlife or Birdwatching Opportunities in Zion National Park in November?

Looking for wildlife photography or birdwatching hotspots in Zion National Park in November? You’re in luck! The park’s diverse habitats offer opportunities to spot mule deer, bighorn sheep, wild turkeys, and a variety of bird species.

Can Visitors Camp in the Narrows in November, and What Are the Regulations for Camping in the Area?

You can’t camp in the Narrows in November. Regulations prohibit overnight stays in the area. Be prepared for cold weather, as temperatures drop to around 40°F. Essential gear includes a drysuit, warm base layers, gloves, and a dry pack for clothing and electronics.

Are There Any Specific November Events or Activities in Zion National Park That Visitors Should Be Aware Of?

In November, Zion National Park offers milder weather and fewer crowds. Be mindful of park closures and weather conditions. Stay safe with proper gear and preparation. Consider attending Thanksgiving events but plan for potential park restrictions.

What Are the Transportation Options for Getting to Zion National Park in November, and Are There Any Specific Considerations for Travel During This Time?

When you plan your November trip to Zion National Park, remember to consider transportation options and weather conditions. Pack and prepare for the cooler temperatures, and explore the quieter side of the Narrows hike.

Conclusion

So, gear up and get ready to experience the magic of The Narrows in November.

Despite the cooler temperatures, the fall foliage and lower water levels make for a truly picturesque hike.

With the right gear and preparation, you can enjoy a quieter and more tranquil trek through this iconic canyon.

So, don’t miss out on this opportunity to have the time of your life and take your breath away.

The world is your oyster, and The Narrows is waiting for you to explore.