Are you aware that discomfort and pain while hiking could be due to your boots being too small?

In this article, you’ll discover seven crucial tips for determining if your hiking boots are too small and how to select the right size for your outdoor excursions.

From recognizing signs of an ill-fitting boot to ensuring the perfect fit, you’ll gain valuable insights into guaranteeing that your hiking boots offer the comfort, support, and protection your feet require on the trails.

Whether you’re a seasoned hiker or just starting out, understanding how your hiking boots should fit is essential for a pain-free outdoor experience.

So, get ready to lace up your boots and embark on a journey to find the perfect fit for your hiking adventures.

Key Takeaways

  • Toes jamming into the end of the boots
  • Squeezed feet due to narrow width
  • Lack of space for toes to move comfortably
  • Inability to wear thicker hiking socks

Signs of Small Hiking Boots

Feeling your toes jamming into the end of the boots is a clear indication of small hiking boots. Evaluating boot width is crucial to ensure a proper fit. If the width is too narrow, your feet will feel squeezed, leading to discomfort and potential injury.

When sizing up for hiking boots, consider the space around your toes. They should have enough room to move comfortably without feeling cramped. Sizing up also allows for wearing thicker hiking socks for added comfort and protection.

Tips for Choosing the Right Size

When choosing the right size hiking boots, carefully check the length and width of the boot to ensure a comfortable fit for your feet. To determine boot size accurately, follow these tips for measuring foot width:

  • Stand on a piece of paper and trace the outline of your foot to measure the widest points. This allows you to choose boots with the appropriate width, preventing discomfort and potential injury.

  • Consider trying boots at the end of the day when your feet are slightly swollen. This mimics how your feet may feel during longer hikes, ensuring the right fit for any condition.

  • Always walk around in the boots to assess comfort and fit. This gives you the freedom to make an informed decision and avoid any future regrets.

Proper Fit for Hiking Boots

Achieving proper fit for hiking boots is essential for comfort and performance on the trails. When evaluating boot support, finding the right fit is crucial. Boots should have ample room for your toes to move comfortably, without feeling squeezed or causing pain. They should provide support and stability, allowing you to tackle various terrains with ease.

Ensure that your toes sit flat in the boot and that there’s no slippage or sliding. It’s important to strike a balance – they shouldn’t be too small or too big. When your boots fit properly, you’ll be able to hike without discomfort, blisters, or foot pain.

Preparing New Boots for Hiking

Before embarking on your hiking adventures, it’s important to prepare your new boots for the trail.

  • Sizing Considerations

  • Ensure the boots have enough room for your toes to move comfortably

  • Gradually break them in by wearing them around the house and on short hikes

  • Make adjustments or add insoles if necessary

  • Waterproofing Techniques

  • Use protective products like waterproof sprays or leather conditioners

  • Test the boots on shorter hikes before attempting longer ones

  • Ensure they’re properly waterproofed to keep your feet dry and comfortable

Determining the Right Boot Length

Once you have ensured that your new hiking boots have enough room for your toes to move comfortably and have been properly broken in, it’s essential to determine the right boot length to guarantee a comfortable and secure fit for your outdoor adventures.

When determining boot length, ensure that there’s about a thumbnail’s length of space between the end of your longest toe and the tip of the boot. Your toes shouldn’t be jammed against the front of the boot, but there should also not be excessive space that causes your foot to slide forward with each step.

Ensuring proper toe comfort is crucial for preventing blisters and discomfort on the trails. Take the time to try on different sizes and styles, and consider consulting with a knowledgeable salesperson to find the perfect fit for your feet.

Evaluating Boot Width for Fit

Check if the width of your hiking boots allows your feet to sit comfortably without feeling squeezed or pinched. When evaluating boot width for fit, consider these emotional responses:

  • Relief: Imagining the freedom of movement without constraint can evoke a sense of relief and comfort.

  • Frustration: Visualizing the common mistakes in boot sizing that lead to discomfort may bring a sense of frustration.

  • Excitement: Envisioning the flexibility and support of properly fitting boots can generate excitement for your next outdoor adventure.

Evaluating boot flexibility and avoiding common mistakes in boot sizing is crucial for a comfortable hiking experience. Ensure your boots provide the freedom your feet crave without sacrificing support and stability.

Ensuring Toe Comfort in Boots

First, ensure your toes have at least a thumb’s width of space between the end of the boot and your longest toe. Proper toe comfort is crucial for an enjoyable hiking experience. Here are some common problems with toe fit in hiking boots and tips to ensure your toes are comfortable:

Common ProblemsTips for Toe Comfort
Toes jammed at the frontEnsure proper toe room
Persistent toe blistersWear moisture-wicking socks
Numbness or tingling toesConsider a wider width
Black toenailsTrim toenails regularly
Uneven pressure on toesTry custom insoles

Purchasing Boots With Caution

When purchasing hiking boots, ensure you try them on in store and with your hiking socks to guarantee the right fit for your outdoor adventures.

  • Avoiding common sizing mistakes

Buying boots without trying them on first can lead to discomfort and pain during hikes. Incorrect sizing may result in blisters, hot spots, and even injuries, hindering your freedom to explore the outdoors. It’s essential to prioritize fit over aesthetics when selecting hiking boots.

Testing Boots With Hiking Socks

Before heading out on a hike, make sure to try on your hiking boots with the socks you plan to wear, as this will help you gauge the fit accurately.

Testing boots with the hiking socks you intend to wear is crucial for ensuring comfort and the proper fit.

The thickness and material of hiking socks can significantly impact the fit of your boots.

By wearing your hiking socks during the try-on, you can ensure that there’s enough room for your toes to move comfortably and that the boots don’t squeeze or suffocate your feet.

This step is essential in determining whether the boots provide the necessary support, stability, and comfort, ultimately preventing pain and blisters on your hiking adventures.

Breaking In New Hiking Boots

To ensure optimal comfort and performance, start breaking in your new hiking boots by wearing them for short periods during everyday activities. This will allow the boots to gradually mold to the shape of your feet, preventing discomfort and blisters on the trail. Here are some key tips to help you through the process:

  • Be patient: Breaking in new hiking boots takes time, so don’t rush the process.

  • You may experience initial discomfort, but it will improve with wear.

  • Take it slow: Gradually increase the duration and intensity of your hikes to allow your boots and feet to adjust.

  • Pushing too hard too soon can lead to unnecessary pain and injury.

  • Listen to your body: If you experience persistent discomfort, reevaluate the fit and consider seeking professional guidance.

Addressing Small Boot Issues on Trails

Addressing discomfort caused by small hiking boots on trails requires proactive measures and adaptability.

Choosing the right insoles can significantly alleviate the issues caused by small boots. Consider investing in high-quality insoles that provide cushioning and support for your feet.

Additionally, dealing with blisters and foot pain requires immediate attention. Utilize blister treatment products and techniques, such as moleskin or blister bandages, to prevent further discomfort.

To address foot pain, take regular breaks during your hike to rest your feet and relieve pressure.

It’s crucial to address these issues promptly to prevent long-term foot problems. By being proactive and adaptable, you can mitigate the effects of small hiking boots and enjoy your hiking experience to the fullest.

Frequently Asked Questions

How Can I Stretch Out My Hiking Boots if They Are Too Small?

If your hiking boots feel too small, you can stretch them by wearing thick socks, using a boot stretcher, or seeking professional stretching services. It’s crucial for comfortable, pain-free hikes.

Can Wearing Thicker Socks Help With Small Hiking Boots?

Wearing thicker socks can help with small hiking boots by adding extra cushioning and filling up some space. However, for a long-term solution, consider boot stretching to ensure a comfortable fit without compromising support.

Is It Normal for Hiking Boots to Feel Snug at First?

When breaking in hiking boots, it’s normal for them to feel snug at first. However, they should still provide a comfortable fit. As you wear them, they should mold to your feet, ensuring a comfortable fit for your hikes.

Are There Any DIY Methods to Make Small Hiking Boots More Comfortable?

Feeling the pinch in your hiking boots? DIY stretching methods like using a boot stretcher or freezer bags filled with water can help. Insole options like gel or foam can also add extra comfort.

Can a Cobbler Help With Making Small Hiking Boots Fit Better?

Yes, a cobbler can help with making small hiking boots fit better by providing professional stretching and sizing adjustments. They have the expertise and tools to modify the shoes to ensure a comfortable fit for your outdoor adventures.

Conclusion

Congratulations! You’re now equipped with the knowledge to ensure your hiking boots fit perfectly. No more discomfort or pain on the trails.

Imagine the feeling of stepping confidently, supported by the right boots, as you conquer rugged terrain and breathtaking landscapes.

With these 7 essential tips, you’ll be ready to tackle any outdoor adventure with ease and comfort.

Lace up, hit the trails, and enjoy the great outdoors in boots that fit just right.

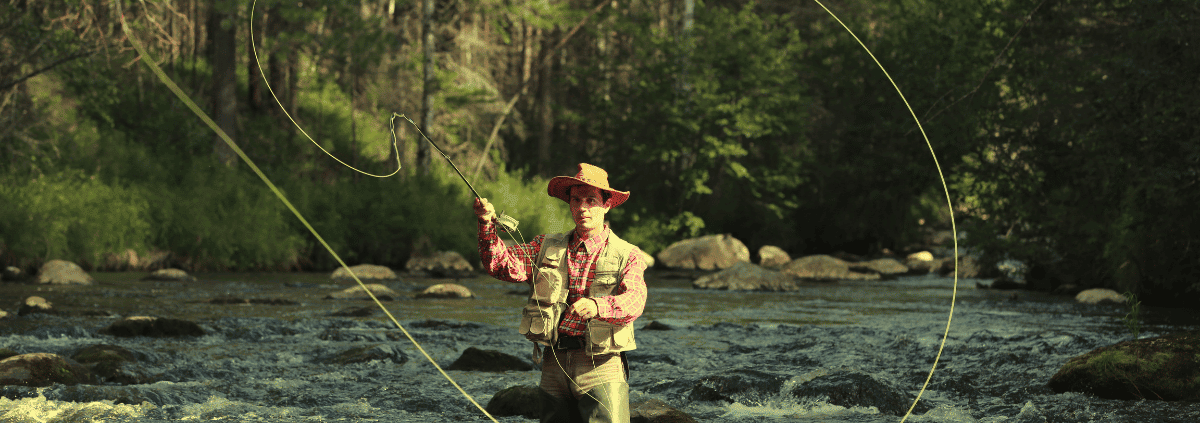
Ready to dive into the captivating world of fly fishing? This complete guide has got your back!

From choosing the perfect gear to honing your casting skills, you’ll be all set to conquer the waters.

No more waiting around – it’s time to embrace the freedom of fly fishing and reel in those unforgettable moments.

So, let’s get started – grab your rod, tie on your favorite fly, and get ready to experience the thrill of fly fishing like never before.

Key Takeaways

  • Choosing the right fly rod size is important and depends on fishing conditions and target species.
  • Fly rod weight selection is critical for performance, with different weights being suitable for different bodies of water and species.
  • Selecting the appropriate fly line based on rod weight is essential, with different types of lines for specific conditions.
  • The choice of flies is crucial for success, with essential patterns for beginners including the Adams Dry Fly, Woolly Bugger, Pheasant Tail Nymph, and Elk Hair Caddis.

Essential Gear for Fly Fishing

To start fly fishing, you’ll need five essential pieces of gear: a fly rod, a fly reel, fly line, leader and tippet, and flies.

When choosing fly fishing accessories, it’s crucial to consider the type of fishing you’ll be doing and the species you’ll be targeting. Fly rods come in different sizes and weights, with a 9-foot 5-weight rod being a great choice for beginners due to its versatility.

Proper maintenance of your fly fishing gear is essential to ensure its longevity. Regularly clean your fly reel and lubricate the drag system to prevent corrosion and ensure smooth operation. Additionally, inspect your fly line for any signs of wear and clean it with mild soap and water.

Proper gear maintenance will keep your equipment in top condition, allowing you to focus on the freedom of the open water.

Choosing the Right Fly Rod Size

When selecting a fly rod size, consider the specific fishing conditions and target species you’ll be encountering. The right rod size enhances your overall fly fishing experience.

Rods are typically made from graphite, fiberglass, or bamboo, each with its advantages. Graphite rods are popular due to their lightweight, sensitivity, and strength. Fiberglass rods are more forgiving and ideal for beginners. Bamboo rods offer a classic feel and are often cherished for their craftsmanship.

Proper maintenance of your fly rod is essential to ensure its longevity and performance. Regularly clean your rod with a mild soap and water, inspect the guides for any damage, and store it in a protective case when not in use.

Guide to Fly Rod Weights

Selecting the appropriate fly rod weight is critical for achieving optimal performance and success in fly fishing. Different fly rod weights offer distinct advantages and are suited to specific fishing conditions. Here’s a comparison of the pros and cons of different fly rod weights:

Fly Rod WeightProsCons
1-3Ideal for small streams and small fishLimited in versatility
4-5Versatile for freshwater applicationsLimited for larger species
6-7Suitable for bigger bodies of waterLess accurate for smaller fish
8-10Ideal for the largest speciesHeavy and tiring for smaller fish

Understanding these comparisons will help you choose the right fly rod weight for your fishing needs. Whether you’re targeting small streams or larger species, selecting the appropriate weight ensures an enjoyable and successful fly fishing experience.

Best Fly Line for Beginners

You will need to choose the best fly line for beginners based on the appropriate rod weight guide. Different types of fly lines, such as floating, sinking, and sink-tip lines, cater to specific fishing conditions.

For instance, a floating line works well for dry fly fishing, while a sinking line is suitable for deep water or streamer fishing.

Using a specialized fly line offers benefits such as improved casting distance, better line control, and enhanced presentation of the fly.

Match the fly line weight to the rod weight for optimal performance. A correctly paired fly line will make casting easier and more enjoyable, giving you the freedom to focus on honing your fly fishing skills.

Recommended Fly Fishing Flies

To improve your success in fly fishing, understanding the significance of fly selection is crucial. When it comes to recommended fly fishing flies for beginners, there are a few essential patterns to consider. These flies are versatile and effective for a variety of fly fishing techniques, making them great choices for anglers just starting out. Here are four recommended fly fishing flies to add to your tackle box:

  • Adams Dry Fly
  • Woolly Bugger
  • Pheasant Tail Nymph
  • Elk Hair Caddis

These flies cover a range of insect imitations and are known to attract a wide array of fish species. Learning to tie these basic fly patterns is also a great way to delve into fly tying basics, providing a deeper understanding of the flies used in fly fishing.

Tips for Successful Fly Fishing

When selecting the best fly fishing flies, ensure you consider the specific conditions and the behavior of the fish you’re targeting. To increase your chances of success, master the art of reading the water. Look for signs of fish activity such as rising fish, ripples, or shadows. Take note of the water’s speed, depth, and the presence of any obstacles or structures.

By understanding the water, you can anticipate where the fish might be and adjust your fly fishing techniques accordingly. Experiment with different retrieves, casting angles, and fly patterns to entice the fish. Remember, successful fly fishing is about adapting to the conditions and being observant of the fish’s behavior.

Keep honing your skills and enjoy the freedom that comes with mastering this timeless sport.

Frequently Asked Questions

What Are the Best Knots to Use for Attaching Flies to the Leader and Tippet?

To attach flies to your leader and tippet, the best fly knots are the Improved Clinch Knot and the Uni Knot. These tying techniques ensure a secure connection, allowing for natural presentation and effective fly fishing.

How Do You Properly Set the Drag on a Fly Reel?

Nail that proper drag like a pro by turning the knob clockwise to increase resistance for bigger fish and counterclockwise for smaller ones. Keep your reel maintained with regular cleaning and lubrication for smooth performance.

What Are Some Common Mistakes Beginners Make When Casting a Fly Rod?

When casting a fly rod, common mistakes include improper wrist action, which affects casting accuracy. Make sure you select the proper fly and focus on line control to avoid tangles and improve your overall technique.

How Should I Approach Different Types of Water When Fly Fishing, Such as Still Water Versus Moving Water?

When approaching still water, look for subtle movements or rises indicating feeding fish. In moving water, understand currents and read water features to locate fish. Adjust presentation techniques based on weather conditions for a successful fly fishing experience.

Are There Any Specific Techniques for Presenting Flies to Fish in Different Weather Conditions, Such as Wind or Rain?

When it’s windy, try a sidearm cast to present flies effectively. In the rain, use darker colored flies and fish closer to the surface. In rough waters, approach fish from downstream and adapt to changing weather for successful fly fishing.

Conclusion

Now that you’re armed with the essential knowledge and gear, it’s time to hit the water and put your newfound skills to the test.

Remember, practice makes perfect, so don’t be discouraged if you don’t reel in a big one on your first try. Keep calm and cast on, and soon enough you’ll be reeling in the big fish like a pro.

So grab your gear, head out to the nearest stream, and get ready to ‘rock the reel’!

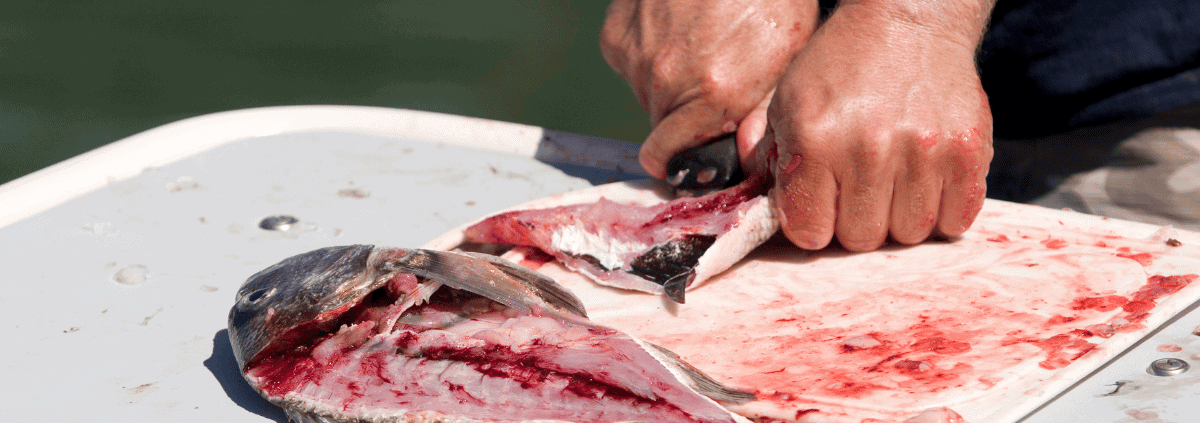
Ready to become a master at cleaning fish? Whether you’re a seasoned angler or just love fresh seafood, knowing how to properly clean a fish is crucial. In this detailed guide, you’ll learn the step-by-step process of preparing and cleaning your catch.

From choosing the right tools to understanding the ideal timeframe for cleaning, this guide will equip you with the knowledge to ensure the quality and freshness of your fish.

Get ready to roll up your sleeves and dive into the world of fish cleaning as we walk you through the essential steps, including gutting, scaling, and overall preparation.

By the end of this guide, you’ll be equipped with the confidence and expertise to clean a fish like a pro. Let’s dive in and get started!

Key Takeaways

  • Proper tools and preparation are necessary for efficient fish cleaning.
  • Clean the fish as soon as possible for maximum freshness and quality.
  • Scaling is an important step in the cleaning process to remove the fish’s scales.
  • Gutting the fish properly ensures thorough cleaning and preparation.

Fish Cleaning Preparation

Before starting to clean a fish, you need to gather all the necessary tools and prepare a clean and organized workspace. To ensure the best practices for fish cleaning, start by laying out a clean cutting board and sharpening your knife or fish scaler. Have access to clean running water, a bucket for waste, cloth or paper towels, and gloves if preferred. It’s also essential to have detergents for cleaning up afterward and an ice bucket to preserve the fish.

Once you have all your tools, it’s time to focus on the fish cleaning techniques. Rest the fish on a table or cutting board, insert the knife into the belly, and carefully remove the entrails. Consider whether you want to scale the fish or gut it, as these are important steps in the cleaning process.

Cleaning Timeframe

Within an hour or two of catching, it’s ideal to clean the fish to maintain its quality and freshness. This ensures maximum cleaning efficiency and preserves the flavor of the fish.

If you’re unable to clean the fish immediately, it’s important to keep it alive in water or on ice to maintain its freshness. However, the fish’s quality will decrease over time, so it’s best to clean it as soon as possible.

If you’re planning to fish for several days, consider bringing the necessary cleaning tools and using a refrigerator to preserve the fish for up to 24 hours. These alternative methods can help you maintain the quality of the fish and ensure a delicious meal.

Basic Steps for Cleaning

To begin cleaning a fish, rest the fish on a table or cutting board. Once you have the fish ready, you can follow these basic steps for cleaning:

  1. Insert the knife into the fish’s belly and cut along the belly, keeping the blade shallow to avoid puncturing the intestines. Remove the entrails and fish’s anus, and scrape off the dark tissue lining the abdominal cavity.

  2. Rinse the cavity and wash the skin, and remove the fish’s head if desired.

  3. Clean the fish-cleaning table and discard the waste properly.

These steps are essential for cleaning various fish species and are fundamental fish cleaning techniques. By following these steps, you can efficiently clean different types of fish and enjoy a fresh meal.

Scaling Process

Once you have finished gutting the fish, you can begin the scaling process by rinsing the fish with cold running water.

Place the fish on a newspaper or a clean surface and use the blunt edge of a knife to scrape off the scales.

Start from the tail and work your way towards the head, applying gentle pressure to remove the scales.

Rinse the fish again and repeat the scaling process if necessary.

To ensure all scales are removed, run your fingers against the grain of the scales to feel for any remaining stubborn scales.

If you encounter stubborn scales, you can use the back of the knife or a fish scaler to carefully remove them.

This technique will help you achieve a perfectly scaled fish for cooking.

Gutting Technique

After finishing the scaling process, you can now move on to the gutting technique, which is a crucial step in cleaning a fish thoroughly. Here are some tips to help you master this skill:

  1. Precise Incision: Fix the knife just in front of the anal fin and slice the fish up to the jawbone. This ensures a clean and effective gutting process.

  2. Gentle Removal: Use your hand to carefully remove the guts, taking care not to rupture any internal organs. This step helps maintain the quality and integrity of the fish.

  3. Thorough Cleaning: After removing the guts, clean the gut cavity with water to ensure that all traces of entrails are removed, leaving the fish completely clean.

Following these gutting techniques will ensure that your fish is thoroughly cleaned and ready for further preparation.

Tools and Equipment

You will need the following tools and equipment to clean a fish thoroughly:

  • A clean cutting board
  • A sharp knife or fish scaler
  • Clean running water
  • A bucket
  • Cloth or paper towels
  • Gloves (optional)
  • Detergents
  • An ice bucket
  • A disposable bag
  • A fresh fish

Having the right tools is essential for ensuring cleaning efficiency. A sharp knife or fish scaler will make the process easier and quicker. Additionally, gloves can provide protection and make handling the fish more comfortable. Consider using alternative cleaning methods such as using a fish scaler instead of a knife if you prefer to keep the skin intact.

Importance of Freshness

Ensuring the freshness of the fish is essential for maintaining its quality and flavor throughout the cleaning process. Eating fresh fish provides numerous benefits, including a richer taste, higher nutritional value, and better texture.

To maintain the freshness of your fish, consider the following tips:

  1. Source from Reliable Suppliers: Purchase fish from reputable vendors who guarantee the freshness and quality of their products.

  2. Check for Signs of Freshness: Look for clear, bright eyes, red gills, and shiny skin, which are indicators of a fresh catch.

  3. Proper Storage: Keep the fish on ice or in a refrigerator as soon as possible after catching it to prevent spoilage and maintain its freshness.

Waste Disposal

How can you responsibly dispose of the waste generated from cleaning a fish? Proper disposal methods are essential to minimize environmental impact.

Eco-friendly alternatives include composting fish waste to create nutrient-rich soil for your garden. You can also bury the waste in a designated area, ensuring it’s at least 12 inches deep to prevent animals from digging it up.

Another option is to double-bag the waste and dispose of it in a sealed trash bin to prevent odors and attract animals. Avoid dumping fish waste in bodies of water, as it can lead to nutrient pollution.

Head Removal

Properly disposing of the waste generated from cleaning a fish is essential to minimize environmental impact and maintain a healthy ecosystem. When it comes to the next step in cleaning a fish, head removal is a crucial part of the process.

Benefits of Head Removal

  1. Minimizes Waste: Removing the head reduces the amount of waste to be disposed of.
  2. Improved Flavor: Some believe that removing the head can improve the flavor of the fish.
  3. Easier Handling: Head removal makes the fish easier to handle and store.

Different Methods of Head Removal

  1. Knife Method: Make a diagonal cut behind the gills to remove the head.
  2. Twist Method: Hold the body and twist the head until it separates from the body.
  3. Cutting Tool: Use a cutting tool, such as a cleaver, to remove the head with a single swift motion.

Head removal can vary depending on personal preference and culinary use.

Refrigeration Tips

To maintain the freshness of the fish, store it in the refrigerator as soon as possible after cleaning. Proper refrigeration is crucial for keeping the fish fresh. Wrap the fish tightly in plastic wrap or aluminum foil before placing it in the coldest part of the refrigerator, usually the back.

If you have a whole fish, make sure to place it on a tray to catch any drips. It’s essential to keep the fish at a temperature of 32°F to 39°F (0°C to 4°C) to slow down bacterial growth and maintain its quality. Additionally, ensure that the refrigerator is clean and free from any strong odors that could be absorbed by the fish.

Frequently Asked Questions

What Are Some Common Mistakes to Avoid When Cleaning a Fish?

When cleaning a fish, avoid common mistakes like using dull tools, rushing the process, or improper waste management. Proper tools, careful cleaning, and responsible waste disposal are essential for a successful and hygienic fish cleaning experience.

Are There Any Specific Techniques for Cleaning Different Types of Fish, Such as Freshwater Vs. Saltwater Fish?

When cleaning different fish species, consider their environments. Freshwater vs. saltwater fish may require different techniques. Oily fish, like salmon, need extra care to remove the strong smell. Non-oily fish, such as tilapia, are easier to clean.

Can the Fish Scales Be Used for Anything, or Should They Be Discarded?

You might consider using fish scales for creative recycling projects like jewelry, art, or even as an ingredient in some traditional dishes. Their iridescent quality can add a unique touch to various crafts.

Are There Any Safety Precautions to Keep in Mind While Cleaning a Fish?

When cleaning a fish, it’s crucial to take safety precautions seriously. Make sure to use proper equipment, handle sharp knives with care, and have a good understanding of fish anatomy to avoid accidents.

How Should Leftover Fish Parts Be Disposed of in an Environmentally Friendly Way?

To dispose of leftover fish parts in an eco-friendly way, consider sustainable practices like composting or using them as fertilizer. Alternatively, you can create fish stock or feed pets. These alternatives promote environmental consciousness and reduce waste.

Conclusion

Now that you’ve mastered the art of cleaning a fish, you’re ready to tackle your next fresh catch with confidence.

Just like a sculptor chiseling a masterpiece, you’ve honed your skills to perfection.

So, grab your tools and get ready to dive into the world of fish cleaning like a seasoned pro.

Happy fishing and may your fillets be as pristine as a sparkling diamond!

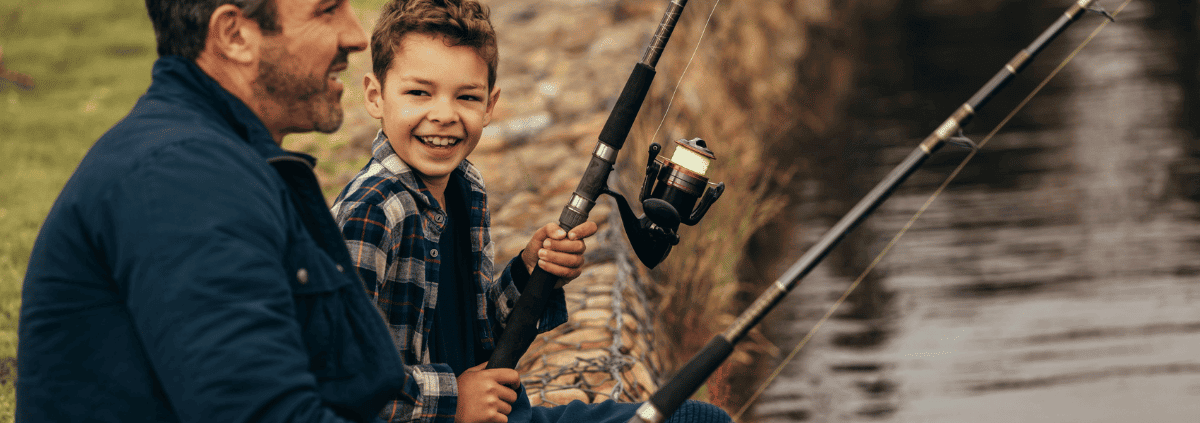
Get ready to cast your line into the vast ocean of fishing knowledge with ‘How To Fish: The Complete Guide To Your Fishing Trip.’ Just like a skilled sailor navigating the open sea, this guide will equip you with the tools and techniques to conquer the waters and reel in the big ones.

From uncovering the best fishing hotspots to mastering the art of baiting and casting, this comprehensive manual is your compass to a successful fishing expedition. Whether you’re a novice or a seasoned angler hungry for new tricks, this article will set you on the path to angling glory.

So, grab your gear, embrace the freedom of the great outdoors, and let’s embark on an unforgettable fishing journey together.

Key Takeaways

  • Lakes are great fishing spots with a variety of gamefish, making them easier to catch.
  • Obtaining a fishing license is necessary to legally fish and can be obtained from local fishing stores.
  • Choosing the right fishing gear, including the appropriate line and bait, is crucial for success.
  • Learning to tie proper knots and practicing fishing technique are essential skills for a successful fishing trip.

Finding Fishing Spots

When planning your fishing trip, locating prime fishing spots is crucial for a successful catch. Local fishing communities are excellent resources for discovering hidden fishing hotspots. They possess valuable knowledge about the best areas to reel in a big catch. Engaging with these communities can provide insider information that fishing apps mightn’t have.

Fishing apps, however, are also great tools for finding fishing spots, as they often provide detailed maps, information on fish species, and even local regulations. These apps can be especially useful when exploring new areas.

Fishing Licenses

To legally fish in most places, you’ll need to obtain a fishing license from local fishing stores.

There are different types of fishing licenses available, including one-day licenses and annual licenses. One-day licenses typically cost less than $20, while annual licenses range from $30 to $150. If you plan to fish regularly, an annual license is more cost-effective.

It’s essential to familiarize yourself with fishing license requirements and regulations in the area you plan to fish. Fishing without a license can lead to trouble with authorities, so be sure to adhere to local regulations.

Fishing Gear

Once you have obtained a fishing license, it’s time to gather the essential gear for your fishing trip.

Choosing the right fishing rod is crucial for success. Consider the type of fish you’ll be targeting and the fishing environment.

For maintenance, regularly clean and lubricate your fishing gear to ensure its longevity and optimal performance. Keep your fishing rod in a protective case when not in use to prevent damage.

Additionally, inspect your line for any signs of wear and change it if needed. Proper maintenance of your gear will extend its lifespan and improve your overall fishing experience.

Tying Knots

First, master the art of tying proper knots to ensure secure hook penetration and prevent line snaps. Different types of fishing knots serve different purposes, such as the improved clinch knot for securing the hook and the palomar knot for attaching the line to the hook.

The importance of knot strength can’t be overstated, as it directly affects your ability to reel in your catch. Neglecting knot tying can result in losing catches, so take the time to learn 1 or 2 good knots. Properly tied knots ensure secure hook penetration, giving you the confidence to handle even the biggest fish.

Knot tying is a fundamental skill in fishing, and mastering it will significantly improve your chances of a successful and enjoyable fishing trip.

Fishing Technique

Your fishing technique’s success relies on proper casting, hook setting, and reeling in the catch with skill and finesse.

Casting techniques:

  • Master the overhead cast for long-distance accuracy
  • Try the sidearm cast for fishing in tight spaces
  • Practice pitching to drop bait gently in a targeted area
  • Learn the roll cast for fishing in areas with obstacles

Hook setting techniques:

  • Set the hook with a swift, upward motion of the rod
  • Keep the line tight to ensure a secure hook set
  • Avoid jerking the rod too hard to prevent breaking the line
  • Pay attention to the tension on the line to know when to set the hook

Bait and Lures Selection

Selecting bait and lures is crucial for enticing fish to bite and increasing your chances of a successful catch. When it comes to freshwater fishing, there are several types of bait you can use to attract different species of fish. Live bait, such as worms and minnows, can be highly effective but requires maintenance and can be messy. On the other hand, artificial lures offer versatility and can mimic the movement of prey, but they may not always be as effective as live bait. To give you a better idea, check out the table below for a comparison of the pros and cons of using lures:

Pros of using luresCons of using lures
VersatilityLess natural scent
Mimics prey movementRequires skill to use
ReusableNot as effective in all conditions
Can cover more waterLess appealing to certain fish
DurableCan be expensive

Understanding these differences will help you make the best choice for your fishing trip.

Understanding Fish Behavior

Before you cast your line, it’s important to understand how fish behavior can impact your fishing success.

Fish Feeding Patterns:

  • Fish are more active during specific times of the day, such as early morning or late afternoon.
  • Understanding what fish eat and when they feed can help you choose the right bait or lure.

Seasonal Migration:

  • Fish often move to different depths or areas of the water based on the season.
  • Knowing the seasonal migration patterns of the fish you’re targeting can increase your chances of a successful catch.

Understanding these behaviors will help you anticipate where fish might be located and what they’re likely to respond to, ultimately improving your fishing experience.

Safety Precautions

  1. Ensure that you have a properly fitted life jacket before heading out on the water. Safety measures are essential for a successful fishing trip.

  2. Before you embark on your adventure, make sure to pack a basic first aid kit, sunscreen, and insect repellent to stay protected.

  3. Emergency preparedness is key, so always check the weather forecast and inform someone of your fishing plans.

  4. It’s also important to have a fully charged phone or a marine radio in case of emergencies.

  5. Additionally, familiarize yourself with the water body’s rules and regulations to avoid any legal issues.

  6. By taking these safety precautions, you can ensure a worry-free and enjoyable fishing experience.

Cleaning and Storing Your Catch

After a successful fishing trip, it’s important to regularly clean and properly store your catch to maintain its freshness and flavor.

  1. Cleaning Techniques

    • Rinse the fish with cold water to remove any blood or debris.
    • Use a sharp knife to fillet the fish, removing the skin and bones.
    • Consider scaling the fish if you plan to cook it with the skin on.
    • Remove any remaining organs and thoroughly clean the cavity.
  2. Proper Storage

    • Place the filleted fish in an airtight container or resealable plastic bag.
    • Store the fish on ice or in the refrigerator to maintain its freshness.
    • If you’re not planning to eat the fish immediately, consider freezing it for long-term storage.
    • Label the packaging with the date to keep track of freshness.

Frequently Asked Questions

What Are Some Common Mistakes That Beginner Fishermen Make and How Can They Be Avoided?

Common mistakes for beginner fishermen include improper knot tying, using the wrong gear, and neglecting local advice. To avoid these, invest time in learning essential knots, choose suitable gear, and seek expert advice from local fishermen.

How Can Weather and Water Conditions Affect Fishing and What Adjustments Should Be Made?

When fishing, the weather and water conditions greatly impact your success. Adjust your tackle selection and bait presentation according to the conditions. The right gear and technique in response to these factors will improve your chances of catching fish.

What Are Some Alternative Methods for Catching Fish, Aside From Traditional Rod and Reel Fishing?

When it comes to catching fish, there are alternative methods like fly fishing and spearfishing. Fly fishing involves using artificial flies to attract fish, while spearfishing requires using a spear to catch them directly. Both methods offer unique challenges and excitement.

What Are Some Tips for Fishing in Heavily Populated Areas With Other Anglers?

When fishing in crowded spots, respect others by giving space and practicing fishing etiquette. Use stealthy angling strategies and try different bait and lures. Cast accurately and be patient. Respect the environment and fellow anglers.

How Can Fishermen Contribute to Conservation Efforts and Protect Fish Populations While Still Enjoying the Sport?

To contribute to conservation efforts and protect fish populations while enjoying the sport, you can practice sustainable practices like catch and release, using barbless hooks, and supporting fishery management regulations for a healthy ecosystem.

Conclusion

Now that you’ve armed yourself with the knowledge and skills to conquer the waters, it’s time to put your newfound expertise to the test.

So grab your gear, pack your patience, and head out to the serene lakes and rivers, where the fish are waiting to dance with your bait.

Remember, fishing isn’t just a hobby, it’s a way of life, so go out there and make some unforgettable memories on your next fishing adventure!

Want to up your fishing game? Did you know that over 40 million people in the United States fish every year?

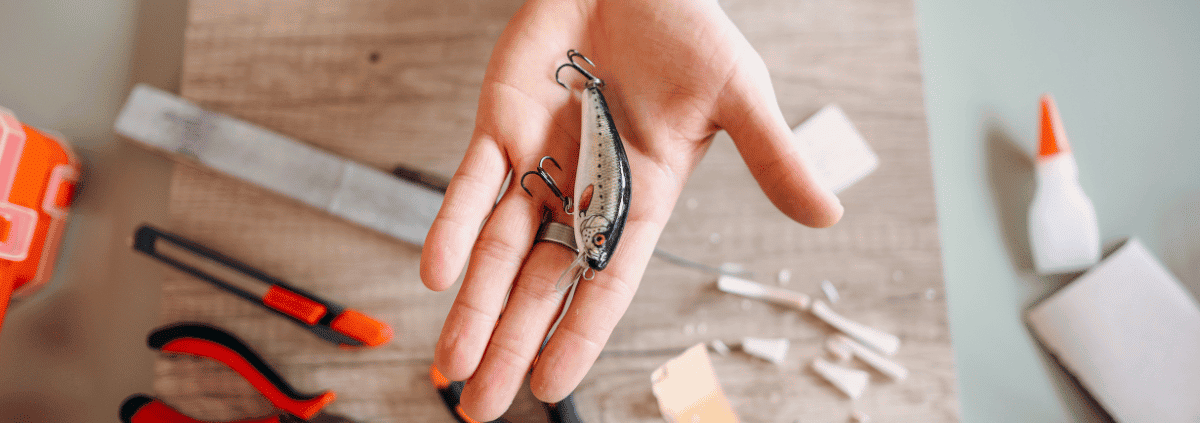
Learning how to make your own fishing lures is a game-changer. Not only is it cost-effective, but it also gives you the freedom to customize and tailor your lures to your specific fishing needs. Catching a fish on a lure you made yourself is truly unmatched.

It enhances your creativity and artistic skills, allowing you to experiment with different designs and materials. Whether you’re interested in making crankbaits, jerkbaits, spinners, or inline spinners, this article will guide you through everything you need to know to get started and elevate your fishing experience.

Key Takeaways

  • Making your own fishing lures is a cost-effective alternative to buying expensive ones.
  • Making your own lures allows for customization to suit your specific fishing needs.
  • Making lures provides a sense of satisfaction and accomplishment.
  • Making your own lures enhances creativity and artistic skills.

Benefits of Making Your Own Lures

If you’re an avid angler, making your own fishing lures offers numerous benefits that can enhance your fishing experience.

It’s a cost-effective alternative to buying expensive lures, saving you money in the long run.

Additionally, the customization options are endless, allowing you to tailor your lures to suit specific fishing needs.

Whether you’re targeting a particular species or fishing in unique conditions, creating your own lures gives you the freedom to design exactly what you need.

Not to mention, the satisfaction and sense of accomplishment that comes with using a lure you’ve crafted yourself.

The creative process enhances your artistic skills and provides the opportunity to experiment with different designs and materials.

Ultimately, making your own lures can be a fulfilling and practical choice for any angler looking for more freedom and control over their fishing gear.

Making Crankbaits

To make crankbaits, gather materials such as wood, sandpaper, paint, and a clear coat. Carve the wood into the desired shape and paint the base with your preferred color. Seal it with a clear coat for durability.

When considering crankbait shapes, think about the action you want the lure to have in the water. Some common shapes include the shad, square bill, and round bill. Experiment with different shapes to see which one works best for your fishing needs.

When it comes to painting techniques, consider using realistic patterns to mimic the look of natural prey. Adding lifelike details can make your crankbait more enticing to fish.

Once the painting is complete, attach hooks and split rings to the crankbait, and remember to test it in water before using it.

Making Jerkbaits or Stickbaits

Crafting a jerkbait or stickbait involves a few steps and materials. To begin, gather wooden blocks, carving knives, paints, and hooks. When selecting the wood for lure making, you can choose from materials like balsa wood, cedar, or basswood. Balsa wood is ideal for its buoyancy, cedar for its durability, and basswood for its ease of carving.

Start by carving the wooden block into the desired shape using the carving knives. Take your time to create the shape that will mimic the baitfish. Once the shape is carved, use sandpaper to smooth the surface of the lure. This step is crucial to ensure the lure’s appearance and performance are top-notch.

To make your lure more realistic, apply a baitfish pattern to it. This can be achieved through techniques such as airbrushing or hand painting. Experiment with different paint patterns and color combinations to find the most attractive and enticing design for the fish you want to catch.

Making Spinners and Inline Spinners

Gather spinner blades, steel wires, hooks, split rings, wire cutters, and pliers for making spinners and inline spinners.

  • Creating Spinners

  • Bend the steel wire into a loop shape using pliers.

  • Attach the spinner blade to the loop, ensuring it can spin freely.

  • Add beads to the wire to enhance visual appeal and attract fish.

  • Making Inline Spinners

  • Bend the steel wire to form a straight framework.

  • Attach a hook to one end and a spinner blade to the other.

  • Add beads or other attractants to the wire before sealing it with a split ring.

When making spoon lures, choose materials that allow easy shaping and painting, such as brass or copper. The right materials will ensure your lures are durable and effective, enhancing your fishing experience.

Optional Steps in Lure Making

For a more lifelike appearance, add artificial eyes and a fish-like nose to your lures, enhancing their attractiveness to fish. Consider using unconventional materials for lure making, such as feathers, hair, or even recycled materials, to create unique and effective lures.

Experimenting with different scents can also make your lures more enticing to fish. Adding natural or artificial scents like shrimp, garlic, or anise oil can attract various fish species.

Additionally, you can waterproof your lures using water-resistant materials and sealants to ensure their longevity. Another optional step is to attach eyelets and split rings to the lure for easy hook attachment, making the fishing experience smoother.

Practical Process Demonstration

You can start the practical process demonstration by selecting the appropriate wooden block for carving your jerkbaits or stickbaits. Here’s how to do it:

  • Choose a smooth, knot-free wooden block for carving
  • Imagine the final shape and size of your lure while selecting the block
  • Envision the lure’s action in the water to determine the ideal shape

When it comes to painting your lures, there are various techniques you can use to achieve the desired look. Consider experimenting with different lure materials to find what works best for you. Additionally, explore different techniques for painting lures, such as airbrushing, hand-painting, or using stencils to create intricate designs.

These techniques will allow you to customize your lures to attract the specific type of fish you’re targeting.

Frequently Asked Questions

What Are Some Safety Precautions to Keep in Mind When Making Fishing Lures at Home?

When making fishing lures at home, it’s crucial to prioritize safety measures. Always wear personal protection, identify potential hazards, and maintain your equipment properly. This ensures a safe and enjoyable lure-making experience.

How Can One Determine the Best Type of Fishing Lure to Make for a Specific Fishing Location or Target Fish Species?

To choose lures for a specific fishing spot or target fish, consider the water conditions, weather, and the types of bait fish in the area. Experiment with different designs and materials to create location-specific lures.

Are There Any Legal Regulations or Restrictions When It Comes to Making and Using Homemade Fishing Lures?

When making homemade lures, you’ll be glad to know that there aren’t many legal restrictions to worry about. As long as your lures adhere to safety precautions and don’t violate fishing regulations, you’re good to go!

What Are Some Tips for Properly Storing and Maintaining Homemade Fishing Lures to Ensure Their Longevity?

To properly store and maintain homemade fishing lures, store them in separate compartments to prevent tangling, and keep them dry to avoid rust. Regularly check for wear and tear, and replace damaged parts for optimal longevity and effectiveness.

Can Homemade Fishing Lures Be as Effective as Commercially Bought Lures, and if So, What Are Some Success Stories or Testimonials From Anglers Who Have Used Them?

Homemade lures can be as effective as store-bought ones. Anglers have shared success stories, praising the customization and cost benefits. Real-life testimonials attest to catching trophy fish with homemade lures, proving their worth on the water.

Conclusion

Now that you have the knowledge and tools to make your own fishing lures, it’s time to dive into this creative and rewarding hobby.

As you craft your customized lures, each one becomes a unique work of art, mirroring your creativity and passion for fishing.

Just imagine the satisfaction of reeling in a big catch on a lure you crafted with your own hands – the ultimate masterpiece of your fishing game.

Ready to conquer the fishing world? Setting up your fishing pole is the key to reeling in those legendary catches. In this comprehensive guide, you’ll master the art of preparing your rod, setting up the reel, threading the fishing line, attaching lures, and perfecting your casting and retrieval techniques.

Whether you’re a novice or a seasoned angler, knowing how to set up a fishing pole like a pro will unleash your angling potential. Get ready to immerse yourself in the freedom of the open water and arm yourself with the skills to set up your fishing pole like a true champion.

Key Takeaways

  • Cleaning the fishing rod before use is important for maintaining durability.
  • Properly assembling the rod and reel ensures optimal performance.
  • Threading the fishing line correctly and securely is crucial for successful fishing.
  • Paying attention to proper casting techniques and avoiding common mistakes can improve fishing success.

Preparing the Fishing Rod

Before setting up your fishing rod, clean it thoroughly to prevent wear and maintain durability. Use a wet cloth and mild soap to wipe down the rod, paying extra attention to the handle and guides. Rinse off the soap with freshwater and dry the rod completely.

Proper handle grip is essential for a comfortable and secure hold while fishing. After cleaning, check for any wobbling or looseness in the rod sections. Make sure the guides on each section are perfectly aligned for optimal performance.

Then, assemble the rod by connecting the ferrules on the rod sections. Follow the manufacturer’s guide for proper assembly.

Ensuring the rod is clean and properly assembled will enhance its longevity and performance when you’re out on the water.

Setting Up the Reel

Once you have assembled your fishing rod, it’s time to set up the reel.

Choosing the right fishing reel for your needs is crucial. Ensure it matches your rod and the type of fishing you’ll be doing.

Properly adjusting the drag on your fishing reel is essential for controlling the amount of resistance when a fish pulls on the line. This prevents line breakage or the fish escaping. Most reels have a drag adjustment knob that can be tightened or loosened to achieve the desired resistance.

Pay attention to the recommended settings for the type of fish you’re targeting.

Setting up the reel correctly ensures a smooth and successful fishing experience.

Threading the Fishing Line

Thread the fishing line through the first guide near the reel seat. When choosing the right fishing line, consider the type of fishing, target species, and the environment.

Properly tying fishing knots is crucial for securing the line to the spool and attaching lures securely. Here are three key steps to threading the fishing line:

  • Securely attach the line to the spool with an arbor knot.
  • Continue threading the line through the rest of the guides on the rod.
  • Wind the line onto the spool by turning the reel handle consistently and smoothly.

Following these steps will ensure that the fishing line is properly threaded through the guides, ready for action.

Attaching Lures and Casting

To attach lures and begin casting, secure the appropriate lure for your fishing needs and prepare to cast. Different types of lures are designed for various fishing techniques, so choose one that suits your target species and the conditions.

Practice different fishing knots to ensure a secure attachment of the lure to the fishing line. It’s crucial to master the art of knot tying to prevent losing your lure during casting and retrieve.

Once the lure is attached securely, you can start casting. Remember to flip the bail open, hold the rod with your dominant hand, and smoothly swing the rod forward to cast.

After casting, reel in any slack or loose line and get ready for retrieval.

Retrieving and Common Mistakes to Avoid

When retrieving your line, it’s crucial to maintain a consistent speed and watch for signs of a bite, such as a pull, jerk, or bend in the rod.

Here are some tips for maintaining tension and properly setting the hook:

  • Set the hook by giving the rod a sharp, firm, upward lift to secure the catch.
  • Keep the rod pointed upwards and maintain tension on the line to prevent the fish from escaping.
  • Avoid overfilling or underfilling the spool with line to prevent issues like birds nests and line breakage.

Cleaning and Maintenance

Your fishing pole’s cleaning and maintenance are essential for its longevity and optimal performance.

Regular maintenance helps prevent wear and tear, ensuring your gear remains in top condition.

After each fishing trip, clean your rod with a wet cloth and mild soap to remove dirt and grime. Pay extra attention to the handle and guides.

Rinse with freshwater and thoroughly dry the rod.

Apply a light coat of wax to protect it from the elements.

Store your rod in a cool, dry place to avoid damage.

Connecting Rod Sections

Locate the ferrules on your rod sections to connect the pieces.

To ensure proper alignment when assembling your fishing rod, follow these techniques:

  • Gently align the rod sections, avoiding forcing or twisting them together.
  • Check the manufacturer’s guide for specific assembly instructions.
  • After connecting, ensure the guides on each section are perfectly aligned for optimal performance.

Securing the Reel Seat

After you have attached the reel foot into the opening of the reel seat, tighten the reel seat clockwise to securely fasten the reel in place. This ensures that the reel is firmly secured and prevents any wobbling during use.

Regular reel seat maintenance is essential to keep it in optimal condition. Check for any signs of wear and tear, and make adjustments as needed to maintain a snug fit.

Proper reel seat adjustment is crucial for ensuring that your reel functions smoothly and efficiently while casting and retrieving.

Customizing Spinning Reels

Securing the reel seat and customizing spinning reels ensures optimal performance and functionality for your fishing rod.

  • Customize reel handles to suit your preference and comfort, enhancing your fishing experience.

  • Choose the right fishing line based on the targeted fish species, fishing conditions, and your preferred fishing technique.

  • Experiment with different line types, such as monofilament, fluorocarbon, or braided lines, to find the best fit for your fishing needs.

Securing the Fishing Line

To secure your fishing line, ensure that it is threaded through each guide on the rod securely and without any tangles. Whether you are using monofilament, fluorocarbon, or braided fishing line, it is essential to tie strong and reliable fishing knots to secure your lures and prevent them from slipping off. Here’s a simple guide to help you choose the right fishing knot for your line:

Fishing Line TypeRecommended Knot
MonofilamentPalomar Knot
FluorocarbonImproved Clinch Knot
BraidedDouble Uni Knot

These knots are dependable and easy to tie, ensuring that your fishing line stays secure and your lures remain in place, giving you the freedom to focus on the thrill of the catch.

Frequently Asked Questions

What Are the Best Types of Lures for Freshwater Versus Saltwater Fishing?

When fishing in freshwater, select lures like spinners, jigs, and crankbaits to attract bass, trout, and panfish. For saltwater, opt for spoons, plugs, and soft plastics to entice species like redfish and snook.

How Do I Choose the Right Fishing Line Weight and Material for Different Types of Fish?

Select strong, durable fishing line for larger fish, prioritizing strength over flexibility. For smaller fish, opt for a more flexible line to prevent breakage. Match the line material to the fish species for optimal performance and enjoyment.

Can You Provide Tips for Casting in Windy Conditions?

When casting in windy conditions, adjust your technique by aiming slightly higher and using a sidearm cast. This helps maintain accuracy and increases casting distance. Keep your line taut to prevent wind interference.

What Are Some Common Mistakes to Avoid When Setting up a Fishing Pole for the First Time?

When setting up your fishing pole, avoid common mistakes like improper assembly and neglecting equipment maintenance. These can lead to frustrating tangles and lost catches. Take care in preparation for a smoother fishing experience.

Are There Any Specific Safety Precautions or Regulations to Be Aware of When Fishing in Certain Areas?

When fishing in certain areas, be aware of specific fishing regulations and safety precautions. Check for any permits, size or catch limits, and restricted areas. Always follow local rules and guidelines to ensure a safe and legal fishing experience.

Conclusion

Now that you’ve mastered the art of setting up your fishing pole, you’re ready to reel in the big one. Just like setting up your rod is essential for a successful fishing trip, being prepared and knowledgeable is key to achieving your goals.

So, grab your gear, head out to the water, and let the adventure begin. Remember, the journey of fishing is about more than just the catch – it’s about the experience and memories made along the way.

Happy fishing!

Ready to explore North Cascades National Park? Like a puzzle waiting to be solved, determining how many days to spend here is like finding the missing piece. You want the freedom to soak in mountain vistas, hike lush trails, and discover hidden waterfalls.

We’ll delve into the ideal duration for your adventure, from a quick snapshot visit to a leisurely exploration. No rigid schedules—just tailored suggestions to help you make the most of your time.

Whether it’s admiring turquoise lakes or savoring alpine meadows, get ready to craft your perfect trip.

Key Takeaways

  • Spending at least 3 days in North Cascades National Park is recommended to fully experience it.
  • With 4 or 5 days, visitors can explore more remote parts of the park.
  • Three days is ideal for first-time visitors to see the main sites.
  • Plan for 3+ days if you want to visit off-the-beaten-path places and enjoy longer hikes and viewpoints.

Recommended Duration for North Cascades National Park

For a fulfilling experience at North Cascades National Park, plan to spend at least three days exploring its natural wonders.

This timeframe allows you to visit the main attractions, such as Artist Point with its breathtaking views and Picture Lake, known for its stunning reflections.

Additionally, it provides the opportunity to venture off the beaten path to discover hidden gems like the Desolation Peak Trail, offering a more secluded and serene hiking experience.

With three days, you can also take in the beauty of Diablo Lake and hike the Chain Lakes Loop, immersing yourself in the park’s diverse landscapes.

Whether it’s admiring the iconic sights or seeking out quieter spots, three days in the park ensure you have the freedom to tailor your experience to your preferences while fully embracing the natural beauty on offer.

One-Day Itinerary

Consider a brisk day at North Cascades National Park, beginning with a hike along the Trail of the Cedars. The lush greenery and serene atmosphere will envelop you as you embark on your adventure.

After that, make your way to Gorge Creek Falls, where the cascading water creates a mesmerizing sight.

Next, take the Ross Dam Trail for breathtaking views of the surrounding landscape.

Finally, don’t miss the Diablo Lake Vista Point, offering stunning panoramas of the vibrant turquoise waters set against the backdrop of majestic mountains.

This one-day itinerary will leave you invigorated and inspired, providing a taste of the park’s natural beauty and a desire to return for more.

Two-Day Itinerary

With two days at North Cascades National Park, you can delve deeper into the natural wonders and activities the park has to offer.

Start your day with the Thunder Knob Trail, offering stunning views of Diablo Lake.

Afterward, seize the opportunity to paddle-board on the crystal-clear waters of Diablo Lake, taking in the surrounding majestic peaks.

For more adventure, hike the Heather-Maple Pass Loop, where vibrant wildflowers and panoramic vistas await.

If time allows, consider beginning the scenic drive to the Mount Baker Wilderness, where further exploration awaits.

Additionally, you can incorporate activities from the one-day itinerary and add more as you desire.

Don’t miss the chance to revel in the recommended hikes and scenic viewpoints, immersing yourself in the breathtaking beauty of the park.

Three-Day Itinerary

To make the most of your three-day visit to North Cascades National Park, plan to visit Artist Point and experience the breathtaking views at Picture Lake. The park offers a plethora of adventures and serene spots to explore, ensuring a memorable experience.

Make sure to include the following activities in your itinerary:

  • Recommended Hikes: The Chain Lakes Loop offers a moderate hike with stunning views. It’s a perfect way to immerse yourself in the park’s beauty.

  • Must-See Viewpoints: Don’t miss the mesmerizing vistas at Artist Point and the reflective beauty of Picture Lake. These viewpoints are bound to leave you in awe.

  • Long Hikes and Relaxation: With three days, you have the freedom to take longer hikes and savor tranquil moments surrounded by nature’s grandeur.

Ensure you make the most of your time, embracing the freedom to explore and relax in this remarkable national park.

Main Activities for a Short Visit

For a short visit to North Cascades National Park, focus on exploring key viewpoints and taking moderate hikes to make the most of your time.

Start by visiting the Diablo Lake Vista Point for breathtaking views of the turquoise waters and surrounding mountains.

Consider hiking the Thunder Knob Trail or Trail of the Cedars for an immersive experience in the park’s stunning landscapes.

The Blue Lake Trail is another recommended hike, offering a beautiful alpine lake and mountain vistas.

As you explore, don’t miss the scenic overlooks at Artist Point and Picture Lake for iconic photo opportunities.

These recommended hikes and scenic viewpoints will give you a taste of the park’s natural beauty and are perfect for a short, yet fulfilling visit.

Additional Activities for Longer Stays

Consider exploring more remote trails and off-the-beaten-path locations to fully immerse yourself in the diverse landscapes of North Cascades National Park during an extended visit.

  • Venture to the hidden gem of Hidden Lake Lookout for a challenging but rewarding hike.

  • Take the Cascade Pass Trail for breathtaking views of peaks and glaciers.

  • Discover the beauty of Thornton Lakes with its pristine alpine lakes and stunning scenery.

  • Explore the remote and serene area around Stehekin, accessible only by boat, plane, or hiking.

These additional hikes and popular viewpoints will allow you to experience the park in a unique and personal way, providing a sense of freedom and adventure as you uncover the hidden wonders of North Cascades National Park.

Best Times to Visit

When planning your visit to North Cascades National Park, you should time your trip to coincide with the months of June, July, or August for longer days and optimal opportunities to explore the park’s natural beauty.

During these months, the snow melts, revealing the best hiking trails, such as the Chain Lakes Loop, Thunder Knob Trail, and Blue Lake Trail. This allows for more extensive exploration and wildlife spotting opportunities, as the park comes to life with diverse animal and bird species.

The warmer weather also provides a more comfortable environment for outdoor activities, and the longer days mean you can maximize your time on the trails and take in the stunning vistas.

Additionally, visiting during this time enhances the chances of catching glimpses of elusive wildlife, adding to the allure of the park.

Seasonal Considerations

You should time your visit to North Cascades National Park to align with the months of June, July, or August for the best opportunities to explore the park’s natural beauty. The seasonal weather during these months offers longer days and less snow, providing optimal conditions for hiking trails and enjoying the stunning vistas.

Here’s what to consider when planning your visit:

  • Longer daylight hours in summer allow for extended hikes and more time to soak in the breathtaking scenery.
  • Reduced snow levels make hiking trails more accessible and safer for exploring the park’s diverse landscapes.
  • Warm weather creates ideal conditions for outdoor activities, such as camping, wildlife viewing, and photography.
  • Visiting during peak season allows for a greater chance to fully experience the park’s tranquility and natural wonders.

Transportation and Scenic Drives

Explore the park’s scenic beauty and diverse landscapes by taking a drive along Highway 20, which offers stunning viewpoints and access to various hiking trails. The park is best explored by car, allowing you the freedom to stop at scenic viewpoints and access trailheads along the way.

Along Highway 20, you’ll encounter breathtaking vistas of jagged peaks, lush forests, and crystal-clear lakes. The drive through the park takes at least an hour, but plan for additional time to stop at the numerous viewpoints and embark on hikes.

If you’re driving to North Cascades National Park, consider the transportation options available to you. Keep in mind that the road may close during winter due to snow, so plan your visit accordingly.

For a truly immersive experience, take advantage of the scenic drives and explore the park’s natural wonders at your own pace.

Exploring Nearby Attractions

Discovering nearby attractions includes exploring charming towns, scenic viewpoints, and recreational activities in the surrounding area of North Cascades National Park.

When you venture out from the park, you can indulge in various day trips, such as:

  • Visiting the charming town of Winthrop, known for its old-western vibe and vibrant arts scene, offering a perfect blend of history and modern amenities.

  • Exploring the stunning viewpoints along the North Cascades Scenic Byway, treating you to breathtaking panoramas of rugged mountain landscapes and lush forests.

  • Enjoying a day of outdoor adventures in the Methow Valley, where you can engage in activities like mountain biking, horseback riding, or simply unwinding by the river.

  • Taking a trip to the beautiful Lake Chelan, offering opportunities for boating, wine tasting, and relaxing on its pristine shores.

These day trips provide a perfect balance to your North Cascades National Park experience, adding a touch of freedom and exploration to your journey.

Making the Most of Your Time

To maximize your experience, prioritize activities that align with your interests and the park’s seasonal conditions. North Cascades National Park offers a range of must-visit attractions, and by planning your itinerary accordingly, you can make the most of your time in the park. Here’s a sample itinerary to guide you:

Day 1Day 2Day 3Day 4Day 5
Hike Trail of the CedarsHike Thunder Knob TrailVisit Artist PointHike Desolation Peak TrailExplore Mount Baker Wilderness
Explore Gorge Creek FallsPaddle-boarding on Diablo LakeView Picture LakeAdditional hikesAdditional relaxation time
Ross Dam TrailHike Heather-Maple Pass LoopHike Chain Lakes Loop

Conclusion and Final Tips

To wrap up your visit to North Cascades National Park, keep in mind a few final tips for making the most of your time and experiences in the park.

  • Stay Open-Minded: Embrace spontaneity and be open to exploring new trails or viewpoints. Let the park’s beauty guide your adventure.

  • Connect with Nature: Take moments to simply sit and absorb the tranquility of the park. Engage all your senses and appreciate the natural world around you.

  • Capture Memories: Whether through photography or journaling, find ways to preserve the special moments and stunning landscapes you encounter.

  • Plan Your Return: With so much to see and do, consider your first visit as an introduction. Start thinking about your next adventure in the park.

Frequently Asked Questions

What Are the Best Camping Spots in North Cascades National Park?

For the best camping spots in North Cascades National Park, explore the Sahale Glacier Camp, Colonial Creek Campground, and Newhalem Creek Campground. These sites offer stunning views, access to best hiking trails, and serene, scenic viewpoints.

Are There Any Guided Tours Available in the Park?

You can immerse yourself in the local culture and outdoor activities available in the park. Guided tours offer an enriching experience, enhancing your understanding of the area’s history and natural beauty.

What Wildlife Can Be Spotted in the Park and How Can Visitors Best Observe Them?

To observe wildlife in North Cascades National Park, bring binoculars and stay quiet. Look for black bears, deer, and eagles around rivers and meadows. Be patient, and keep your distance for safety.

Are There Any Dining Options Within the Park or Nearby?

You’ll find local restaurants near the park entrance, and picnic areas within the park. These options give you the flexibility to dine out or enjoy a scenic meal amidst the natural beauty of North Cascades National Park.

What Are the Photography Opportunities in the Park and Any Specific Photography Guidelines to Be Aware Of?

For photography tips, capture stunning landscape views at North Cascades National Park. Embrace the natural light, play with composition, and venture off the beaten path for unique shots. Respect wildlife and natural habitats while snapping memorable moments.

Conclusion

So, whether you’re planning a quick day trip or a leisurely three-day excursion, North Cascades National Park has something for everyone.

Just like the diverse landscapes and breathtaking views in the park, your experience can be tailored to suit your interests and time frame.

With the right planning and insider tips, you can make the most of your visit and create unforgettable memories that will last a lifetime.

So pack your sense of adventure and get ready to explore!

Are you ready to tackle an 8-mile hike and wondering how long it will take? Just like navigating a winding river, estimating your hiking time involves considering various currents and obstacles. Understanding your average hiking speed, elevation gains, trail difficulty, and terrain is essential for planning a successful outdoor adventure.

In this article, we’ll explore six key factors that can impact the time it takes to complete an 8-mile hike. By diving into these elements and learning how to calculate hike duration, you’ll gain the freedom to plan with confidence.

Stay informed, prepare effectively, and embark on your 8-mile journey equipped with the knowledge needed to tackle the trail.

Key Takeaways

  • Factors that affect hike duration include the hiker’s average pace, elevation gain and loss, difficulty rating, terrain, and trail popularity.
  • Hiking apps like All Trails can be used to track average pace and estimate hike duration.
  • Fitness level and distance of the hike are important factors to consider when estimating hike duration.
  • Hike timing tools like All Trails, Trails NH, and Cairn app can provide valuable information for planning and tracking hikes.

Factors Affecting Hike Duration

Your average pace and the trail’s elevation profile significantly impact the duration of an 8-mile hike. Hiking speed is crucial; the average hiker covers 2 miles per hour, while faster hikers can reach up to 4 miles per hour.

Uphill sections can slow down the pace, while downhill sections may allow for faster hiking. Additionally, trail popularity can affect your journey. More popular trails may have slower hikers blocking the way and may require longer breaks at viewpoints.

It’s essential to factor in breaks and rest stops along the trail, as well as longer breaks at specific points. By considering these factors, you can estimate the duration of your hike more accurately and plan for a more enjoyable and fulfilling experience.

Calculating Hike Duration

How can you estimate the duration of an 8-mile hike more accurately and effectively? To calculate hike duration, consider your average hiking pace and the distance of the hike. The table below can help you estimate the time needed for an 8-mile hike based on different average hiking speeds:

Average Hiking PaceEstimated Hike Duration
2 miles per hour4 hours
2.5 miles per hour3.2 hours
3 miles per hour2.7 hours
3.5 miles per hour2.3 hours
4 miles per hour2 hours

Hike Timing Tools

To enhance your hiking experience and accurately calculate hike duration, utilize hike timing tools such as the All Trails app, Trails NH, and the Cairn app. These apps provide valuable information for planning and tracking hikes, taking into account trail conditions and difficulty.

The All Trails app helps find new trails, track hikes, and read trip reports from other hikers.

Trails NH is a tool to calculate estimated hike duration based on distance.

The Cairn app helps find hikes in your area and track them while on the trail.

These tools are essential for understanding how trail conditions and difficulty can impact your hiking time, allowing you to plan and prepare accordingly for an 8-mile hike.

Hiking Preparation Tips

Ensure you’re adequately prepared for your 8-mile hike by incorporating these essential hiking preparation tips.

First, carefully consider your hiking gear selection. Choose appropriate clothing and equipment based on the weather conditions and terrain to ensure comfort and safety.

Additionally, assess the trail difficulty and your fitness level. For a challenging 8-mile hike, it’s crucial to be physically prepared for the demands of the trail. Engage in weightlifting, cardio exercises, and core workouts to improve your fitness.

Lastly, pack the 10 essentials, including water, food, navigation tools, and first aid kit, to stay prepared for any situation. Adapting your gear and fitness level to the trail’s difficulty will help make your hike more enjoyable and safe.

Essential Packing List

Select appropriate clothing and equipment based on the weather conditions and terrain to ensure comfort and safety during your 8-mile hike.

  • Comfortable backpack with adjustable straps for proper weight distribution
  • Quick-drying clothing suitable for the expected weather conditions
  • Sturdy hiking boots for support and traction on varying terrain

Consider the backpack weight and weather conditions when packing. Keep the pack light but ensure you have the essentials. Layers are essential for changing weather and temperature fluctuations, while moisture-wicking fabric helps keep you dry and comfortable. Opt for breathable and waterproof gear to stay prepared for unexpected weather changes.

With the right equipment and clothing, you can enjoy a safe and comfortable 8-mile hike, no matter the conditions.

Hiking Pace and Fitness

Improving your hiking pace and fitness can significantly impact the duration of an 8-mile hike. Hiking speed is closely tied to physical condition, with better fitness leading to a faster pace. As your endurance and strength increase, so does your ability to maintain a brisk hiking speed.

A good way to enhance your pace is by incorporating regular cardio, weightlifting, and core workouts into your fitness routine. These exercises can help improve your overall physical condition, allowing you to cover the 8-mile distance more efficiently.

Additionally, practicing hiking on various terrains and inclines can help you build the necessary stamina and leg strength to maintain a consistent hiking speed throughout the journey.

Trail Difficulty and Terrain

To gauge your hiking pace on an 8-mile trail, consider the difficulty rating and terrain you’ll encounter. Trail difficulty and terrain greatly impact your hiking speed and overall experience. Here are some factors to consider:

  • Trail Conditions:
  • Check the trail conditions before starting your hike, as muddy or slippery paths can slow you down.
  • Wear appropriate hiking shoes with good traction to navigate various terrains and maintain stability.
  • Be prepared for obstacles like rocks, tree roots, or stream crossings, which can affect your pace.

Understanding the trail difficulty and terrain will help you plan for a more enjoyable and efficient 8-mile hike.

Hiking Apps for Tracking

Consider using hiking apps to accurately track your pace and progress while on the trail, helping you stay informed and prepared for your 8-mile hike.

Some hiking app features to look for include GPS tracking, trail mapping, elevation profiles, and the ability to download maps for offline use.

For beginners, the best hiking apps offer user-friendly interfaces, community reviews, and recommendations for trails suitable for your skill level. Apps like AllTrails and Trails NH provide valuable tools for planning and tracking hikes, while also offering insights from other hikers.

These apps can help you estimate hike duration based on distance, track your fitness progress, and discover new trails in your area.

Utilizing such apps can enhance your hiking experience and ensure a safer and more enjoyable adventure.

Fitness and Hydration

Ensure your fitness level and hydration are adequate for an 8-mile hike to maintain energy and endurance throughout the journey. It’s essential to prepare your body and stay properly hydrated to tackle the hike effectively.

  • Fitness Level: Engage in regular cardio exercises and core workouts to enhance your stamina and endurance for the hike.

  • Water Intake: Drink plenty of water before and during the hike to stay hydrated and maintain peak performance.

  • Nutritious Meals: Consume balanced, energy-boosting meals before and during the hike to sustain your physical exertion.

Safety and Gear Selection

Before embarking on the 8-mile hike, prioritize your safety and gear selection to ensure a smooth and secure journey.

Trail safety is paramount, so be sure to inform someone of your plans and expected return time.

Choose appropriate hiking equipment, including sturdy footwear with good traction, a well-stocked first aid kit, navigation tools, and sufficient water and snacks.

It’s also crucial to dress in moisture-wicking layers and consider weather conditions.

As you pack, remember the ten essentials, and consider additional items like a comfortable backpack, bug spray, and a portable charger.

Proper gear selection can enhance your hiking experience and keep you safe on the trail, allowing you the freedom to fully immerse yourself in the natural beauty around you.

Frequently Asked Questions

What Are Some Tips for Staying Motivated and Focused During a Long 8-Mile Hike?

To stay motivated and focused during an 8-mile hike, mental preparation is key. Stay hydrated and nourished, prioritize self-care. Take breaks, appreciate the surroundings, and set small goals to keep going.

Are There Any Specific Etiquette Rules or Guidelines to Follow When Hiking on Popular Trails?

When hiking on popular trails, it’s important to practice trail manners and leave no trace. Be courteous to others, yield to uphill hikers, and minimize noise. Respect wildlife and always pack out your trash.

How Can I Prevent and Treat Blisters or Foot Pain During a Long Hike?

To prevent blisters and treat foot pain during a long hike, prioritize proper footwear and sock selection. Choose moisture-wicking socks and well-fitted, supportive shoes. Address hot spots early with moleskin or blister pads.

What Are Some Potential Wildlife Encounters to Be Aware of on an 8-Mile Hike?

When hiking 8 miles, be aware of potential wildlife encounters and trail hazards. Ensure safety by staying alert, making noise to avoid startling animals, and carrying bear spray in bear country. Always follow trail precautions.

How Can I Find and Join Hiking Groups or Clubs in My Area for Group Hikes?

To find and join hiking groups or clubs in your area, utilize apps like Meetup, REI Co-op, or local community boards. These platforms are great for meeting new people, socializing outdoors, and discovering new trails.

Conclusion

So, how long does it take to hike 8 miles?

On average, a hiker can cover 2-3 miles per hour, but this can vary based on factors like elevation gain, trail difficulty, and terrain.

By considering these factors and using helpful hiking apps, you can accurately estimate your hike duration.

Remember, proper preparation, fitness, and hydration are essential for a safe and enjoyable outdoor adventure.

Happy hiking!

Do you want to hone your spinning reel casting skills like a conductor mastering a symphony? Mastering the art of gripping, casting, and fighting the fish is crucial for any angler.

This article is your guide to enhancing your casting abilities and making your fishing experience more gratifying. From selecting the right gear and setting up your rod to perfecting different casting techniques, you’ll gain valuable insights.

You’ll also learn how to handle the fight once you’ve hooked a fish, ensuring a successful catch. Whether you’re a novice looking to improve or an experienced angler aiming to refine your technique, this article will equip you with the knowledge and confidence to cast a spinning reel with precision and finesse.

Key Takeaways

  • Select the appropriate gear and setup for casting, including a spinning rod and reel, compatible fishing line, leader line, and lure or bait.
  • Grip and hold the fishing rod properly by holding the handle with the dominant hand on top, securing the grip with the index finger above the reel, and using the non-dominant hand for stability.
  • Practice different casting techniques such as the overhead cast and sidearm cast, ensuring to bring the rod back over the head or start beside the arm and swing like a baseball bat while twisting the hips and shoulders for more distance.
  • After casting, set the hook with a firm, swift rod pull, maintain consistent pressure on the line while reeling in the fish, and consider using a net, gaff, or fishing gloves to bring the fish out of the water.

Gear and Setup for Casting

Before you start casting a spinning reel, ensure you have the proper gear and setup to maximize your fishing experience.

Selecting appropriate gear is crucial. Ensure you have a spinning rod and reel suitable for your target species and fishing style. It’s essential to choose the right fishing line that’s compatible with your spinning rod and reel. Additionally, consider using a leader line to connect your main line to the lure or bait. Guides are available to help you select the appropriate gear for your specific needs.

Once you have the right gear and setup, you’ll be ready to make the most of your fishing experience.

Gripping and Holding Your Fishing Rod

To properly grip and hold your fishing rod, ensure that your dominant hand is on top of the rod handle and your other hand is positioned near the butt for stability and balance.

Position your index finger above the reel to secure the grip, ensuring a somewhat horizontal and parallel orientation to the ground.

It’s important to maintain a proper rod grip to have control when casting, while your non-dominant hand provides stability without the need to grip tightly.

This balance allows for more precise and controlled movements during the casting process.

Casting Techniques

Ensure your rod is positioned correctly and prepare to execute the casting technique with precision and control.

For casting accuracy, focus on the trajectory of your cast, keeping it low for short distances and adjusting the angle for longer casts. The overhead cast provides accuracy for short to medium distances. Smoothly bring the rod back over your head, slightly pointing upwards, then cast it forward, releasing the line at a 45-degree angle.

For longer distances, the sidearm cast is effective. Stand sideways to your target, swing the rod like a baseball bat, and use your hips and shoulders to add power to the cast.

Overhead Cast

As you transition into the overhead cast, remember to maintain a focused trajectory for accurate short to medium-distance casting. The overhead cast is a versatile technique that allows you to precisely target specific areas.

To execute this cast, start by bringing the rod back over your head, pointing slightly upwards. As you cast the rod forward, release the index finger at a 45-degree angle, allowing the line to smoothly flow off the reel. This technique provides a good casting distance, making it suitable for various fishing environments.

It’s important to close the bail once the lure or bait touches the water. After casting, reel in the line until it’s taut and be prepared to wait for a bite or create the desired action.

Mastering the overhead cast will significantly enhance your fishing experience.

Sidearm Cast

Achieving accuracy and distance, the sidearm cast provides an effective alternative to the overhead cast when targeting specific areas from a different angle. When comparing the sidearm cast to the overhead cast, several advantages become apparent. The sidearm cast allows for lower-profile presentations, making it ideal for situations where overhanging vegetation or obstacles limit the space for a backcast. Additionally, the sidearm cast enables you to cast under low-hanging tree branches or docks with ease, reaching areas that the overhead cast cannot access. Here’s a comparison of the sidearm cast and the overhead cast:

Sidearm CastOverhead Cast
ProsLower-profile presentationMaximum distance potential
Ideal for limited backcast spaceEffective for open areas
Access under low-hanging objectsGreater accuracy in open waters
ConsReduced distance potentialLimited by obstacles overhead
Limited accuracy over open waterChallenging in tight spaces

The sidearm cast offers distinct advantages over the overhead cast in specific fishing scenarios, providing freedom and versatility when targeting hard-to-reach areas.

Post-Casting

After casting, maintain consistent pressure on the line while reeling in the fish. This ensures that the hook stays set, preventing the fish from shaking it loose.

As you reel in, keep the rod tip up to maintain tension on the line. If the fish makes a sudden run, allow the line to release from the reel, preventing it from snapping.

Proper rod position after casting is crucial. Keep the rod at a 45-degree angle or slightly higher, allowing for better control and leverage when fighting the fish. This position also helps to absorb the fish’s movements, reducing the risk of the line breaking.

Setting the Hook

To ensure a successful catch, maintain consistent pressure on the line while reeling in the fish. When the moment is right, execute a swift and firm upward or sideways rod pull to set the hook firmly.

Different hook setting techniques are employed depending on the type of lure or bait used. For soft plastic lures, a slight delay in the hook set may be necessary to allow the fish to fully take the bait into its mouth before setting the hook.

On the other hand, with hard baits or lures with treble hooks, a quick and forceful hook set is often required to ensure a solid connection.

Understanding the behavior of the fish and the characteristics of the lure or bait will guide you in employing the most effective hook setting technique for a successful catch.

Maintaining Pressure

Once you have set the hook, it’s crucial to maintain consistent pressure on the line while reeling in the fish. By maintaining pressure, you keep the fish from shaking the hook loose or breaking the line.

Use the rod to absorb the fish’s movements, allowing it to run if it makes a sudden burst. Release tension by allowing the fish to take line when needed, but always keep steady pressure to control the fight. Avoid giving the fish slack, as this can give it the opportunity to escape.

As the fish tires out, continue to reel it in steadily, maintaining the pressure to bring it closer to the shore or boat. Remember, the key is to keep the tension on the line to ensure a successful catch.

Dealing With Sudden Bursts

You should immediately apply pressure to the line when the fish makes a sudden burst, allowing it to run while maintaining control. Handling aggressive fish requires skillful management of line tension. When the fish makes a sudden burst, it’s crucial to maintain a firm grip on the rod while allowing the fish to run within reason. This action prevents the line from snapping under sudden strain.

ActionDescription
Apply PressureImmediately apply pressure to the line to maintain control while allowing the fish to run.
Maintain GripKeep a firm grip on the rod to ensure control and prevent the line from snapping.
Assess the SituationEvaluate the fish’s behavior and adjust your technique to manage the sudden burst effectively.

Bringing the Fish Out

Bringing the fish out of the water requires skill and careful maneuvering to avoid losing your catch. Once the fish is hooked, employ effective fighting strategies to tire it out. Maintain consistent pressure on the line while reeling in, allowing the fish to run if it makes a sudden burst.

When the fish is sufficiently worn out, carefully bring it closer using smooth, steady movements. Utilize a landing net to secure the fish, ensuring a safe and successful retrieval.

Storing the Fish

To safely preserve your well-earned catch, it’s essential to consider proper methods for storing the fish.

Keeping fish fresh is crucial for maintaining their quality. Once caught, it’s best to clean the fish as soon as possible. Scaling, gutting, and cleaning the fish helps in preserving its freshness.

After cleaning, it’s important to keep the fish on ice or in a cooler to maintain its quality. If you plan to consume the fish within a day or two, storing it on ice is adequate. However, for longer storage, consider vacuum sealing or freezing the fish.

Vacuum sealing helps to prevent freezer burn and preserves the fish’s flavor. Freezing the fish at the right temperature can extend its shelf life while maintaining its freshness.

Frequently Asked Questions

How Can I Prevent My Line From Tangling or Getting Twisted While Casting?

To prevent tangles and twisted lines while casting, focus on line management. Control the distance and accuracy of your cast by using proper technique. Keep the bail closed and maintain a consistent pace when reeling in the line.

What Type of Reel and Rod Should I Use for Casting in Freshwater Versus Saltwater?

When casting in freshwater, a medium-action spinning rod and reel with a light line work well, while in saltwater, a medium-heavy action rod and reel with a heavier line are preferable. Proper maintenance enhances performance and longevity.

Are There Any Specific Techniques for Casting in Windy Conditions?

In windy conditions, adjust casting techniques by using a sidearm cast to minimize wind interference. Angle the cast low to the water’s surface, reducing the impact of wind. Maintain a firm grip and release the line at the right moment for improved accuracy.

How Do I Know if I Am Using the Correct Lure or Bait for the Fish I Am Targeting?

To know if you’re using the correct lure or bait for your target fish, observe their behavior and feeding habits. Choose a lure that mimics their natural prey and present your bait in a way that triggers their feeding instincts.

What Are Some Tips for Casting From a Boat or Kayak?

When casting from a boat or kayak, remember to maintain stability by using proper paddle technique. Consider boat positioning to optimize casting distance. This ensures you have the freedom to reach prime fishing spots.

Conclusion

Now that you’ve mastered the art of casting a spinning reel, you can confidently navigate the waters and reel in your catch like a seasoned pro.

Just like a skilled painter effortlessly strokes a canvas, you’ll smoothly cast your line and expertly handle the fight with finesse.

With the right gear, techniques, and mindset, you’ll be ready to tackle any fishing adventure with precision and grace.

Happy casting!

Curious how long it’ll take to hike 5 miles? The time to cover this distance can vary based on your fitness level, trail conditions, and more. Your pace, the terrain, breaks, and company all factor in.

Your fitness, routine, diet, and health history impact your speed. Uphill hiking and higher elevations can slow you down. Trail conditions, breaks, and hiking partners also influence your time.

Understanding these factors helps you plan and estimate your hiking time.

Key Takeaways

  • Personal factors such as fitness levels, exercise routines, and dietary habits significantly affect hiking time.
  • Elevation gain and altitude have a substantial impact on hiking speed and require adjusting pace accordingly.
  • Trail conditions, including rough terrain and popularity, can influence hiking speed and should be considered for a more enjoyable experience.
  • Managing breaks strategically based on weather, trail difficulty, and elevation changes can optimize hiking time.

Personal Factors Affecting Hiking Time

How does your personal fitness level impact the time it takes to hike 5 miles?

Your hiking speed and fitness level are closely intertwined. Individuals with higher fitness levels typically have a faster hiking pace, completing 5 miles in less time.

Regular exercise routines and healthy dietary habits contribute to improved endurance and stamina, allowing for a quicker and more efficient hike.

Conversely, those with lower fitness levels may take longer to cover the same distance due to reduced endurance and slower hiking speed.

Therefore, focusing on improving your fitness level and maintaining a wholesome diet can significantly affect your hiking time, making the overall experience more enjoyable and fulfilling.

Impact of Elevation on Hiking Pace

When hiking 5 miles, the elevation gain significantly affects your pace, influencing the overall time it takes to complete the hike. The effect of altitude on hiking speed is substantial, requiring you to adjust your pace for uphill hiking. To give you a clearer understanding, here’s a table highlighting the impact of elevation on hiking time:

Elevation GainImpact on Hiking Pace
LowMinimal effect, steady pace maintained
ModerateGradual decrease in pace, more frequent breaks
HighSignificant reduction in pace, frequent rest stops

Adjusting your pace for uphill hiking is crucial for a successful and enjoyable hike. As you encounter varying elevation gains, be mindful of the impact on your pace and plan your breaks accordingly. This awareness will contribute to a more satisfying hiking experience.

Trail Conditions and Their Influence

Considering the impact of trail conditions on hiking time, you’ll need to adapt your pace and plan for potential obstacles and challenges along the trail. Keep in mind the following factors that can influence your hiking speed:

  • Rough terrain challenges
  • Trail popularity
  • Influence of trail conditions on hiking speed

Rough terrain, such as rocky or uneven paths, can slow you down and require extra caution. Additionally, popular trails may have more hikers, affecting your pace as you navigate around others.

Considering these factors and adjusting your expectations based on the trail’s conditions can help you have a more enjoyable and successful hiking experience.

Managing Breaks for Optimal Hiking Time

Planning your breaks strategically can significantly impact your overall hiking time and experience. Balancing hydration needs is crucial, so plan regular water breaks based on the weather, trail difficulty, and your personal hydration requirements.

Determining rest stops based on elevation changes and trail conditions can help you maintain a steady pace and energy levels. Consider taking shorter, more frequent breaks on uphill sections, and longer breaks at scenic spots or flatter areas.

It’s essential to listen to your body and recognize signs of fatigue or dehydration to ensure a safe and enjoyable hike. By managing your breaks effectively, you can optimize your hiking time and make the most of your outdoor adventure.

Utilizing All Trails App for Planning

To optimize your hiking experience, utilize the All Trails app for detailed trail information, including elevation data, trail conditions, and user reviews. The app provides a wealth of information to assist in trail planning and hiking route optimization. Here are three features to take advantage of:

  • Elevation Data: Access detailed elevation profiles to prepare for inclines and declines along your route.

  • Trail Conditions: Stay informed about the current state of the trail, including any obstacles or hazards that may impact your hike.

  • User Reviews: Benefit from firsthand experiences shared by other hikers to gain insights into the trail’s difficulty and overall appeal.

Embracing technology for trail planning can enhance your hiking adventures, ensuring a more enjoyable and well-prepared experience.

Frequently Asked Questions

Are There Any Specific Dietary Recommendations for Hikers to Improve Their Hiking Speed and Endurance?

To improve hiking speed and endurance, consider dietary recommendations. Nutritional strategies impact energy levels. Focus on balanced meals, hydrating well, and consuming complex carbs for sustained energy. These choices can enhance your overall hiking performance.

How Does the Presence of Wildlife on the Trail Affect Hiking Time and Pace?

When wildlife appears on the trail, distractions can slow you down. Unexpected encounters with animals affect hiking time and pace. It’s essential to stay alert and adapt to wildlife behavior while maintaining a steady pace.

What Are Some Common Mistakes That Hikers Make That Can Significantly Impact Their Hiking Time?

When hiking, common mistakes impacting time include improper hydration and footwear choice. Not drinking enough water affects energy levels. Inadequate or inappropriate footwear can lead to discomfort and slow you down. Pay attention to these to optimize your hiking time.

Is There a Recommended Gear List for Hikers to Optimize Their Hiking Time and Overall Experience?

To optimize your hiking time and experience, it’s essential to have recommended gear like proper hiking footwear, a hydration plan, and a nutrition plan. These items can enhance your comfort, endurance, and overall enjoyment on the trail.

How Does the Time of Day and Sunlight Availability Impact Hiking Pace and Time?

As the sun rises, your pace quickens, embracing daylight’s energy. Increased visibility and warmth lift spirits and step count. Later, shadows lengthen, cooling air slows your gait. Sunlight impacts daytime pace.

Conclusion

So, how long will it take you to hike 5 miles?

It all depends on your fitness level, the trail conditions, and the elevation gain.

Managing breaks and hiking with partners can also impact your hiking time.

Consider using the All Trails app to plan and estimate your hiking time more accurately.

Remember, every hike is unique, so take these factors into account and enjoy the journey!