Bass Bite Fishing

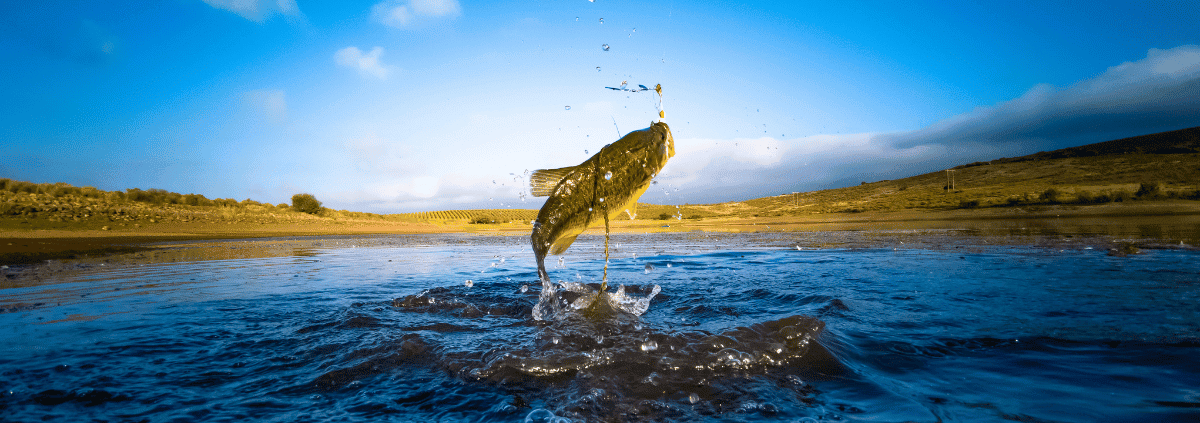
Ready to find out what really makes those bass bite? ‘What Do Bass Bite On? 7 Lures to Catch Bass in Any Season’ has all the answers.

Whether you’re a beginner or a seasoned angler, knowing the right lures can make or break your bass fishing success. From jigs to crankbaits, finesse worms to jerkbaits, spinnerbaits to lipless crankbaits, and swimbaits, each lure has its own appeal to different bass behaviors.

This article will dive into why each lure is effective, when and how to use them, and which bass species they are best suited for. Get ready to elevate your bass fishing game and bring home some impressive catches with these versatile and proven lures.

It’s time to explore the exciting world of bass fishing and reel in those big ones!

Key Takeaways

  • Jigs are considered the best setup for bass fishing and are effective for all species of bass.
  • Finesse worms are particularly effective during winter and appear as an easy meal for bass.
  • Jerkbaits excel in attracting bass to bite and are especially useful during winter.
  • Swimbaits resemble actual fish and are irresistible to bass, making them great for catching largemouth and big bass in spring.

Crankbait

When you want to catch bass in any season, crankbaits are a reliable choice due to their versatility and ability to imitate baitfish effectively. One of the pros of using crankbaits for bass fishing is their ability to cover a large area of water due to their diving capabilities, allowing you to locate fish more efficiently.

Additionally, crankbaits come in various shapes, sizes, and diving depths, making them adaptable to different weather conditions and water depths. However, one con to consider is that crankbaits can be prone to snags and may require precise maneuvering around underwater structures.

In spring and autumn, try using shallow or medium diving crankbaits in warmer, shallower waters. In summer, opt for deeper diving crankbaits in cooler, deeper areas. Experiment with different retrieval speeds to find what works best for the current conditions.

Finesse Worm

You’ll find that finesse worms are a go-to lure for bass fishing, especially during winter when bass are seeking easy prey. To effectively use finesse worms in different seasons, consider using lighter weights in the spring and summer to imitate natural movements of smaller baitfish, while in the fall and winter, opt for slightly heavier weights to match the slower movements of prey in colder water.

To maximize bass bites with finesse worms, try using a shaky head or drop shot rig, and be sure to work the bait slowly and methodically along the bottom. Pay attention to the color of the finesse worm, using natural hues in clear water, and bolder colors in murky conditions.

Jerkbait

To maximize your chances of enticing bass to strike with a jerkbait, experiment with different retrieval speeds and erratic movements to imitate injured baitfish.

When using a jerkbait to catch bass in different seasons, consider these tips for choosing the right jerkbait for different fishing conditions:

  • Vary your retrieval speed to mimic the erratic movements of an injured baitfish.
  • Use a suspending jerkbait to keep the lure in the strike zone for longer periods.
  • Choose a jerkbait color that matches the prevailing conditions, such as clear water or overcast skies.

Spinnerbait

How effectively can you use a spinnerbait to attract aggressive bass in various fishing environments and conditions?

Spinnerbaits are versatile lures that come in various types, each designed for specific fishing conditions. They’re highly effective in attracting bass, especially in summer, spring, or autumn.

Different spinnerbaits, such as tandem, double willow, and Colorado blade spinnerbaits, offer varying vibrations and flash, making them suitable for different water clarities and light conditions. In murky water, opt for Colorado blades for maximum vibration, while willow blades are perfect for clear water.

When fishing in shallow areas with vegetation, tandem blades work best. To maximize your catch, vary your retrieval speed and use spinnerbaits near structures where bass may be hiding.

These techniques make spinnerbaits a go-to lure for bass fishing in any season.

Lipless Crankbait

When targeting aggressive bass in various fishing environments and conditions, consider the effectiveness of a lipless crankbait for attracting strikes.

The advantages of using lipless crankbaits in winter include their ability to imitate fleeing baitfish and their effectiveness at any depth or speed.

In cold water conditions, try casting the lipless crankbait and allowing it to sink to the desired depth before reeling it in with a steady, medium-paced retrieve.

In warmer water, experiment with a faster retrieve or varying the depth at which the lure is presented to find the most productive approach.

Additionally, the absence of a lip on the lure allows it to navigate through vegetation and cover more easily, making it a versatile option for enticing strikes in different water conditions.

Swimbait

Continuing from the previous subtopic, you’ll find that a swimbait is an incredibly realistic and enticing lure designed to mimic the appearance and movement of baitfish. Below, you’ll find a breakdown of different types of swimbaits and their effectiveness in different seasons, as well as tips and techniques for using swimbaits to target trophy-sized bass.

Types of SwimbaitsEffectiveness in Different Seasons
Soft Plastic SwimbaitsEffective in spring and fall
Hard Body SwimbaitsEffective in summer and winter
Paddle Tail SwimbaitsEffective in all seasons

When using swimbaits to target trophy-sized bass, it’s essential to vary your retrieval speed and depth to find where the big bass are lurking. Additionally, consider using larger swimbaits to entice the bigger, more mature bass.

Frequently Asked Questions

How Do Different Water Temperatures Affect the Effectiveness of These Lures?

In cold water, bass are less active, so slower-moving lures like jigs and finesse worms are more effective. In warm water, bass are more aggressive, making crankbaits and spinnerbaits great choices. Water temperature greatly influences bass behavior and lure effectiveness.

Are There Any Specific Retrieval Techniques That Work Best for Each Type of Lure?

To hook bass consistently, tailor retrieval techniques to lure type. Jigs: vary speed. Crankbaits: stop-and-go. Finesse worms: slow, gentle twitch. Jerkbaits: erratic action. Spinnerbaits: steady retrieve. Lipless crankbaits: burn and pause. Swimbaits: steady, slow.

What Are the Best Color Choices for Each Type of Lure in Different Water Conditions?

For the best color choices in different water conditions, consider natural colors like green pumpkin or shad for clear water and darker colors for murky water. Vary retrieval techniques based on water temperature and bass activity.

Can These Lures Be Used in Combination With Other Types of Bait or Lures for Better Results?

You can definitely use live bait or artificial lures in combination with other types for better results. Experiment with different bass fishing techniques and fishing strategies to see what works best for you.

Are There Any Specific Types of Fishing Rods or Lines That Work Best With These Lures?

For the best rods and lines with these lures, consider medium-heavy to heavy rods and fluorocarbon or braided lines. Vary retrieval techniques, match colors to water temperatures, and experiment with lure combinations for maximum effectiveness.

Conclusion

Now that you’ve learned about the top 7 lures for catching bass in any season, it’s time to put your knowledge to the test.

Head out to your favorite fishing spot, armed with these versatile and proven lures, and see what kind of bass you can reel in.

With the right lures and techniques, you’ll be sure to elevate your bass fishing game and bring home some impressive catches.

Get ready for an exciting and rewarding bass fishing adventure!

Sedona

Struggling to select between Sedona and the Grand Canyon for your 2023 getaway? Both offer stunning scenery and unique experiences, making the decision tricky.

This article compares the two destinations, helping you choose the perfect spot for your upcoming adventure. From hiking to family-friendly activities, we’ll provide insights tailored to your travel preferences.

Whether you crave a spiritual escape among red rock canyons or an encounter with a natural wonder, we’ll guide you. Join us on a journey of discovery as we explore the charms of Sedona and the Grand Canyon, helping you decide which is the ultimate destination for your 2023 travels.

Key Takeaways

  • The Grand Canyon and Sedona offer spectacular landscapes in different ways, with the Grand Canyon being more developed and popular while Sedona has a unique spiritual atmosphere.
  • Sedona is easily accessible as it is located in a city, while visiting the Grand Canyon requires more travel.
  • Sedona offers many easy hiking trails, making it ideal for those who prefer shorter and easier hikes, while the Grand Canyon has limited easy trails and is better suited for hikers looking for more challenging or multi-day hikes.
  • Both destinations are family-friendly, but caution must be taken due to cliff drop-offs. Both offer fun family activities such as biking the Rim Trail in the Grand Canyon and taking a Pink Jeep Tour in Sedona.

Scenic Landscapes and Attractions

In your 2023 adventure, explore the awe-inspiring scenic landscapes and attractions that both Sedona and the Grand Canyon have to offer.

The Grand Canyon boasts some of the best viewpoints in the world, showcasing its breathtaking natural formations. From the iconic South Rim to the lesser-visited North Rim, each viewpoint offers a unique perspective of the canyon’s immense beauty.

On the other hand, Sedona’s red rock canyons and buttes adorned with green foliage create a captivating natural canvas. The best viewpoints in Sedona, such as Airport Mesa and Cathedral Rock, provide stunning panoramas of the striking rock formations.

Whether you’re marveling at the vastness of the Grand Canyon or the vibrant hues of Sedona, both destinations promise unforgettable experiences at their best viewpoints and natural formations.

Hiking Opportunities and Difficulty

When planning your 2023 trip, consider the diverse hiking opportunities and varying levels of difficulty at both Sedona and the Grand Canyon.

  • Hiking trails comparison: Sedona offers many easy hiking trails such as Devils Bridge, Soldiers Pass, and Birthing Cave, while the Grand Canyon has limited easy trails like Shoshone Point and the Rim Trail.

  • Best hikes for beginners: Sedona is best for those who prefer shorter and easier hikes, making it ideal for beginners. On the other hand, the Grand Canyon is suitable for hikers looking for more challenging or multi-day hikes.

  • Hiking difficulty: Sedona’s trails are generally easier and shorter, while the Grand Canyon’s trails are longer and more strenuous, requiring careful planning and multiple days for longer hikes.

Location and Nearby Points of Interest

As you plan your 2023 trip, consider the central locations of Sedona and the Grand Canyon, each offering convenient access to nearby points of interest.

The Grand Canyon, closer to Northeastern Arizona, is a great addition to a southern Utah road trip, near Flagstaff, Marble Canyon, and Page.

On the other hand, Sedona is centrally located and closer to Jerome, Tuzigoot and Montezuma Castle National Monuments, and Prescott. Sedona is easier to reach as it doesn’t require driving around the entire canyon, making it an ideal stop for a road trip.

Both destinations offer convenient access to nearby attractions, making them excellent road trip stops for your 2023 adventure.

Family-Friendly Activities

For your 2023 trip, consider the numerous family-friendly activities available at both Sedona and the Grand Canyon. Here are some exciting options to explore:

  • Enjoy biking options along the Rim Trail at the Grand Canyon, offering stunning views and a family-friendly adventure.

  • Take a Pink Jeep Tour in Sedona for a thrilling off-road experience suitable for all ages.

  • Encounter local wildlife while exploring the trails at both destinations, providing educational and memorable experiences for the whole family.

Both Sedona and the Grand Canyon offer a range of activities that cater to families, ensuring an unforgettable and enjoyable vacation for all.

Managing Crowds, Fees, and Accommodations

To ensure a more enjoyable visit, plan your accommodations and consider the crowds and fees at both Sedona and the Grand Canyon for your 2023 trip.

Both destinations experience major crowds, impacting the overall experience. Traffic congestion and limited parking can be an issue in Sedona, while the Grand Canyon offers a shuttle system to alleviate traffic.

The Grand Canyon has an entrance fee of $35 for seven days, and many trails in Sedona require a Red Rock pass.

Accommodations and dining options in both areas aren’t particularly budget-friendly. However, more affordable lodging options can be found in Williams or Flagstaff for Grand Canyon visitors. Sedona may offer a bigger variety of accommodations and dining options, making budget constraints easier to manage.

Consider these tips for a hassle-free visit and finding affordable lodging options.

Access and Transportation

Planning your visit to Sedona or the Grand Canyon in 2023, considering access and transportation is crucial for a seamless travel experience. Here’s what you need to know:

  • Public Transportation: While both destinations offer public transportation options, the Grand Canyon has a shuttle system to help with traffic, making it easier to navigate and reducing the hassle of finding parking.

  • Parking Options: In Sedona, traffic in the main area can be congested, and parking may be difficult at trailheads. However, the Grand Canyon provides various parking options, making it more convenient for visitors to access the park’s attractions without struggling to find a parking spot.

These aspects are essential for ensuring a smooth and enjoyable visit to these Arizona destinations in 2023.

Unique Features and Atmosphere

Navigating the unique features and atmosphere of both Sedona and the Grand Canyon is essential for determining which destination best aligns with your travel preferences in 2023.

Sedona is renowned for its red rock formations and offers a unique spiritual energy, making it a magnet for those seeking a tranquil and mystical experience. The city’s landscape is adorned with vibrant red canyons and buttes, creating a serene and awe-inspiring atmosphere.

On the other hand, the Grand Canyon boasts breathtaking panoramic views and natural wonders, with a more rugged and adventurous ambiance. Its vast, awe-inspiring vistas and deep canyons provide an exhilarating and humbling experience.

Whether you seek spiritual rejuvenation amidst red rock formations or an adventurous encounter with nature, both destinations offer distinct atmospheres that cater to diverse travel preferences.

Best Time to Visit

When is the best time to visit Sedona or the Grand Canyon in 2023?

  • Ideal weather conditions: Consider visiting in spring (March to May) or fall (September to November) for pleasant temperatures and blooming landscapes.

  • Avoiding peak tourist season: Plan your trip during the quieter months of January, February, or November to experience fewer crowds and possibly lower accommodation rates.

  • Tailoring your visit: If you prefer specific activities like river rafting or wildflower hikes, research the best time for those experiences based on seasonal conditions.

Timing your visit to Sedona or the Grand Canyon can significantly impact your overall experience, from weather enjoyment to crowd avoidance. Keep these factors in mind when planning your 2023 adventure.

Frequently Asked Questions

Are There Any Helicopter Tours Available at Both Sedona and the Grand Canyon?

Yes, both Sedona and the Grand Canyon offer helicopter tours. Experience breathtaking scenic overlooks and thrilling adventure activities from a unique aerial perspective. It’s a fantastic way to appreciate the stunning beauty of these iconic destinations.

What Are the Best Options for Public Transportation or Shuttle Services in Sedona and the Grand Canyon?

For public transportation and shuttle options in Sedona and the Grand Canyon, hop on the Sedona Trolley or utilize the Grand Canyon shuttle system. Both offer scenic routes and cater to remote locations, ensuring hassle-free exploration.

Are There Any Stargazing or Astronomy Events or Activities in Sedona or the Grand Canyon?

For stargazing events, Sedona hosts the Sedona Star Party and offers astronomy activities through local observatories. The Grand Canyon also holds occasional stargazing events and astronomy programs, providing unique celestial experiences for visitors.

Can You Rent Camping Equipment or Gear at Both Sedona and the Grand Canyon?

You can absolutely rent camping gear at both Sedona and the Grand Canyon, making your camping experience hassle-free and convenient. Embrace the freedom of the great outdoors with everything you need readily available.

Are There Any Cultural or Historical Events or Festivals That Take Place in Sedona or the Grand Canyon?

Yes, cultural festivals and historical events occur in Sedona and the Grand Canyon. Both offer local cuisine and traditional art. Sedona hosts the Sedona International Film Festival, while the Grand Canyon has events like Native American Heritage Days.

Conclusion

So, whether you’re dreaming of the vibrant red rock formations of Sedona or the awe-inspiring vastness of the Grand Canyon, 2023 promises to be an unforgettable year for your adventures.

Picture yourself surrounded by the mystical energy of Sedona’s vortexes or standing on the edge of the Grand Canyon, feeling the sheer magnitude of nature’s power.

Whichever destination you choose, get ready for an experience that will leave you in awe and make memories to last a lifetime.

Sore Feet After Hiking

Experiencing sore feet after hiking? It’s crucial to pinpoint the causes and find effective remedies.

Whether your boots are too tight, your shoes lack support, or you’re new to hiking, there are solutions to ease your discomfort.

Factors like heavy backpacks and post-hike recovery also play a role.

This article delves into the reasons behind sore feet after hiking and offers the best remedies.

By addressing these common issues, you can ensure a more enjoyable and pain-free hiking experience.

Key Takeaways

  • Ensuring proper boot fit is crucial to avoid discomfort and blisters. Visit an outdoor store for professional advice if boots are too small or too big.
  • Wearing suitable footwear, such as hiking boots, is necessary to provide support and prevent blisters during long hikes.
  • Using proper insoles can provide cushioning and stability for different foot issues, such as arch support or plantar fasciitis.
  • Gradually increasing hiking difficulty and distance allows the feet to adapt and reduce foot pain. Rest and recovery after a long hike are also important for alleviating foot pain.

Ill-fitting Boots

If you experience sore feet after hiking, it could be due to ill-fitting boots that aren’t providing the necessary support and comfort for your outdoor adventures.

Common boot issues such as boots that are too small can lead to toes jamming into the front and feet feeling squeezed, causing blisters and discomfort. On the other hand, boots that are too big may result in feet sliding around, lack of support, and potential blisters.

Not wearing the right shoes, like unsuitable footwear, can lead to a lack of support and comfort, causing blisters and discomfort. Finding the right fit is crucial.

Visit an outdoor store to get professional advice and ensure a proper fit to prevent these issues. Your freedom on the trails depends on finding the right boots for your outdoor pursuits.

Inadequate Footwear

Wear proper hiking boots to prevent foot pain and discomfort during your outdoor adventures. Inadequate arch support and unsuitable shoe material can lead to sore feet after hiking.

Boots with insufficient arch support may cause discomfort, muscle fatigue, and even plantar fasciitis. Choose boots with proper arch support to maintain foot stability and prevent excessive strain.

Additionally, unsuitable shoe material, such as non-breathable fabrics, can lead to excessive moisture and discomfort, increasing the risk of blisters and irritation. Invest in hiking boots that provide adequate arch support and are made of breathable, moisture-wicking materials to ensure your feet stay comfortable and supported throughout your hiking excursions.

Prioritize footwear that offers both support and breathability for a more enjoyable and pain-free hiking experience.

Insufficient Support

You may experience sore feet after hiking due to insufficient support from your footwear, leading to discomfort and potential foot issues. To address this, proper insoles selection can significantly improve foot fatigue management. Check out the table below for a quick guide on insoles selection:

Type of InsolesPurpose
Cushioned insolesProvide extra shock absorption for comfort
Orthotic insolesOffer arch support and alignment for stability
Supportive insolesHelp distribute weight and reduce foot fatigue
Specialty insolesAddress specific foot conditions like plantar fasciitis

Choosing the right insoles can enhance your footwear’s support, reduce discomfort, and prevent potential foot issues. So, take the time to select insoles that cater to your specific needs and ensure a comfortable and supported hiking experience.

Inexperienced Hiking

Experiencing sore feet after hiking can often be attributed to being inexperienced with the activity. When it comes to injury prevention and hiking tips for inexperienced hikers, consider the following:

  • Start with the right footwear:

  • Invest in proper hiking boots for support and comfort.

  • Ensure the boots fit well and provide ample room for the toes.

  • Use high-quality hiking socks to prevent blisters and provide cushioning.

  • Train and prepare:

  • Gradually build up your hiking endurance and experience.

  • Start with shorter and easier trails before tackling more challenging ones.

  • Learn proper hiking techniques such as foot placement and avoiding overexertion.

  • Pack light and wisely:

  • Carry only essential gear to minimize strain on your feet.

  • Distribute weight evenly in your backpack and adjust it according to your body’s capacity and the trail’s difficulty.

Heavy Backpack Strain

After a long hike, it’s important to be mindful of the weight of your backpack and its potential impact on foot strain. Carrying a heavy backpack can significantly contribute to foot pain and discomfort. Ideally, your backpack weight shouldn’t exceed 20% of your body weight for backpacking, and for day hikes, it shouldn’t exceed 10% of your body weight.

Adjusting the pack weight according to your personal preference and the season can help alleviate foot strain. Lightening the load can reduce the strain on your feet, allowing for a more enjoyable and pain-free hiking experience. Therefore, it’s crucial to consider the weight of your backpack and make necessary adjustments to prevent foot strain and discomfort during and after your hiking adventures.

Post-Hike Recovery

Consider assessing the duration and intensity of your hike to determine the necessary steps for post-hike recovery. After a long hike, it’s essential to focus on recovery to alleviate foot pain and prevent potential injuries. Here are some key tips to aid in your post-hike recovery:

  • Rest and Elevation

  • Elevate your feet to reduce swelling

  • Allow your body time to recover and repair

  • Treating Blisters

  • Clean and protect any blisters with appropriate bandages

  • Avoid popping blisters, as this can lead to infection

  • Stretching Exercises

  • Perform gentle stretching exercises to relieve tightness in the calves and feet

  • Incorporate calf stretches and toe scrunches to promote circulation and flexibility

Following these tips will help you recover effectively and ensure that your next hiking adventure is as enjoyable as possible.

Sock Selection

Selecting proper hiking socks is crucial to prevent blisters and provide comfort during your hiking adventures. When choosing socks for hiking, consider their thickness and moisture-wicking properties to ensure your feet stay dry and friction is minimized. Here’s a comparison of some popular hiking sock options:

Sock BrandThicknessMoisture Wicking
Darn ToughMediumYes
SmartwoolMedium to ThickYes
REI Co-opLight to MediumYes

These brands offer varying thickness levels and excellent moisture-wicking properties to keep your feet dry and comfortable on the trails. Investing in high-quality hiking socks like these can significantly improve your hiking experience and reduce the risk of developing blisters.

Terrain Adaptation

When hiking, it’s essential to gradually acclimate to different terrains to prevent foot discomfort and injury. Terrain acclimatization plays a crucial role in ensuring a pleasant and pain-free hiking experience. Here’s how you can adapt to various terrains and maintain proper foot care:

  • Gradually increase difficulty and distance

  • Start with short and flat hiking trails

  • Gradually expose your feet to rough terrain

  • Allow your feet to adapt to the demands of hiking

  • Choose appropriate footwear for hiking

  • Invest in high-quality hiking boots

  • Ensure proper fit and support for different terrains

  • Consider the specific requirements of the terrain you’ll be hiking on

  • Practice proper foot care

  • Regularly inspect your feet for any signs of discomfort or injury

  • Address any foot issues promptly to prevent them from worsening

  • Utilize appropriate foot care products to maintain foot health

Weight Distribution

To prevent sore feet after hiking, focus on evenly distributing the weight in your backpack. Uneven weight distribution can lead to common foot injuries, such as blisters, hot spots, and discomfort.

Proper hiking techniques include packing heavier items closer to your back and towards the middle of the pack. This helps maintain your center of gravity and reduces strain on your feet. Use compression straps to secure the load and prevent it from shifting while hiking.

Avoid overloading your pack by carrying only essential items, keeping the weight within recommended limits. By ensuring proper weight distribution, you can minimize the strain on your feet and enjoy a more comfortable hiking experience.

Frequently Asked Questions

Can Wearing the Wrong Socks Contribute to Foot Pain While Hiking?

Choosing proper footwear is crucial for avoiding foot pain while hiking. Wearing the wrong socks can lead to discomfort, blisters, and lack of support. Stretching before and after hiking is also important for preventing foot pain.

How Can I Determine if My Backpack Weight Is Contributing to My Foot Pain While Hiking?

To determine if your backpack weight is contributing to foot pain while hiking, assess the impact of the weight on your feet. Consider adjusting the pack weight, ensuring it doesn’t exceed 20% of your body weight, and invest in proper hiking gear.

Are There Specific Insoles That Can Help With Foot Pain While Hiking?

"When hiking, finding the right insoles is crucial for foot pain. Look for ones with good arch support to lessen discomfort. Consider custom options for specific foot issues. Invest in quality insoles for a better hiking experience."

What Are the Signs That I May Need to Size up or Down in My Hiking Boots?

Hey there! When hiking, if your boots feel like a tight hug, your toes are jammed, or your feet slip around, it’s time to rethink the fit. Proper boot sizing and arch support are crucial for happy feet on the trail.

How Can I Prevent Blisters and Discomfort When Hiking in Different Terrains?

To prevent blisters and discomfort when hiking in different terrains, wear proper footwear and prioritize foot care. Choose suitable hiking boots, break them in, and invest in quality socks. Maintain good hygiene, keep feet dry, and address any hot spots promptly.

Conclusion

Don’t let sore feet put a damper on your hiking adventures. With the right footwear, proper support, and smart packing, you can conquer any trail without the pain.

Remember, your feet are the foundation of your hiking experience, so take care of them and they’ll take care of you.

Embrace the journey, and let your feet lead the way to new adventures.

Should I Wear a Sports Bra to Hike

Ready to take your hiking to the next level? Should you wear a sports bra for your next outdoor adventure? Yes! Wearing a sports bra while hiking provides crucial comfort and support, allowing you to fully enjoy the beauty of nature without any discomfort or distractions.

This article will guide you through the importance of wearing a sports bra for hiking and help you choose the best one for your needs. From the factors to consider when selecting the perfect sports bra to the best options available on the market, you’ll find everything you need to make an informed decision.

So, lace up your hiking boots and get ready to discover the best sports bras for your next outdoor escapade!

Key Takeaways

  • Wearing a sports bra is recommended for hiking due to its comfort and support.
  • Factors to consider when choosing a sports bra for hiking include support, comfort, and breathability.
  • Compression and encapsulation sports bras are both suitable for hiking, with different levels of support available.
  • Some recommended sports bras for hiking include Adidas Power Impact Training Medium Support Bra, Brooks Dare Scoopback Run Bra, and Lululemon Run Times Bra.

Importance of Wearing a Sports Bra for Hiking

Why should you wear a sports bra for hiking?

Wearing a sports bra offers numerous benefits while hiking. It provides essential support, reducing discomfort and preventing chafing, ensuring you stay comfortable throughout your hike.

When choosing a sports bra for hiking, focus on finding the right size that offers support, comfort, and breathability. Look for a snug yet comfortable fit that minimizes breast movement, and adjustable straps for a customized fit.

Opt for moisture-wicking and breathable materials to enhance overall comfort. When selecting a sports bra, consider the different types available, such as compression or encapsulation bras, and the level of support needed.

Factors to Consider When Choosing a Sports Bra

When choosing a sports bra for hiking, prioritize support, comfort, and breathability to ensure a comfortable and enjoyable outdoor experience. Start by choosing the right size to ensure a snug yet comfortable fit, avoiding discomfort and pain.

Understanding different levels of support is crucial; look for bras with a high level of support to minimize breast movement. Opt for adjustable straps for a customized fit and consider moisture-wicking and breathable materials for added comfort.

Different types of sports bras, such as compression and encapsulation, offer various levels of support. When selecting a sports bra, prioritize your comfort and the level of support needed for the intensity of your hikes.

This will ensure you have the best experience while out on the trails.

Types of Sports Bras for Hiking

To choose the right sports bra for hiking, consider the different types available to find one that suits your needs and preferences. When selecting a sports bra for hiking, it’s essential to understand the benefits of wearing one and how to choose the right type. Here are the types of sports bras for hiking:

Type of Sports BraDescription
Compression Sports BrasCompress the breasts to the body for a secure fit.
Encapsulation Sports BrasHave separate cups that support each breast.
Combination Sports BrasCombine compression and encapsulation for extra support.
Support LevelsOffer different levels of support, such as low, medium, or high impact.

Considering these options will help you find a sports bra that provides the comfort and support you need for an enjoyable hiking experience.

Adidas Power Impact Training Medium Support Bra

The Adidas Power Impact Training Medium Support Bra is a comfortable and supportive option for your hiking needs. Its benefits of wearing a sports bra during physical activity include reducing discomfort, preventing chafing, and providing a secure fit.

When choosing the right size sports bra, consider factors like support, comfort, and breathability. Look for a snug yet comfortable fit to avoid discomfort and pain, and opt for moisture-wicking and breathable materials for added comfort.

The adjustable straps provide a customized fit, ensuring proper support and comfort. This bra is fast-drying, making it suitable for outdoor activities like hiking.

With the Adidas Power Impact Training Medium Support Bra, you can enjoy the freedom to move comfortably and confidently during your hiking adventures.

Brooks Dare Scoopback Run Bra

Consider the Brooks Dare Scoopback Run Bra for your hiking adventures, as it provides extra support and stability while ensuring comfort and confidence during physical activity.

Benefits of the Brooks Dare Scoopback Run Bra

  1. Enhanced Stability: Experience minimal breast movement, allowing you to focus on your hike.
  2. Ultimate Comfort: The soft, breathable fabric keeps you comfortable throughout your adventure.
  3. Confidence Boost: Feel secure and supported, enhancing your overall performance and enjoyment.
  4. Stylish Design: The scoopback style offers a trendy look while providing the necessary support.

When comparing compression and encapsulation sports bras, the Brooks Dare Scoopback Run Bra combines the best of both worlds, offering the support of encapsulation with the security of compression. This hybrid design ensures superior stability and comfort, making it an excellent choice for your hiking escapades.

Lululemon Run Times Bra

Consider wearing the Lululemon Run Times Bra for its snug fit and moisture-wicking properties during your hiking adventures. This sports bra provides exceptional support and comfort, minimizing breast movement while ensuring breathability.

The Lululemon Run Times Bra excels in moisture management, keeping you dry and comfortable during strenuous hikes. Compared to other sports bras, it offers a unique combination of a secure fit and moisture-wicking capabilities, making it an ideal choice for outdoor activities.

Its seamless design and adjustable straps provide a customized fit, reducing the risk of discomfort and chafing. When compared to other sports bras for hiking, the Lululemon Run Times Bra stands out for its ability to keep you feeling secure, supported, and dry, allowing you to fully enjoy your hiking experience.

Tips and Considerations for Wearing a Sports Bra

When wearing a sports bra for hiking, ensure a snug yet comfortable fit to minimize discomfort and provide optimal support for your outdoor adventure.

To prevent chafing while hiking, consider these tips for staying comfortable on long hikes:

  1. Adjust the straps to customize support and comfort.

  2. Check for any chafing or discomfort during a trial hike.

  3. Opt for moisture-wicking and breathable materials for overall comfort.

  4. Wear layers to adapt to changing weather conditions.

Proper Fit and Adjustment of Straps

To ensure optimal comfort and support while hiking, it’s essential to properly adjust the straps of your sports bra for a snug yet comfortable fit. The proper fit is crucial for suitable support level, chafing prevention, and overall comfort.

Look for bras with adjustable straps to customize the fit according to your body type. Opt for bras made from moisture-wicking materials for breathability and durability.

Ensure the sports bra is suitable for different body types and appropriate for the impact level of your hike. A well-fitted sports bra will prevent discomfort and chafing during your hike.

Prioritize comfort and support by choosing a sports bra that meets these criteria for an enjoyable and hassle-free hiking experience.

Care and Maintenance of Sports Bras

Ensuring the proper care and maintenance of your sports bra is essential for maximizing its longevity and performance during your hikes. Here are four tips for caring for your sports bra:

  1. Hand Wash: Gently hand wash your sports bra with mild detergent to preserve its elasticity and support.

  2. Air Dry: Avoid using a dryer as the heat can damage the fabric and elastic fibers. Instead, air dry your sports bra to maintain its shape and functionality.

  3. Rotate Bras: Rotate between multiple sports bras to allow them to rest and recover between uses, prolonging their lifespan.

  4. Store Carefully: Store your sports bras by folding them neatly or hanging them to prevent stretching or misshaping.

Proper care and maintenance not only extend the life of your sports bra but also ensure that you continue to benefit from its support and comfort during your hikes.

Additional Gear for Hiking

Consider packing essential gear like a backpack with water, snacks, and a map for a successful hiking trip.

When it comes to hiking, the benefits of wearing hiking boots can’t be overstated. They provide ankle support, traction, and protection from sharp rocks or branches.

Choose a backpack that fits comfortably and has adjustable straps for a customized fit. Look for one with multiple compartments to keep your gear organized. Additionally, opt for a backpack with a hydration system or space for a water bottle to stay hydrated.

Consider the size of the backpack based on the length of your hike and the amount of gear you plan to carry. Investing in a quality backpack designed for hiking will ensure you have a comfortable and enjoyable experience on the trails.

Frequently Asked Questions

Can Wearing a Sports Bra Prevent Back Pain During Hiking?

Wearing a sports bra can prevent back pain during hiking by providing proper support. Choose one with high support and a snug yet comfortable fit. Combine it with supportive gear and comfortable clothing for an enjoyable hike.

Are There Any Specific Sports Bras Designed for Women With Larger Bust Sizes for Hiking?

When hiking with a larger bust, supportive sports bras are essential for comfort and stability. Look for options with adjustable straps and breathable, comfortable materials to ensure a snug and supportive fit throughout your hike.

How Can I Prevent Chafing While Wearing a Sports Bra for Hiking?

To prevent chafing while hiking in a sports bra, prioritize a proper fit, moisture-wicking fabric, and a seamless design. Ensure the bra fits snugly but comfortably, and look for materials that wick away sweat to keep you comfortable on your adventure.

Is It Necessary to Wear a Sports Bra if I Already Have a Supportive Hiking Backpack?

When hiking, a supportive backpack is like a good friend, but a sports bra is your trusty sidekick. While the backpack provides essential support, a sports bra ensures comfort and minimizes bouncing.

Are There Any Specific Sports Bras Recommended for Hot Weather Hiking to Keep Me Cool and Comfortable?

For hot weather hiking, choose a sports bra with moisture-wicking technology and breathable fabric. Look for adjustable straps and a racerback design for added comfort and support. Stay cool and comfortable on your hike.

Conclusion

So, next time you hit the trails, don’t forget to gear up with a supportive sports bra. It’s the secret weapon for a comfortable and enjoyable hiking experience.

Keep the girls in place and say goodbye to any discomfort or distractions. With the right sports bra, you’ll be ready to conquer any trail with ease and confidence.

Happy hiking!

Snow Boots

Are you preparing for winter escapades and contemplating between snow boots and hiking boots? In this piece, you’ll unravel the distinctions and resemblances between these two types of footwear.

You’ll explore the unique attributes and uses of both snow boots and hiking boots, weighing their advantages and disadvantages. Dive into a comparison encompassing aspects like ankle support, insulation, traction, waterproofing, and overall comfort.

Plus, you’ll uncover recommendations for the finest hiking boots suitable for snowy conditions, ensuring you’re geared up appropriately for your cold-weather journeys.

Lastly, you’ll gain valuable insights into the significance of waterproof hiking boots, particularly for navigating through snowy landscapes. By the end, you’ll have a clear grasp of which boot type best aligns with your winter outdoor pursuits.

Key Takeaways

  • Hiking boots and snow boots have different purposes and features.
  • Hiking boots offer ankle support and are suitable for various terrains, while snow boots provide insulation and traction on snow and ice.
  • Waterproofing is important for both hiking boots and snow boots, especially in snowy conditions.
  • It is recommended to wear waterproof hiking boots for winter trail hiking to keep feet dry and protected.

Understanding Hiking Boots Vs. Snow Boots

How do hiking boots and snow boots differ in terms of their design and functionality?

Hiking boots are designed for long walks on various terrains, providing ankle support, stability, and durability. They offer good traction, are lightweight, and breathable, suitable for day hikes and backpacking trips. However, their limited insulation and water resistance may not be ideal for snowy conditions.

On the other hand, snow boots are specifically designed for cold, wet, and snowy environments. They feature insulation, waterproofing, and sturdy soles to provide warmth, traction, and protection in harsh winter conditions. While they excel in snowy landscapes, their bulkiness and limited ankle support may not be suitable for extensive hiking.

Understanding the pros and cons of hiking boots and the features and uses of snow boots will help you make an informed choice for your outdoor adventures.

Comparison of Support and Ankle Stability

When comparing support and ankle stability, assess the differences between hiking boots and snow boots to ensure your footwear meets the demands of your outdoor activities.

Hiking boots typically offer strong ankle support, crucial for navigating rough terrains. They’re designed with sturdy, rigid construction to prevent ankle rolling and provide stability on uneven surfaces.

Snow boots, on the other hand, prioritize warmth and insulation, often with a focus on comfort rather than rigid ankle support. While they may offer some ankle stability, they aren’t specifically engineered for the same level of support as hiking boots.

When considering traction capabilities on rough terrain, hiking boots often feature aggressive treads for grip, while snow boots prioritize traction on snow and ice.

Understanding these differences will help you choose the right footwear for your outdoor adventures.

Warmth and Insulation Variances

Assessing the warmth and insulation variances between hiking boots and snow boots is crucial to ensure that your footwear meets the specific requirements of your outdoor activities.

  1. Insulation Properties: Snow boots are typically designed with higher levels of insulation to keep your feet warm in extremely cold conditions. Hiking boots, on the other hand, offer less insulation, making them more suitable for moderate temperatures.

  2. Winter Suitability: Snow boots are specifically engineered to handle snowy and icy conditions, providing better protection against the cold and wetness. Hiking boots, although suitable for cold weather, may not offer the same level of protection and insulation as snow boots.

  3. Versatility: While snow boots excel in extreme cold and snowy conditions, hiking boots are more versatile and can be used in a wider range of temperatures and terrains.

Understanding these differences will help you select the right footwear for your winter adventures.

Traction and Grip on Different Terrains

Understanding the differences in traction and grip between hiking boots and snow boots is crucial for selecting the right footwear for your outdoor activities, especially if you frequently encounter diverse terrains and weather conditions. When hiking on icy trails, having the right outsole can make all the difference. Hiking boots typically feature a durable and aggressive outsole designed to provide excellent grip on rugged and varied terrains. On the other hand, snow boots are equipped with specialized outsoles designed to offer traction specifically in snowy and icy conditions. To illustrate the differences clearly:

Hiking BootsSnow Boots
Durable and aggressive outsoleSpecialized outsole for snow and ice
Excellent grip on rugged and varied terrainsTraction optimized for snowy and icy conditions

Choosing the right outsole for winter hiking is essential for ensuring your safety and enjoyment on the trails.

Waterproof Features and Effectiveness

To ensure dry and comfortable feet during winter hikes, it’s essential to assess the waterproof features and effectiveness of both snow boots and hiking boots. When comparing the waterproof capabilities of these boots, there are significant differences worth noting:

  1. Material Differences: Snow boots often feature rubber and waterproof leather, offering excellent protection against moisture, while hiking boots may use breathable, water-resistant membranes to balance waterproofing with breathability.

  2. Seam Sealing: Snow boots typically have fully sealed seams to prevent water from seeping in through stitching, providing superior waterproofing. In contrast, hiking boots may have fewer fully sealed seams, potentially impacting their waterproof effectiveness.

  3. Height and Coverage: Snow boots generally have higher shafts and better coverage to keep out snow and water, whereas hiking boots may offer less coverage, making them more susceptible to water intrusion.

Understanding these differences can help you choose the best option for your specific needs, ensuring dry and comfortable feet on your winter adventures.

Comfort, Breathability, and Weight Differences

When considering snow boots and hiking boots, you’ll find that they differ in terms of comfort, breathability, and weight.

Snow boots prioritize warmth and protection from the elements, often resulting in a heavier and less breathable design. They provide excellent insulation but may lack breathability during high-exertion activities.

On the other hand, hiking boots focus on being lightweight and breathable, allowing for better ventilation and comfort during long treks. This makes them suitable for various terrains and climates, although they may not offer the same level of warmth as snow boots.

It’s essential to weigh the pros and cons of comfort and breathability in snow boots versus hiking boots based on your specific outdoor activities and environmental conditions.

Best Hiking Boots for Snow

Where can you find the best hiking boots for snow?

When it comes to tackling snowy trails, you need reliable footwear that offers warmth, traction, and waterproofing. Consider the following options for the top hiking boots designed for snow:

  1. Oboz Bridger Mid B-Dry: This boot provides exceptional durability and comfort, making it perfect for snow hiking. Its waterproofing technology keeps your feet dry, while the insulation provides warmth in cold conditions.

  2. KEEN Revel 4 Mid-Calf Polar Boots: These boots are specifically designed to resist cold temperatures and offer superior waterproofing, making them ideal for snow hiking. Additionally, they provide excellent traction on icy and snowy terrain.

Both options offer unique features and benefits tailored for snow hiking, ensuring your comfort and safety during winter adventures.

Importance of Waterproof Footwear

For snowy trails, you need reliable footwear that offers warmth, traction, and waterproofing, ensuring your comfort and safety during winter adventures.

Waterproof footwear is essential for keeping your feet dry and warm in snowy conditions. The benefits of insulation in waterproof boots provide crucial warmth, preventing discomfort and potential cold-related issues.

Additionally, the durability of waterproofing ensures that your boots remain effective in keeping moisture out, even in challenging terrains. Whether you’re hiking through deep snow or encountering slushy areas, waterproof footwear is vital for maintaining dryness and warmth, ultimately contributing to a more enjoyable and safe outdoor experience.

Therefore, investing in high-quality waterproof hiking or snow boots is a wise choice for those seeking freedom and adventure in winter landscapes.

Frequently Asked Questions

Can Snow Boots Be Used for Hiking in Warmer Weather?

Yes, snow boots can be used for hiking in warmer weather, but they may not be the most comfortable option due to their insulation and warmth. Consider lightweight hiking boots designed for summer trekking for a better experience.

What Are the Best Snow Boots for Extreme Cold Temperatures?

When braving extreme cold, prioritize insulating materials for warmth retention. Look for snow boot styles with varied traction options to conquer icy terrain. Your freedom to explore demands reliable gear for the wintry adventure ahead.

Are There Any Hiking Boots That Are Specifically Designed for Use in Icy Conditions?

Yes, there are hiking boots specifically designed for icy conditions. Look for ones with aggressive outsoles and special lugs for ice traction. These features provide stability and grip, making them ideal for winter hiking.

Can Snow Boots Provide the Same Level of Ankle Support as Hiking Boots?

Snow boots for running, hiking boots for stability. Snow boots prioritize warmth and traction, while hiking boots emphasize ankle support and breathability. For snowy conditions, snow boots are suitable, but for rough terrain, opt for hiking boots.

Are There Any Snow Boots That Are Suitable for Use on Rocky Terrain?

You can find snow boots suitable for rocky terrain, offering traction and stability. Look for options designed for more rugged conditions, with durable outsoles and ankle support. Consider your needs for warmth and breathability in warmer weather.

Conclusion

So, whether you’re hitting the snowy trails or trekking through winter wonderlands, choosing the right footwear is essential. Both snow boots and hiking boots have their own unique features and purposes, but ultimately, it comes down to your specific needs and the terrain you’ll be exploring.

Remember, finding the perfect pair of boots is like finding a diamond in the rough – it may take some searching, but once you find the right fit, you’ll be unstoppable on your winter adventures!

Should Hiking Boots Be a Size Bigger

Are you aware that the debate over whether hiking boots should be a size bigger is a common dilemma for outdoor enthusiasts? Choosing the right fit for your hiking boots is essential for a comfortable and enjoyable trek. In this article, we’ll delve into the discussion and provide you with essential sizing guide tips for fitting.

Understanding the significance of a proper fit, recognizing the signs of boots being too big or too small, and considering the fitting process will empower you to make an informed decision. Whether you’re a seasoned hiker or just starting out, finding the right size will ensure that your feet are well-supported and free from discomfort on the trail.

Let’s explore the world of hiking boot sizing and guarantee that your next outdoor adventure is a comfortable and enjoyable one.

Key Takeaways

  • Hiking boots should fit snugly and comfortably on your feet, with a slight allowance for foot swelling.
  • It is recommended to get fitted at a store like REI for accurate sizing.
  • Boots that are too big can cause discomfort, blisters, and lack of balance on uneven terrain.
  • Hiking boots should feel comfortable, supportive, and not too loose, with enough room in the toe box for toe movement.

Importance of Properly Fitting Hiking Boots

You should prioritize the importance of properly fitting your hiking boots to ensure a comfortable and safe hiking experience. The benefits of properly fitting hiking boots can’t be overstated.

Contrary to common misconceptions, wearing boots that are too big can cause discomfort, blisters, and even lead to injuries due to loss of balance on uneven terrain. On the other hand, boots that are too small can result in tightness, discomfort, and potential foot problems.

It’s crucial to get fitted at a store like REI for accurate sizing and consider trying on boots later in the day when your feet are likely to swell. Remember, the ideal fit is loose enough for comfort but snug enough to provide support.

Prioritize finding the right fit to prevent any discomfort and potential foot problems during your hiking adventures.

Tips for Buying the Right Fitting Hiking Boots

When purchasing hiking boots, ensure that the fit allows for comfortable movement and proper support on the trail. Here are some tips for buying the right fitting hiking boots:

  1. Get fitted at a store like REI for accurate sizing: Professional fittings can ensure you find the perfect size for your feet.

  2. Try on boots with a second pair of hiking socks: Wearing an extra pair of socks can help you determine if the boots provide the right fit, especially if you plan to wear them with thicker socks on the trail.

  3. Consider leaving a little bit of wiggle room: A small amount of space, particularly in the toe box, allows for natural foot swelling and movement during long hikes.

Following these tips will help you find hiking boots that provide the comfort and support necessary for enjoyable and safe adventures on the trails.

Wearing Hiking Boots That Are Too Big

If your hiking boots are too big, they can cause discomfort and problems such as blisters and instability on the trail. While it’s okay for hiking boots to be slightly bigger, excessively oversized boots can lead to feet sliding, resulting in blisters and pain. Losing balance on uneven terrain due to slippage can also lead to potential injury.

However, there are some benefits to wearing boots that are slightly larger, such as accommodating foot swelling during long hikes. To prevent slippage in hiking boots that are too big, try wearing thicker socks or using insoles for a better fit.

Ultimately, finding the right balance is crucial – boots should be snug enough to provide support but also allow room for comfort and natural foot movement.

Is It Better to Have Hiking Boots Too Big or Too Small

Having hiking boots that are slightly bigger is preferable to having them too small. When it comes to finding the right balance between comfort and stability in hiking boot sizing, it’s essential to consider the pros and cons of wearing boots that are too big.

Pros of Wearing Hiking Boots That Are Too Big

  • More room for foot swelling during long hikes.
  • Reduced risk of blisters and discomfort caused by tight boots.
  • Extra space can accommodate thicker socks for added warmth in cold weather.

Cons of Wearing Hiking Boots That Are Too Big

  • Potential loss of stability and support on rough terrain.
  • Increased risk of foot sliding, leading to discomfort and potential injury.
  • Excessive space may lead to friction and blisters if not managed properly.

Signs of Boots Being Too Big or Too Small

You can identify signs of hiking boots being too big or too small by paying attention to how your feet feel during and after wearing them.

If your boots are too big, you may experience your feet sliding around inside, toes jamming into the ends, or getting blisters on your toes or heels. This can lead to discomfort, blisters, and potential injury due to instability on uneven terrain.

On the other hand, if your boots are too small, you might feel suffocated, develop blisters on your ankles, or have toes crossing over each other. It’s essential to determine the right size for hiking boots to prevent these issues.

Wearing oversized hiking boots can lead to discomfort and instability, while choosing the correct size ensures a comfortable and safe hiking experience.

How Do You Know Your Hiking Boot Size

To determine your hiking boot size, measure your feet with a ruler or tape measure and compare the measurements to the sizing chart provided by the boot manufacturer. When finding the right fit for hiking boots, consider these tips:

  1. Measure your feet at the end of the day when they’re likely to be at their largest size.
  2. Wear the socks you intend to wear while hiking when measuring your feet for the most accurate sizing.
  3. Stand while measuring your feet to mimic the weight and size your feet will be while wearing the boots.

Should Hiking Boots Be the Same Size as Running Shoes

When fitting hiking boots, considering whether they should be the same size as running shoes is essential for ensuring comfort and support during outdoor activities.

Generally, hiking boots are the same size as regular or running shoes, but slight variations may exist depending on the brand.

It’s crucial to try them on before hiking, as slight adjustments in size may be necessary for a better fit.

Hiking boots provide different support and protection than trail running shoes, so finding the right fit for hiking boots is important.

Ensure that there’s enough room in the toe box to wiggle your toes slightly, and consider going half a size up if your regular size feels too tight.

Trying on boots before purchasing is crucial to ensure the right fit and avoid discomfort during hikes.

Are Hiking Boots the Same Size as Shoes

In determining if hiking boots are the same size as regular shoes, consider the individual fit and characteristics of your feet. Here are some important points to keep in mind:

  • Hiking boot sizing can be similar to your regular shoe size, but it’s crucial to try them on for the best fit.
  • Shoe size comparison may vary slightly depending on the brand, so trying on different boots is recommended.
  • Consider individual foot characteristics to ensure the right fit for your hiking boots.

When finding the perfect hiking boot size, it’s essential to prioritize comfort and support for your outdoor adventures.

How Much Room Should You Have in the Toe of Hiking Boots

You should have enough room in the toe box of your hiking boots to wiggle your toes slightly. A tight toe box can lead to discomfort, while excessive space can cause instability and blisters. Choosing the right toe box size is crucial for a comfortable hiking experience. Consider the following guidelines when determining the appropriate amount of room in the toe of your hiking boots:

Sizing Guide for Hiking BootsRecommendations
Wiggle RoomThere should be enough space for your toes to move slightly, ensuring comfort and preventing constriction.
Toe MovementYour toes should not feel cramped or jammed at the front of the boot, allowing for natural movement while walking.
StabilityWhile there should be room for movement, the fit should still provide stability and prevent sliding or shifting within the boot.
ComfortThe toe box should feel comfortable, neither too tight nor excessively spacious, ensuring a pleasant hiking experience.
Trial FittingAlways try on hiking boots to ensure the appropriate toe box size before making a purchase.

Considerations for Fitting Hiking Boots

Make sure your hiking boots fit slightly loose to allow space for toe movement and foot swelling on the trail. When fitting your hiking boots, consider the following:

  1. Toe Movement: Your boots should allow your toes to move freely without feeling cramped or jammed at the front.

  2. Foot Swelling: Account for potential foot swelling by choosing boots that provide enough room for expansion without being excessively loose.

  3. Support and Comfort: Ensure that the boots offer ample support and comfort while still allowing for slight movement.

When considering fitting techniques, keep in mind common sizing issues, such as boots running small, and the importance of trying on different brands to find the best fit for your individual foot characteristics.

Frequently Asked Questions

Can Hiking Boots Be Stretched to Fit Better if They Are Slightly Too Small?

If your hiking boots are slightly too small, try stretching methods like wearing thick socks or using a boot stretcher. Consider sizing alternatives and get fitted at the store for accurate sizing.

Are There Specific Brands of Hiking Boots That Tend to Run Larger or Smaller in Size?

When choosing hiking boots, sizing varies among brands. Try on different brands to find the best fit for you. Consider fitting techniques like wearing two pairs of socks or getting fitted at a store.

How Can I Prevent My Feet From Sliding Around in Hiking Boots That Are Slightly Too Big?

To prevent your feet from sliding in slightly big hiking boots, try using a thicker pair of socks or footwear inserts for a snug fit. Adjust lacing techniques and consider toe box adjustments for added stability and comfort.

Are There Any Tips for Breaking in Hiking Boots to Prevent Discomfort During Long Hikes?

To prevent blisters and discomfort on long hikes, break in your hiking boots by wearing them on short walks and gradually increasing the duration. Proper lacing techniques can also help prevent feet from sliding around in slightly bigger boots.

Should I Consider Getting Custom Insoles for My Hiking Boots if I Have Specific Foot Support Needs?

If you have specific foot support needs, considering custom insoles for your hiking boots is a great idea. They can provide tailored support and enhance comfort, especially if you’re experiencing foot discomfort.

Conclusion

When fitting hiking boots, remember that size matters. Ensure a snug fit, not too big or small, for a satisfying hike. Pay attention to signs of discomfort and consider the proper room for your toes.

With these sizing guide tips, you’ll be ready to hit the trails in boots that fit just right.

So, step into the world of hiking with confidence, comfort, and contentment.

North Cascades

When faced with the choice of exploring Washington’s natural wonders, you’re caught in a dilemma reminiscent of a classic tale: Mount Rainier or North Cascades National Park? Both parks offer captivating scenery and distinct experiences, but which one is the right fit for your adventure?

In this guide, we’ll dissect the unique landscapes, family-friendly activities, and accessibility of each park. Whether you crave the iconic sight of Mount Rainier or the untouched wilderness of North Cascades, you’ll gain the insights needed to make an informed decision.

Prepare to compare the towering peaks of Mount Rainier with the snow-draped mountains of North Cascades and uncover the best transport options to reach these natural marvels. It’s time to weigh your options and set off on an unforgettable journey through Washington’s finest parks.

Key Takeaways

  • Mount Rainier National Park is home to the tallest mountain in Washington, standing at 14,410 feet above sea level and offering expansive views of rolling hills and the iconic Mount Rainier itself.
  • North Cascades National Park is known for its remote wilderness and stunning landscapes, with large viewpoints of snow-capped mountain peaks.
  • Mount Rainier National Park is more family-friendly, with short and easy hiking trails, pull-off viewpoints, and areas to see views at visitor centers.
  • North Cascades National Park may be less suitable for young children due to its remote nature, and it is one of the least visited national parks in the country.

Park Histories and Significance

If you’re planning a visit to either Mount Rainier or North Cascades National Park, it’s important to understand the historical significance of each park.

Mount Rainier National Park holds immense historical significance. It was established in 1899, making it one of the oldest national parks in the United States. The park isn’t only known for its stunning landscapes but also for its ecological importance. Mount Rainier is an active volcano and is the most glaciated peak in the country. Its diverse ecosystems house various plant and animal species, contributing to its ecological significance.

On the other hand, North Cascades National Park, established in 1968, is renowned for its remote wilderness and ecological importance. The park’s rugged terrain and diverse habitats make it a vital area for conservation and research, highlighting its ecological significance.

Spectacular Scenery and Landscapes

When comparing the spectacular scenery and landscapes of Mount Rainier and North Cascades National Parks, you’ll find diverse and breathtaking natural beauty in both locations.

  • Hiking Trails: North Cascades offers extensive and challenging trails, ideal for experienced hikers, while Mount Rainier provides a mix of easy, family-friendly trails and strenuous routes for seasoned adventurers.

  • Wildlife Viewing: Both parks offer exceptional wildlife viewing opportunities. North Cascades is renowned for its diverse wildlife, including bears, deer, and eagles. Mount Rainier is home to a variety of wildlife, such as elk and mountain goats, making it a paradise for animal enthusiasts.

  • Spectacular Vistas: North Cascades boasts panoramic views of snow-capped peaks, while Mount Rainier provides sweeping vistas of its iconic namesake and lush, rolling hills.

  • Unique Landscapes: North Cascades showcases rugged, remote landscapes with glacially-carved peaks and valleys, while Mount Rainier features a blend of alpine meadows, old-growth forests, and icy glaciers.

  • Scenic Diversity: Both parks offer a rich tapestry of landscapes, from subalpine terrain to dense forests, ensuring an array of stunning scenery to explore.

Family-Friendly Features

You can explore short and easy hiking trails at Mount Rainier National Park, perfect for families with young children.

The park offers a range of family-friendly hiking options, such as the Trail of the Shadows, a flat and leisurely loop trail suitable for all ages.

Visitor amenities include designated picnic areas, where families can relax and enjoy a meal surrounded by stunning natural beauty.

Additionally, the park provides educational programs specifically tailored for children, allowing them to engage with and learn about the park’s ecosystem.

Mount Rainier National Park’s accessible facilities, including restrooms and visitor centers, cater to the needs of families, ensuring a comfortable and enjoyable experience for all.

These family-focused features make Mount Rainier National Park an ideal destination for those seeking a memorable outdoor adventure with their loved ones.

Geographic Contrasts

When comparing Mount Rainier and North Cascades, consider the geographic contrasts between the two parks.

  • Geographic Features
  • Mount Rainier boasts a single prominent peak and expansive glaciers, while North Cascades is characterized by numerous jagged peaks and over 300 glaciers.
  • Mount Rainier’s landscape is dominated by the iconic volcano, providing a dramatic backdrop, whereas North Cascades features a rugged, serrated terrain with deep valleys and fjord-like lakes.
  • Mount Rainier’s ecosystem is influenced by the active volcano, resulting in unique flora and fauna, while North Cascades is known for its diverse and pristine ecosystems, including old-growth forests and alpine meadows.
  • Mount Rainier offers a mix of subalpine and alpine environments, while North Cascades showcases a wide range of ecosystems, from lush temperate rainforests to arid shrub-steppe.
  • Mount Rainier’s terrain consists of rolling hills and open meadows, in contrast to North Cascades’ rugged and densely forested landscapes.

These geographic differences contribute to the distinct experiences each park offers, from the flora and fauna to the hiking terrain and scenic viewpoints.

Accessibility and Transportation

For a convenient visit to either Mount Rainier or North Cascades National Park, consider renting a car from Seattle-Tacoma International Airport (SEA) for easy transportation within the parks. SEA is approximately a 2.5-hour drive from North Cascades National Park and about 1.75 hours to Mount Rainier.

Rental cars are readily available at the airport, providing the freedom to explore the parks at your own pace. Since there’s no public transportation within the parks, having a car is essential for park access and flexibility.

Both parks offer well-maintained roads and designated parking areas for various attractions and trailheads. By having your own transportation, you can easily access different areas of the parks, ensuring that you make the most of your visit.

Popular Activities and Highlights

To fully immerse yourself in the natural wonders of Mount Rainier and North Cascades National Parks, consider exploring the trails and viewpoints that showcase their breathtaking landscapes.

  • Hiking Trails: Both parks offer a plethora of hiking trails, catering to various difficulty levels. Mount Rainier boasts iconic trails like Skyline Trail and Wonderland Trail, while North Cascades offers trails like Cascade Pass and Maple Pass Loop.

  • Wildlife Viewing: Visitors can indulge in unparalleled wildlife viewing experiences. Mount Rainier is home to black bears, marmots, and elk, with the possibility of spotting mountain goats. In North Cascades, you can encounter wildlife such as grizzly bears, gray wolves, and bald eagles in their natural habitat.

  • Scenic Viewpoints: Numerous viewpoints provide stunning panoramas of the parks’ landscapes, allowing you to soak in the grandeur of Mount Rainier and the North Cascades.

  • Photography Opportunities: With diverse flora and fauna, both parks offer incredible opportunities for photography enthusiasts to capture the beauty of the natural surroundings.

  • Ranger-Led Programs: Engage in educational and informative ranger-led programs, which offer insights into the parks’ ecosystems, geology, and conservation efforts.

Seasonal Considerations

As you plan your visit to either Mount Rainier or North Cascades National Park, it’s important to consider the seasonal variations that can significantly impact your experience.

The best time to visit Mount Rainier is during the summer months, from late June to early September, when the weather conditions are most favorable for hiking and enjoying the breathtaking views. During this time, the wildflowers are in full bloom, and the trails are generally snow-free.

On the other hand, North Cascades National Park is best visited in late summer and early fall, from August to September, to avoid the heavy snowfall and take advantage of the clearer weather conditions.

Keep in mind that both parks can experience sudden weather changes, so it’s essential to be prepared for various conditions regardless of the season.

Frequently Asked Questions

Are There Any Specific Safety Precautions or Considerations to Keep in Mind When Visiting Either Park, Such as Wildlife Encounters or Weather Conditions?

When visiting either park, keep wildlife safety in mind by storing food properly and avoiding close encounters. Be aware of changing weather conditions, especially at high elevations. Enjoy trail adventures and photography spots with caution.

What Are Some Recommended Off-The-Beaten-Path Activities or Hidden Gems to Explore in Either Park?

When exploring Mount Rainier, seek out the hidden waterfalls along the Wonderland Trail, and hike the remote Mildred Point trail for stunning views. For North Cascades, visit the remote Hidden Lake Lookout and photograph wildlife in the Pasayten Wilderness.

Are There Any Notable Cultural or Historical Sites Within the Parks That Visitors Should Be Aware Of?

Within both parks, immerse yourself in the rich cultural preservation and Indigenous history. Mount Rainier features the Longmire Museum, showcasing historical landmarks and artifacts. North Cascades’ Skagit Information Center educates visitors on the park’s fascinating cultural heritage.

What Are the Dining and Accommodation Options Like Near Each Park, and Are There Any Unique Local Restaurants or Lodging Choices to Consider?

When visiting Mount Rainier, you’ll find cozy cabins and farm-to-table dining options nearby. For North Cascades, boutique inns and local cuisine are popular choices. Both parks offer unique lodging and dining experiences amidst their stunning landscapes.

Are There Any Guided Tour Options or Special Events That Visitors Should Plan for When Visiting Either Park?

When visiting Mount Rainier or North Cascades, there are special events and guided tours to consider. Keep an eye out for wildlife encounters and be prepared for varying weather conditions. These experiences will elevate your trip.

Conclusion

So, whether you choose the iconic sight of Mount Rainier or the remote wilderness of North Cascades, both parks offer experiences as unique as a fingerprint.

Each park is like a precious gem, offering its own breathtaking views and family-friendly activities.

No matter which park you choose, you’re in for a journey that’s as exhilarating as a rollercoaster ride.

So pack your bags, hit the road, and get ready to make memories that will last a lifetime.

Olympic National Park

When deciding between Olympic National Park and North Cascades National Park for your Washington visit in 2023, picture yourself standing amidst the lush, ancient rainforests of Olympic or gazing at the rugged, snow-capped peaks of North Cascades. Each park offers its own captivating allure, from coastal wonders to alpine landscapes.

Dive into this guide to uncover the distinctive features of both parks, from accessibility and natural beauty to recreational opportunities and conservation efforts. By the end, you’ll be equipped to make an informed choice for your outdoor escapade.

Whether you crave the coastal rainforests and diverse wildlife of Olympic or the untamed mountain grandeur of North Cascades, this guide will steer you towards the perfect destination for your adventure.

Key Takeaways

  • Olympic National Park is located on the Olympic Peninsula in Washington state, while North Cascades National Park is located in northern Washington near the Canadian border.
  • Olympic National Park offers diverse landscapes including rainforests, glaciers, and coastline, while North Cascades National Park is known for its rugged mountain peaks and alpine lakes.
  • Olympic National Park offers various entry points and visitor centers, while North Cascades National Park provides multiple access points for hiking and camping.
  • Olympic National Park is in close proximity to major cities like Seattle and can be crowded during peak tourist seasons, while North Cascades National Park is more remote and generally less crowded.

Location and Accessibility

If you’re considering a visit to Washington state, where Olympic National Park and North Cascades National Park are located, it’s important to note that Olympic National Park is situated on the Olympic Peninsula and is accessible by car via Highway 101, while North Cascades National Park is located in northern Washington near the Canadian border and is reachable by car via State Route 20.

Olympic National Park offers proximity to major cities like Seattle, making it more accessible for travelers seeking convenience. On the other hand, North Cascades National Park is in a more remote location, providing a secluded experience away from the hustle and bustle.

While Olympic National Park may attract more visitors due to its accessibility, North Cascades National Park offers a quieter and more serene environment, perfect for those desiring a peaceful and undisturbed wilderness experience.

Scenic Beauty and Natural Features

For nature enthusiasts seeking breathtaking landscapes and diverse natural features, both Olympic National Park and North Cascades National Park offer unparalleled beauty and unique attractions.

  • Coastal views vs. snow-capped mountains: Olympic National Park boasts stunning coastal views along the Pacific Ocean, while North Cascades National Park offers breathtaking vistas of snow-capped mountains.

  • Rainforests vs. glaciers: Olympic National Park showcases diverse landscapes including lush rainforests and glaciers, such as the Hoh Rainforest and the iconic Hurricane Ridge, while North Cascades National Park is known for its rugged mountain peaks, alpine lakes, and over 300 glaciers, making it a ‘glacier-rich’ area.

  • Unique wildlife and dramatic landscapes: Olympic National Park is home to unique wildlife such as Roosevelt elk and Pacific salmon, and has the iconic Hurricane Ridge providing panoramic views. On the other hand, North Cascades National Park offers opportunities to spot wildlife like black bears and mountain goats, and features steep valleys and deep canyons, creating a dramatic landscape.

Outdoor Activities and Recreation

When visiting either Olympic National Park or North Cascades National Park, you can explore a wide range of outdoor activities and recreational opportunities. Both parks offer great hiking trails for all skill levels and scenic drives to admire the natural beauty. In addition, you can engage in various activities like camping, backpacking, birdwatching, and wildlife viewing. While Olympic National Park provides beachcombing, tidepooling, and surfing along the coast, North Cascades National Park offers backcountry camping and fishing in its numerous lakes and rivers. For experienced adventurers, North Cascades National Park also provides opportunities for mountaineering and rock climbing. Here’s a glimpse of the outdoor activities and recreation you can enjoy at these national parks:

Olympic National ParkNorth Cascades National Park
Hiking trailsBackcountry camping
Camping optionsFishing and boating
BirdwatchingMountaineering and climbing
Wildlife viewingScenic drives
Beachcombing and surfing

Climate and Weather

Exploring the climate and weather of Olympic National Park and North Cascades National Park, you’ll encounter distinct environmental conditions that shape your outdoor experience.

  • Rainfall Patterns: Olympic National Park experiences abundant rainfall, leading to lush vegetation and vibrant wildflowers. In contrast, North Cascades National Park has heavy snowfall, especially during winter, due to its alpine climate.

  • Seasonal Attractions: Olympic National Park showcases fall foliage displays as a highlight during autumn, while North Cascades National Park sees blooming wildflowers and cascading waterfalls in spring. These seasonal attractions offer unique opportunities for visitors to witness the parks’ natural beauty at different times of the year.

These diverse climate and weather patterns not only influence the landscapes and ecosystems but also provide visitors with distinct seasonal experiences, making both parks worth exploring throughout the year.

Conservation and Wilderness Protection

You may frequently encounter robust conservation efforts and wilderness protection initiatives in both Olympic National Park and North Cascades National Park, demonstrating their commitment to preserving these natural treasures.

Conservation EffortsOlympic National ParkNorth Cascades National Park
UNESCO DesignationUNESCO World Heritage SitePart of North Cascades National Park Complex
Ecosystem FocusPreservation of old-growth forests and diversityEmphasis on preserving pristine wilderness and fragile ecosystems
Restoration ProjectsElwha River ecosystem restorationOngoing research and monitoring of glacial retreat and climate change impacts
Community CollaborationCollaboration with Native American tribes and Indigenous communitiesCollaborative efforts with Native American tribes and Indigenous communities

Both parks prioritize environmental education, cultural preservation, and responsible outdoor recreation. Olympic National Park’s Elwha River restoration project aims to revive the river ecosystem, while North Cascades National Park’s glacial retreat research contributes to understanding climate change impacts. These initiatives reflect the parks’ dedication to preserving the natural environment, offering you the chance to explore and appreciate these pristine landscapes.

Entry Points and Visitor Centers

For accessing Olympic National Park, drive to the various entry points and visitor centers along Highway 101. The park provides comprehensive visitor services, including information centers and parking facilities. Here are some key entry points and visitor centers to consider:

  • Hurricane Ridge Visitor Center: Offers stunning panoramic views and exhibits on the park’s natural history.

  • Hoh Rain Forest Visitor Center: Provides insights into the unique temperate rainforest ecosystem.

  • Kalaloch Ranger Station: Offers access to the park’s pristine coastline and provides information on beachcombing and tidepooling opportunities.

These visitor centers not only offer valuable information but also provide ample parking facilities, making it convenient to explore the diverse landscapes and ecosystems within Olympic National Park.

Rugged Mountain Peaks and Alpine Lakes

Amidst the stunning landscapes of North Cascades National Park, you’ll encounter rugged mountain peaks and pristine alpine lakes that beckon to be explored. The park boasts over 300 glaciers, creating a ‘glacier-rich’ area perfect for mountaineering opportunities. If you’re an experienced adventurer, consider scaling challenging peaks like Mount Shuksan or Forbidden Peak for a thrilling mountaineering experience.

Additionally, the park offers numerous fishing and boating activities in its clear alpine lakes and rivers. Cast your line for a chance to reel in native trout or take a peaceful boat ride surrounded by breathtaking mountain vistas.

Whether you seek the thrill of mountaineering or the tranquility of fishing and boating, North Cascades National Park promises unforgettable experiences amidst its rugged mountain peaks and pristine alpine lakes.

Hiking Opportunities and Trail Diversity

Exploring the diverse landscapes of Olympic National Park and North Cascades National Park provides hikers with a range of trail options and scenic experiences. Both parks offer hiking trails suitable for various skill levels and preferences.

When considering your hiking options, you’ll find a variety of difficulty levels and trail length options to choose from.

  • Olympic National Park provides trails ranging from easy coastal walks to challenging mountain ascents, catering to hikers of all abilities.

  • North Cascades National Park offers diverse trail lengths, including short, family-friendly hikes, moderate day hikes, and longer, more strenuous trails for experienced hikers.

  • Both parks feature well-maintained trails that showcase the unique natural beauty of the Pacific Northwest, ensuring that you’ll find the perfect hiking experience for your adventure.

Unique Wildlife and Wildlife Viewing

As you explore Olympic National Park and North Cascades National Park, you’ll encounter diverse and fascinating wildlife unique to each park’s ecosystem.

Olympic National Park is renowned for its Roosevelt elk, Pacific salmon, and the fascinating array of bird species. The Hoh Rainforest and the coastal areas provide excellent wildlife viewing opportunities.

Additionally, the park conducts extensive wildlife preservation efforts, particularly in preserving the Elwha River ecosystem.

On the other hand, North Cascades National Park offers the chance to spot black bears, mountain goats, and other alpine wildlife. The best wildlife viewing spots in this park include the subalpine and alpine meadows, where you can witness these creatures in their natural habitats.

Both parks allow for an immersive wildlife experience, contributing to the preservation and appreciation of these remarkable species.

Environmental Education and Responsible Recreation

You can enhance your visit to Olympic National Park or North Cascades National Park by participating in educational programs and practicing responsible recreation. Both parks offer opportunities for environmental stewardship and sustainable tourism.

Here are some ways to engage in these practices:

  • Join ranger-led educational programs to learn about the parks’ ecosystems and conservation efforts.
  • Practice Leave No Trace principles by minimizing your impact on the environment and respecting wildlife habitats.
  • Support local initiatives and businesses that promote sustainable tourism practices.

Frequently Asked Questions

What Are the Best Spots for Stargazing in Olympic National Park and North Cascades National Park?

For the best stargazing in both parks, bring binoculars or a telescope. Ideal conditions include clear, moonless nights. Capture stunning night photos with long exposures. The best times for stargazing are during new moon phases.

Are There Any Hot Springs or Natural Pools for Soaking in Either of the Parks?

When you explore Olympic National Park, consider a visit to Sol Duc Hot Springs for a relaxing soak in natural pools. After hiking the trails, unwind while enjoying the wildlife viewing opportunities in this serene setting.

Can Visitors Participate in Guided Tours or Educational Programs at Either of the Parks?

Sure, both parks offer guided tours and educational programs. Olympic National Park has ranger-led walks and talks, while North Cascades National Park provides guided hikes and interactive programs, enriching your visit with valuable insights.

Are There Any Designated Areas for Stargazing or Astrophotography in the Parks?

For stargazing enthusiasts, both parks offer designated areas for breathtaking night sky views. Olympic National Park’s Hurricane Ridge and North Cascades National Park’s Cascade Pass provide excellent stargazing locations and ample opportunities for stunning astrophotography.

What Are the Options for Dining and Lodging Within or Near the Parks?

When visiting Olympic National Park or North Cascades, you’ll find diverse dining options and accommodation choices. Olympic National Park offers lodges, cabins, and campgrounds, while North Cascades provides campgrounds and rustic cabins. Both parks have nearby dining establishments for various tastes.

Conclusion

So, there you have it! Whether you choose Olympic National Park or North Cascades National Park for your Washington visit in 2023, you’re in for a wild adventure.

From lush rainforests to rugged mountain peaks, there’s no shortage of natural beauty and outdoor activities to explore.

Whichever park you pick, be prepared to be amazed by the stunning scenery and diverse wildlife.

Happy trails!

Knee Pain After Hiking

Are you tired of your knees feeling like a roadblock on your hiking adventures? Knee pain after hitting the trails can put a damper on your outdoor excursions.

Discover nine possible reasons behind your post-hike knee discomfort and practical ways to prevent it. From understanding underlying injuries to strengthening your leg muscles, this article arms you with actionable strategies for pain-free hiking.

Learn how to choose the right footwear, utilize trekking poles, and pack smart for your next adventure. Embrace freedom on the trails by adopting proper hiking techniques, wearing supportive gear, and taking care of your knees post-hike.

Don’t let knee pain slow you down – take charge of your hiking experience.

Key Takeaways

  • Strengthen leg muscles
  • Use proper hiking technique
  • Wear supportive footwear
  • Take breaks and rest

Underlying Knee Injuries

If you experience knee pain after hiking, it may be due to underlying knee injuries such as ACL damage, bursitis, tendinitis, iliotibial band syndrome, patellofemoral pain syndrome, or synovial plica syndrome.

To address these issues, consider treatment options and the best exercises. Seek medical advice for a proper diagnosis and treatment plan tailored to your specific condition. Treatment options may include physical therapy, medication, or in severe cases, surgery.

However, certain exercises can help strengthen the muscles surrounding the knee, providing support and stability. These may include leg extensions, hamstring curls, and calf raises. Always consult a healthcare professional before starting any new exercise regimen, and ensure that you perform these exercises with proper form and technique to prevent further injury.

Muscle Fatigue

Combat muscle fatigue during hiking by incorporating strength training exercises into your routine. Strengthening your leg muscles can help prevent muscle fatigue and knee pain. Here are some exercises to strengthen your leg muscles:

  1. Squats: Perform bodyweight squats or add resistance with weights to build strength in your quadriceps, hamstrings, and glutes.

  2. Lunges: Forward lunges, reverse lunges, and lateral lunges target different leg muscles and improve stability.

  3. Calf Raises: Strengthen your calf muscles with this simple exercise to provide support for your knees during hikes.

  4. Step-Ups: Step onto a platform or sturdy bench to engage your leg muscles and improve endurance.

Incorporating these exercises into your routine will help you build strength and endurance, reducing the risk of muscle fatigue during hiking.

Improper Footwear

How can improper footwear contribute to knee pain after hiking, and what can you do to prevent it?

Choosing the right shoes is crucial to prevent knee pain. Look for hiking shoes that provide good support and are designed for rough terrain. Properly fitting shoes are essential to prevent discomfort and potential knee injuries. Additionally, ensure that your shoes are broken in before embarking on a long hike to prevent blisters and hot spots.

Opt for moisture-wicking socks and consider using blister prevention products. Investing in quality footwear is a proactive step to safeguarding your knees during and after hiking. By prioritizing the right shoes, you can mitigate the risk of knee pain and enjoy your hiking adventures without unnecessary discomfort.

Muscle Weakness

Strengthen your leg muscles to reduce the risk of knee pain after hiking. Preventing muscle weakness is crucial for maintaining healthy knees. Try these strengthening exercises for knees:

  1. Squats: This exercise targets the quadriceps, hamstrings, and glutes, providing overall strength for the legs.

  2. Lunges: Lunges help to improve balance and stability while strengthening the quadriceps, hamstrings, and glutes.

  3. Leg presses: Using a leg press machine can effectively build strength in the quadriceps, hamstrings, and calves.

  4. Step-ups: Step-ups work the quadriceps and glutes, and can be done using a step or bench.

Incorporating these exercises into your routine can help prevent muscle weakness and reduce the risk of knee pain after hiking. Strengthening your leg muscles is essential for maintaining joint stability and preventing injury.

Pressure on Joints

To minimize pressure on your joints while hiking, it is important to distribute your weight evenly and maintain proper posture. Reducing joint stress and minimizing impact on knees can significantly alleviate knee pain after hiking. Consider incorporating the following strategies into your hiking routine:

Strategies for Minimizing Joint StressDescription
Use Trekking PolesReduce forces on the legs and provide stability
Slow DownChoose the right path and avoid stomping
Pack Appropriately for the HikePack only what is necessary

Incorporating these strategies will help prevent unnecessary strain on your knees and ensure an enjoyable hiking experience. Remember, taking care of your joints is essential for pain-free hiking.

Heavy Backpack

Carrying a heavy backpack while hiking can significantly strain your knees and contribute to post-hiking knee pain. To prevent knee pain from a heavy backpack, consider the following:

  1. Proper Weight Distribution: Distribute the weight evenly in your backpack to reduce strain on your knees.

  2. Use a Backpack with Waist and Chest Straps: Utilize a backpack with waist and chest straps to help distribute the weight and provide additional support.

  3. Strengthen Your Leg Muscles: Strengthening your leg muscles can help support the added weight and reduce strain on your knees.

  4. Pack Light: Pack only the essentials to minimize the weight on your back and alleviate strain on your knees.

Hiking Distance

If you’re experiencing knee pain after hiking, the distance you hike may play a significant role in causing or exacerbating your discomfort.

Choosing the right hiking route is crucial to prevent knee pain. Opt for trails that match your fitness level and gradually increase the distance as your endurance improves.

Proper hydration is also essential to maintain joint lubrication and reduce the risk of knee pain. Ensure you drink enough water before, during, and after your hike.

Scrambling and Terrain

Navigating challenging terrain, such as steep inclines and rocky surfaces, can significantly impact your knee health while hiking. To prevent knee pain from scrambling and tough terrain, consider the following tips:

  1. Use Proper Hiking Techniques: Implement techniques like bending your knees and leaning forward slightly when ascending and descending to reduce strain on your knees.

  2. Benefits of Trekking Poles: Utilize trekking poles to improve stability, reduce impact on your knees, and provide support on challenging terrain.

  3. Choose Your Path Wisely: Select the best route to avoid excessively rocky or uneven ground that could strain your knees.

  4. Maintain a Steady Pace: Keep a consistent speed and avoid sudden movements to minimize stress on your knees while navigating tricky terrain.

Inexperience With Hiking

When inexperienced with hiking, you may inadvertently put excessive strain on your knees, leading to potential discomfort and pain. Proper hiking preparation is crucial to avoid knee pain. Consider the benefits of hiking with experienced guides who can provide valuable insights on proper techniques and help you navigate challenging terrains. They can also offer guidance on choosing suitable footwear, packing essentials, and pacing yourself. By learning from experienced hikers, you’ll be better equipped to prevent knee pain and ensure an enjoyable hiking experience. Prioritize your preparation to avoid unnecessary strain on your knees and make the most of your hiking adventures.

Importance of Proper Hiking PreparationBenefits of Hiking with Experienced Guides
Helps avoid excessive strain on kneesProvides valuable insights on proper techniques
Ensures an enjoyable hiking experienceOffers guidance on choosing suitable footwear
Prioritizes preparationHelps navigate challenging terrains

Frequently Asked Questions

How Can I Tell if My Knee Pain After Hiking Is Caused by an Underlying Knee Injury?

If your knee pain after hiking is persistent, consult a doctor for knee pain diagnosis. Look for signs like swelling, instability, or inability to bear weight. Seeking treatment early is crucial for common hiking injuries.

Are There Specific Exercises I Can Do to Prevent Muscle Fatigue and Knee Pain While Hiking?

To prevent muscle fatigue and knee pain while hiking, incorporate exercises and stretches to strengthen and activate your leg muscles. Focus on injury prevention by warming up, using proper technique, and wearing supportive footwear.

What Should I Look for in a Pair of Hiking Shoes to Ensure They Are Not Causing My Knee Pain?

When choosing proper footwear, focus on support, cushioning, and traction for hiking. Look for shoes with good arch support and shock absorption to reduce knee pain. Ensure the shoes provide stability and grip on various terrains.

Can You Recommend Some Specific Strength Training Exercises to Address Muscle Weakness and Prevent Knee Pain While Hiking?

To address muscle weakness and prevent knee pain while hiking, incorporate strength training exercises that target muscle imbalances. Focus on injury prevention and improving joint stability through exercises like squats, lunges, step-ups, and balance drills.

Are There Certain Techniques or Strategies I Can Use to Reduce Pressure on My Joints and Alleviate Knee Pain While Hiking?

As you hike, imagine your feet as royalty, deserving of proper footwear to navigate the rugged terrain. Embrace the zig-zag pattern, use trekking poles, and lighten your load. Let your knees reign supreme.

Conclusion

As you navigate the trails of life, remember that your knees are like the compass guiding you on your journey. By understanding the terrain and equipping yourself with the right tools, you can prevent knee pain and continue exploring the great outdoors.

Strengthen your leg muscles, wear supportive footwear, and take it slow. Just like a hiker adjusts their path to avoid obstacles, you can take steps to protect your knees and enjoy pain-free adventures.

Happy hiking!

Mt. Rainier

Wondering which Washington national park reigns supreme? Let’s settle the debate.

Mt. Rainier and Olympic National Park both boast stunning natural beauty, but which one truly takes the cake?

Get ready to dive into a comparison that will help you choose the ultimate outdoor adventure.

From the soaring peaks and wildflower-strewn meadows of Mt. Rainier to the lush rainforests and dramatic coastline of Olympic, each park offers its own brand of magic.

With all the insider info you need, you’ll soon be equipped to make the right choice for your next epic outdoor escapade.

So, lace up those boots and prepare to uncover the best of Washington’s natural wonders.

Key Takeaways

  • Mt. Rainier National Park is located near Packwood and Ashford, about 2 hours from Seattle and 2.5 hours from Portland, Oregon, while Olympic National Park is situated on the Olympic Peninsula, approximately 2 hours from Seattle.
  • Mt. Rainier National Park offers epic views of Mount Rainier and surrounding mountains, beautiful alpine and subalpine meadows, and lakes, while Olympic National Park features temperate rainforests, the Olympic Mountain range, and about 70 miles of coastline on the Pacific Ocean.
  • Both parks offer a range of activities, such as hiking to scenic viewpoints, visiting visitor centers, experiencing waterfalls and hot springs, and observing wildlife.
  • The best time to visit Mt. Rainier National Park is during the summer months (July-September) for the least amount of snow and good temperatures, while late September is recommended to avoid crowds. Olympic National Park is best visited during the summer months (June-September) for no snow and good temperatures, or in late spring and early summer to experience vibrant rainforests.

Park Overview and Location

If you’re seeking a vast and diverse landscape, Mt. Rainier National Park spans almost 1 million acres and showcases a variety of ecosystems, including ocean views, temperate rainforests, and mountains.

The park’s accessibility is a major draw, located just about 2 hours from Seattle and 2.5 hours from Portland, Oregon. This makes it an ideal destination for those seeking a quick escape into nature.

Additionally, the park’s proximity to other attractions such as Packwood and Ashford provides ample opportunities for exploration beyond the park’s borders.

Whether you’re interested in hiking, camping, or simply enjoying the stunning views, Mt. Rainier National Park offers something for everyone.

Its diverse landscape and nearby attractions make it a must-visit for outdoor enthusiasts or anyone looking to experience the beauty of the Pacific Northwest.

Activities in Each Park

When visiting Mt. Rainier National Park, you can hike the Skyline Trail to Myrtle Falls, visit Mount Fremont Lookout at sunrise, watch for a cloud inversion, and ride the gondola at Crystal Mountain.

The park offers an abundance of hiking options, ranging from leisurely strolls to challenging treks, catering to all levels of adventurers.

For sightseeing, the epic views of Mount Rainier and the surrounding mountains are absolutely breathtaking, while the alpine and subalpine meadows, as well as the pristine lakes, provide picturesque spots for relaxation and photography.

Wildlife enthusiasts will also find plenty of opportunities to spot diverse wildlife in their natural habitat.

Whether you’re an avid hiker, a nature lover, or a photography enthusiast, Mt. Rainier National Park has a myriad of activities to offer, ensuring a fulfilling and memorable experience for all visitors.

Views and Landscape

For those seeking breathtaking natural beauty and diverse landscapes, both parks offer an abundance of picturesque views and unique terrain to explore.

Comparison of Views and Landscape:

  1. Mt. Rainier National Park: The park offers epic views of Mount Rainier and surrounding mountains, beautiful alpine and subalpine meadows, and serene lakes.

  2. Olympic National Park: Features magnificent temperate rainforests, the stunning Olympic Mountain range, and approximately 70 miles of pristine coastline along the Pacific Ocean.

When comparing the scenic beauty, Mt. Rainier impresses with its majestic mountain vistas, while Olympic National Park captivates with its lush rainforests and dramatic coastal scenery.

Whether you prefer the rugged grandeur of mountains or the tranquil allure of forests and ocean, both parks provide an awe-inspiring experience in their own distinct ways.

Logistics and Transportation

To explore the logistics and transportation for visiting both parks, you’ll need to consider the closest airports and the most convenient way to get around each location.

AspectMt. Rainier National ParkOlympic National Park
Closest AirportPortland International Airport (PDX) or Seattle-Tacoma International Airport (SEA), both about 2-2.5 hours awaySeattle-Tacoma International Airport (SEA), approximately a 2-hour drive
How to Get AroundBest to have a car for touring the park and exploring surrounding areas. No shuttle buses available.A car is recommended due to the park’s size. The Clallam Transit System makes some stops, but a car provides more flexibility.
Parking AvailabilityLimited parking, especially during peak season. It’s advisable to arrive early.Limited parking at popular trailheads. Consider arriving early or visiting during off-peak hours.
Public Transportation OptionsNo shuttle buses available. Limited public transportation options.Clallam Transit System makes some stops, but it’s limited. A car provides more flexibility.

When visiting either park, having your own vehicle provides the most freedom and flexibility, especially when it comes to exploring the surrounding areas. While public transportation options are limited, the beauty and tranquility of these parks make the journey well worth it.

Closest Airport

The closest airport to Mt. Rainier National Park is either Portland International Airport (PDX) or Seattle-Tacoma International Airport (SEA), both about 2-2.5 hours away.

  1. Park Access: Both airports provide convenient access to the park, allowing for a pleasant drive through the scenic landscapes of Washington state.

  2. Transportation Options: Renting a car is the best option for park access and exploring the surrounding areas at your own pace. Public transportation is limited, so having your own vehicle provides the freedom to visit the park’s various attractions.

  3. Convenience: With these airport options, you have the flexibility to plan your trip according to your schedule and preferences, ensuring a stress-free journey to Mt. Rainier National Park.

  4. Scenic Drive: The drive from either of these airports to the park allows you to enjoy the stunning natural beauty of the Pacific Northwest, setting the tone for an unforgettable outdoor adventure.

Whether you choose PDX or SEA, the journey to Mt. Rainier National Park promises to be part of your overall memorable experience.

How to Get Around

When visiting Mt. Rainier National Park, it’s best to have a car for touring the park and exploring surrounding areas, as no shuttle buses are available. However, if you prefer alternative transportation options or want to reduce your environmental impact, public transportation and other methods are available.

Consider the following transportation options:

Public TransportationAlternative Transportation Options
Clallam Transit SystemBiking
Hiking
Carpooling
Ride-sharing services
Rental bikes

While having a car provides flexibility, using public transportation or alternative methods allows you to immerse yourself more deeply in the natural beauty of the park. Whether you choose the convenience of a car or the freedom of alternative transportation, the key is to enjoy your experience to the fullest.

Best Time to Visit and Duration

For the most enjoyable visit, aim to explore Mt. Rainier National Park during the summer months, when the park is most accessible and the weather is generally pleasant. Here’s what you need to know:

  1. Best Time to Visit:

    • Mt. Rainier National Park: Summer months (July-September) for the least amount of snow and good temperatures. Late September to avoid crowds. Winter for snow activities.
    • Olympic National Park: Summer months (June-September) for no snow and good temperatures. Late spring and early summer for vibrant rainforest. Accessible in winter with no snow in some parts.
  2. Recommended Duration:

    • Mt. Rainier National Park: 1-2 days to see the main attractions. 3 days to fully experience the park and do more hiking.
    • Olympic National Park: Minimum of 3 days to fully experience the park and visit main attractions.

Visiting during the recommended times ensures you experience the parks at their best, allowing for a memorable and fulfilling adventure.

Mt. Rainier National Park Overview

To understand Mt. Rainier National Park’s distinctiveness, begin with its diverse landscape and prominent peak, Mount Rainier. The park boasts some of the best hiking trails in the entire Pacific Northwest, winding through alpine meadows, dense forests, and offering breathtaking views.

Wildlife spotting opportunities are abundant, with chances to see black bears, elk, mountain goats, and more. The iconic Wonderland Trail encircles the mountain, providing an immersive experience for avid hikers. For a more leisurely stroll, the Trail of the Shadows offers a shorter loop with a glimpse into the park’s history.

Whether you’re seeking an adrenaline-pumping adventure or a peaceful encounter with nature, Mt. Rainier National Park has something for everyone. It’s a paradise for outdoor enthusiasts, beckoning you to explore its natural wonders.

Olympic National Park Overview

You’ll often find yourself surrounded by lush temperate rainforests, rugged mountain ranges, and stunning Pacific coastline when exploring Olympic National Park.

  • Recreational Activities: Olympic National Park offers a plethora of outdoor activities, including hiking, camping, fishing, and birdwatching. The park’s diverse landscape provides opportunities for both leisurely and challenging hikes, catering to all levels of outdoor enthusiasts.

  • Wildlife Sightings: Keep your eyes peeled for diverse wildlife, including black bears, Roosevelt elk, mountain goats, and a variety of bird species. The park’s rich biodiversity ensures that wildlife sightings are a common and thrilling experience.

  • Stunning Coastal Views: The park boasts approximately 70 miles of coastline, offering spectacular views of the rugged Pacific Ocean and opportunities for beachcombing and tidepool exploration.

  • Soothing Hot Springs: Unwind in the natural hot springs of Sol Duc, providing a relaxing and rejuvenating experience after a day of exploration.

Recreational Opportunities

Amidst the diverse landscapes of Olympic National Park, visitors can partake in a wide array of recreational opportunities, including hiking, camping, and wildlife spotting.

Olympic National Park boasts some of the best hiking trails in the Pacific Northwest. The Hoh River Trail is a must for nature enthusiasts, leading through lush rainforests and offering glimpses of diverse wildlife. For an unforgettable coastal experience, the Ozette Loop Trail showcases breathtaking sea stacks and pristine beaches.

The park’s camping options are equally impressive, with various campgrounds providing an opportunity to immerse yourself in the park’s natural beauty. Whether you prefer a backcountry experience or the convenience of car camping, Olympic National Park offers something for everyone.

Get ready to explore the park’s wonders and create lasting memories in the great outdoors.

Visitor Facilities

When can you access visitor facilities at Mt. Rainier and Olympic National Park?

  1. Mt. Rainier National Park: Visitor facilities are available year-round, but some amenities may be limited during the winter months. The park offers visitor centers, ranger stations, restrooms, and picnic areas. Services like lodging and dining are mainly found in the gateway communities outside the park.

  2. Olympic National Park: Visitor facilities are accessible year-round, with seasonal variations in services. The park provides visitor centers, wilderness information centers, restrooms, and picnic areas. Lodging and dining options are located in nearby towns and within the park at specific locations.

Both parks offer essential visitor facilities, but Mt. Rainier has more developed infrastructure due to its proximity to larger towns. In contrast, Olympic National Park’s facilities are more integrated with the natural surroundings, providing a different experience.

Frequently Asked Questions

What Are the Best Spots for Stargazing in Mt. Rainier National Park?

For the best stargazing spots in Mt. Rainier National Park, head to Sunrise or Paradise. Join night photography workshops to capture stunning night sky images. These spots offer ideal conditions for stargazing and memorable experiences.

Are There Any Special Events or Festivals That Take Place in Olympic National Park Throughout the Year?

For special events and festivals in Olympic National Park, you’ll find wildlife watching, trail hikes, and ranger-led programs year-round. From the annual Wilderness Press Writers Workshop to the Olympic Peninsula BirdFest, there’s something for everyone.

Can Visitors Go Fishing or Boating in Any of the Lakes Within Mt. Rainier National Park?

Yes, you can enjoy fishing opportunities in some lakes within Mt. Rainier National Park, like the Reflection Lakes. Boating options are limited, but electric motors are allowed on designated lakes for a peaceful experience.

Are There Any Guided Tours or Ranger-Led Programs Available in Olympic National Park?

Yes, in Olympic National Park, you can join ranger-led nature walks for wildlife viewing, take part in photography workshops, and enjoy birdwatching. These activities are a fantastic way to immerse yourself in the park’s natural beauty.

What Are the Options for Lodging and Camping Within Olympic National Park?

If you’re considering lodging in Olympic National Park, you can choose from various options like historic lodges, cabins, and campgrounds. The camping facilities offer stunning natural surroundings, ideal for an outdoor adventure.

Conclusion

So, which park is best for you?

If you’re seeking towering peaks and alpine meadows, Mt. Rainier is the way to go.

But if lush rainforests and rugged coastline are more your style, then Olympic National Park is the perfect choice.

Both parks offer unique and unforgettable experiences, so lace up your boots and get ready to explore the natural wonders of Washington state.

Happy adventuring!