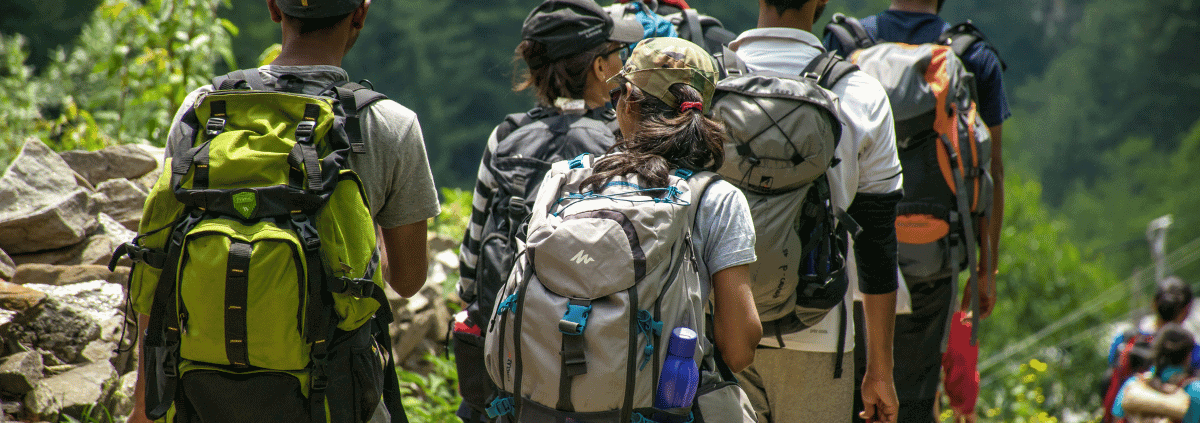
So, your hiking boots are giving your poor toes a hard time, huh? It’s a real pain when your outdoor adventure turns into a toe torture session. But fear not! In this article, we’ll dive into the 7 possible reasons why those boots are causing you grief.

Whether you’re a trail expert or just getting started, understanding why your hiking boots are hurting your toes is key to getting back to enjoying the great outdoors. From finding the right fit to nailing your lacing technique, we’ve got you covered.

Say goodbye to toe woes and get ready to hit the trails with confidence. Let’s make sure those boots are working for you, not against you.

Key Takeaways

  • Improper boot fit, both too big and too small, can cause toe pain while hiking.
  • Incorrect lacing techniques can also contribute to toe pain.
  • Sock issues, such as bunched socks or socks that are too big, can lead to discomfort.
  • Carrying excessive weight can put extra pressure on the toes and cause pain.
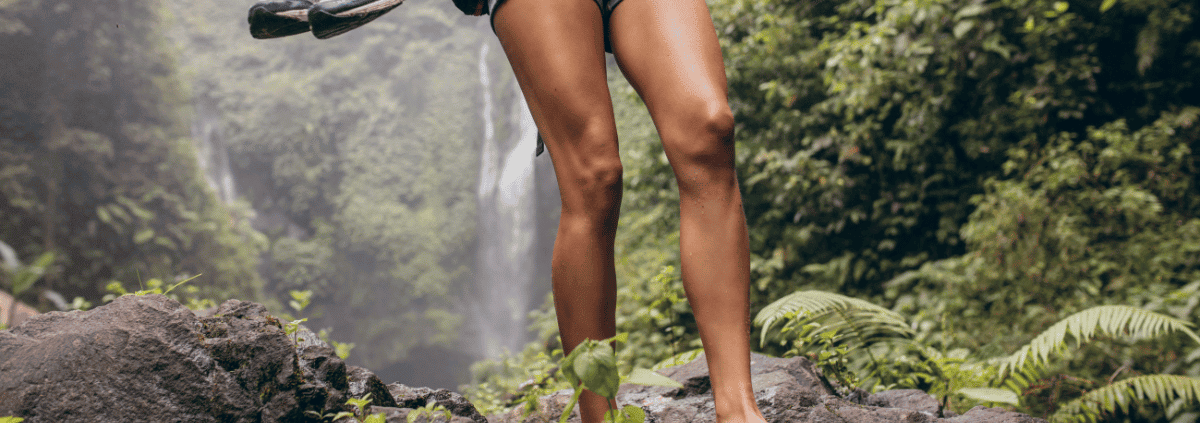
Improper Boot Fit

If your hiking boots hurt your toes, improper boot fit could be the cause. Choosing the right hiking boot size is crucial for a comfortable hiking experience. Boots that are too big may cause your toes to slide and jam against the sidewalls, while boots that are too small can lead to overlapping toes and discomfort. Proper sizing allows for some wiggle room for your toes and about a finger-width space between your heel and the boot.

Additionally, the importance of proper lacing techniques for boot fit can’t be overstated. Improper lacing can cause pain regardless of the boot size. Utilizing techniques like the runners loop for boots that are too big and loosening laces for boots that are too small can make a significant difference in your comfort while hiking.

Incorrect Lacing Techniques

Lacing your hiking boots improperly can cause discomfort and pain, regardless of the boot size. Proper lacing techniques are crucial for preventing toe squishing and ensuring a comfortable fit.

If your boots are too big, try using a runner’s loop to keep your heel locked in place and prevent sliding. For boots that are too small, consider loosening the laces to allow more room for your feet.

While it may be tempting to skip eyelets for a quick fix, it’s not recommended for the long term as it can affect foot support. Watching videos for tutorials on proper lacing techniques can also be helpful.

Sock Issues

Why do bunched socks cause toe pain during hiking?

Sock bunching can create uncomfortable pressure points and lead to blisters on your toes, ruining your hiking experience.

Choosing the right hiking socks is crucial for preventing sock bunching and ensuring a comfortable fit. Look for socks specifically designed for hiking with proper padding and no seams. Brands like Darn Tough and Smartwool are highly recommended for their quality and performance.

Preventing sock bunching will help you enjoy your hike without the distraction of painful toes. So, invest in the right hiking socks and say goodbye to the agony of sock bunching during your outdoor adventures.

Carrying Excessive Weight

When carrying excessive weight during hiking, your toes can be subject to increased pressure and potential jamming in your boots. The impact of foot arch support on toe pain is crucial. Proper arch support can help distribute the weight more evenly, reducing the strain on your toes.

It’s also essential to compare toe box width in different hiking boot brands. A wider toe box can provide more room for your toes, reducing the likelihood of them being jammed or squished, especially when carrying a heavy load.

Choosing boots with adequate arch support and a spacious toe box can make a significant difference in alleviating toe pain while carrying excessive weight during your hikes.

Other Factors

Ensure proper toenail care to avoid potential discomfort and injury during your hikes, especially on challenging terrain.

  • Long toenails can cause pain and potential cutting of other toes
  • Hilly trails can cause feet to slide forward, even with properly fitting boots
  • Trim toenails regularly during hiking season

It’s essential to keep your toenails trimmed to prevent them from digging into your toes, especially when navigating hilly terrain. Long toenails can lead to discomfort and even injury during your hikes, so make sure to trim them regularly.

Additionally, when hiking on hilly trails, your feet may slide forward, causing pressure and discomfort on your toes. Proper toenail care and well-fitted boots are crucial to prevent these issues.

Solutions for Hurting Toes

To alleviate toe pain from hiking boots, tighten laces to prevent slipping and jamming of toes. If your boots are too big, adding a second pair of socks can provide a better fit. Conversely, if your boots are too small, loosen the laces to allow more room for your feet to breathe. Consider re-lacing your boots using techniques like the runners loop or skipping eyelets, depending on the fit. Additionally, wearing proper hiking socks is crucial to prevent sock bunching and pressure points. Opt for hiking-specific socks with adequate padding and no seams. Below, find a table summarizing solutions for preventing toe pain and choosing the right hiking socks.

Preventing Toe PainChoosing the Right Hiking Socks
Tighten lacesOpt for hiking-specific socks
Add a second pair of socksLook for adequate padding
Loosen lacesAvoid seams and pressure points

How Should Hiking Boots Fit

Your hiking boots should provide a snug, secure fit without feeling tight. When finding the right fit, keep in mind these emotional touchpoints:

  • Comfort is key: Your boots should feel comfortable from the get-go, with minimal discomfort during the breaking-in process.

  • Freedom of movement: Your toes should have ample wiggle room, preventing any feelings of constriction or tightness.

  • Confidence in every step: A secure heel and overall fit will give you the assurance you need to conquer any trail with ease.

Should My Hiking Boots Be Comfortable

Your hiking boots should provide comfort for long walks on the trails. They need to fit snugly without being tight, allowing some wiggle room for your toes and providing secure support for your heels. Initially, your boots may feel slightly uncomfortable, but breaking them in can improve comfort. When choosing hiking socks, opt for those made of moisture-wicking and breathable materials like merino wool or synthetic blends to keep your feet dry and comfortable. Here’s a helpful table to guide you in selecting the right hiking socks:

FeaturesDescription
Moisture-wickingKeeps feet dry and reduces blisters
Breathable materialsPrevents overheating and discomfort
Padding and cushioningAdds comfort and support
Seamless designReduces friction and hot spots
Proper lengthEnsures coverage and prevents rubbing

Do Hiking Boots Need to Be Broken In

Breaking in your hiking boots is recommended to ensure maximum comfort on the trail. It’s like finding the perfect pair of jeans that feel snug but not restrictive. When you break in your boots, you’re customizing them to fit your unique foot shape, and that’s important for an enjoyable hiking experience.

Here are three reasons why breaking in your boots is crucial:

  • Prevents painful blisters and hot spots, allowing you to focus on the stunning scenery, not your feet.
  • Ensures the boots conform to your feet, providing the support and flexibility you need on rugged terrain.
  • Gives you the confidence that your boots won’t cause discomfort, allowing you to conquer any trail with ease.

Should My Toes Touch the End of My Hiking Boots?

The proper fit of your hiking boots is essential for comfort and support while hiking, ensuring that your toes have enough room to prevent discomfort and pain.

When it comes to choosing the right hiking boot size, remember that your toes shouldn’t touch the end of your boots. Leave about 1/2 inch of room between your toes and the end of the boot. This proper toe room prevents discomfort and pain, similar to regular shoes.

If your toes touch the end of the boot, it can cause pain and discomfort, especially during long hikes. So, when you’re trying on hiking boots, make sure to assess the fit and ensure that there’s adequate space for your toes.

Frequently Asked Questions

Can Wearing the Wrong Type of Socks Cause Toe Pain While Hiking?

Choosing the right socks is crucial for your hiking comfort. Proper foot care involves selecting hiking-specific socks with padding and no seams. Avoid bunched or oversized socks to prevent toe pain while hiking.

How Can I Prevent Toe Pain When Hiking on Hilly Trails?

Looking to prevent toe pain while hiking on hilly trails? Make sure you’ve got proper footwear and consider some hill training to get those toes prepared for the challenge. It’s all about being proactive!

Are There Any Specific Brands of Hiking Socks That Are Recommended for Preventing Toe Pain?

When it comes to preventing toe pain and discomfort, it’s essential to focus on finding a well-fitting pair of hiking boots and pairing them with high-quality, seamless hiking-specific socks. Look for brands like Darn Tough and Smartwool for optimal comfort.

Can Wearing Boots That Are Too Big Lead to Ankle Pain as Well as Toe Pain?

Wearing boots that are too big can lead to ankle pain as well as toe pain. Proper footwear sizing and lacing techniques are crucial for preventing blisters, ensuring ankle support, and overall comfort during hikes.

Is There a Recommended Way to Trim Toenails for Hiking to Prevent Toe Pain?

To prevent toe pain while hiking, ensure proper footwear fit, trim toenails straight across, and wear hiking-specific socks with no seams. This reduces pressure and rubbing in the toe box, keeping your feet comfortable.

Conclusion

So, next time you hit the trails, make sure to check your boot fit, lacing techniques, and sock choices to avoid toe pain.

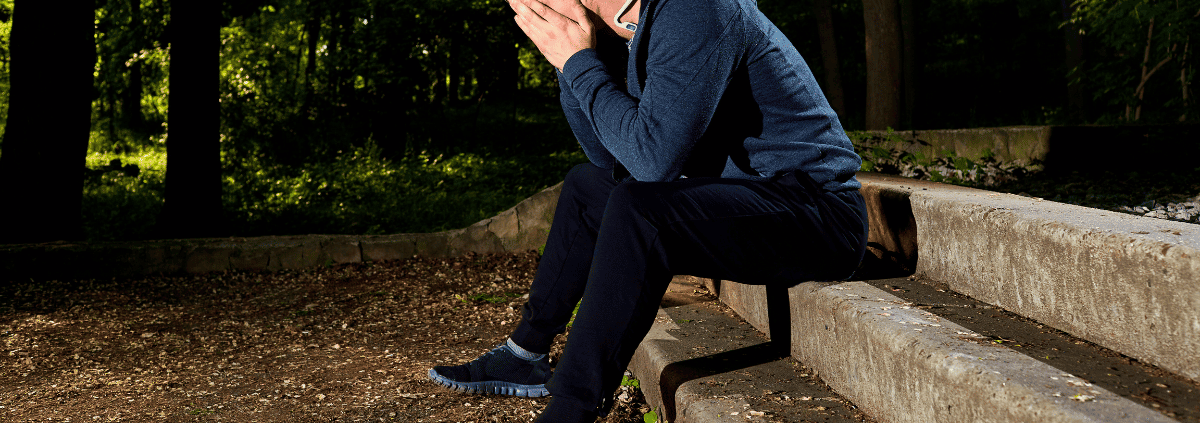
But if you’re still experiencing discomfort, don’t give up just yet. Consider consulting with a professional to address any underlying issues with your feet.

Remember, your outdoor adventure should be enjoyable and pain-free, so don’t let toe pain stop you from exploring the great outdoors!

When to Replace Hiking Boots and Shoes

Hey there, avid hiker!

Ever feel like your trusty old boots have been through everything with you? Well, it might be time to face the truth – your boots have their limits. Knowing when to replace them is crucial for a comfortable and safe adventure.

In this article, we’ll give you the lowdown on 13 signs it’s time for a new pair of hiking boots. From worn treads to compromised ankle support, we’ve got you covered.

We’ll also delve into factors that affect boot longevity and essential care tips. So, get ready to retire those worn-out boots and step into a new pair that’ll have you conquering the trails with confidence!

Key Takeaways

  • Worn down tread reduces grip and traction, increasing the risk of falling or slipping.
  • Foot pain, especially in the ankles, toes, or arch, can indicate the need for new boots.
  • Most hiking boot companies recommend replacing boots after 500-1,000 miles, but check with the specific brand.
  • Proper care and maintenance, such as cleaning after each use and storing in a cool, dry place, can prolong the lifespan of hiking boots.

Signs of Worn Tread

If you notice decreased traction or grip on your hiking boots, it may indicate worn tread and the need for a new pair. Proper hiking boot maintenance is crucial for a safe and enjoyable outdoor experience. Worn tread can lead to a lack of grip and traction, increasing the risk of slipping and falling on various terrains.

Additionally, it’s important to emphasize the significance of a proper fit. Ill-fitting boots can cause discomfort, blisters, and even injuries during your hikes. Ensuring that your boots provide the right fit and support for your feet is essential for a successful hiking trip.

Foot Discomfort

Experiencing discomfort in your feet while hiking can be a sign that it’s time to replace your boots. Foot pain, blisters, or soreness shouldn’t be part of your hiking experience.

Preventing foot pain starts with choosing the right shoe size. Ill-fitting boots can cause friction, leading to painful blisters and hot spots. If your toes constantly hit the front of your boots on descents, it’s a clear sign that your boots are too small. On the other hand, if your feet slide around inside the boot, they may be too large, causing discomfort and instability.

Ensuring you have the correct size and fit will help prevent foot discomfort and make your hiking experience more enjoyable.

Compromised Ankle Support

To prevent foot pain and discomfort, check your hiking boots for compromised ankle support, as worn ankle cuffs can lead to instability and potential injury on the trail.

Here are four signs of compromised ankle support to watch out for:

  1. Reduced Stability: Worn ankle cuffs may fail to provide the necessary ankle stability, increasing the risk of twisting or rolling your ankle.

  2. Lack of Cushioning: If you notice a decrease in cushioning quality around the ankle area, it could lead to discomfort and impact your overall hiking experience.

  3. Increased Fatigue: As ankle support diminishes, you might find yourself feeling more fatigued during and after hikes due to the additional strain on your ankles.

  4. Heightened Risk of Injury: Compromised ankle support raises the likelihood of ankle injuries, potentially leading to a halt in your outdoor adventures.

Manufacturer’s Recommendations

Consider the manufacturer’s guidelines for when to replace your hiking boots. They often provide a recommended mileage limit and lifespan for their boots.

Additionally, reputable brands like Oboz, Merrell, and Salomon offer durability comparison information to help you gauge the expected longevity of their products.

It’s essential to pay attention to the manufacturer’s warranty as well, as it could provide insights into the expected lifespan of your boots.

Loss of Comfort

Loss of comfort in your hiking boots may manifest as increased foot pain and discomfort during your outdoor excursions. To prevent discomfort and improve comfort, here are some signs that it’s time for a new pair:

  1. Constant rubbing or chafing leading to blisters or hot spots.
  2. Reduced cushioning and support, causing fatigue and soreness.
  3. Uneven wear or compression of the midsole, resulting in uneven weight distribution.
  4. Persistent discomfort or pain in your feet or ankles, even on shorter hikes.

When you start experiencing these issues, it’s a good indicator that your boots are no longer providing the support and comfort needed for your adventures. Prioritize your comfort and safety by considering a new pair of hiking boots to enhance your outdoor experiences.

Visible Damage

When examining your hiking boots for signs of wear, look for visible damage that may compromise their structural integrity and performance. Holes in the toes, ankles, soles, or anywhere else on the shoe are a clear sign that your boots need replacement.

If you notice the sole separating from the upper part of the boot, it’s time to consider repair options or invest in a new pair. DIY shoe maintenance, such as patching up small holes or reattaching loose soles, can sometimes extend the life of your boots. However, if the damage is extensive or compromises the boot’s support and waterproofing, it’s best to opt for a new pair.

Keeping an eye out for visible damage and addressing it promptly can help you avoid uncomfortable or dangerous conditions caused by worn-out shoes.

Factors Affecting Lifespan

Factors such as brand and quality significantly influence the lifespan of hiking boots, impacting their durability and performance on various terrains. When considering brand comparisons, keep in mind that reputable brands like Oboz, Merrell, and Salomon often offer longer-lasting boots compared to budget options.

Proper care tips are also crucial in extending the lifespan of your boots. Remember to properly break in your new boots, store them in a cool, dry place, and apply waterproofing treatments to protect them from water damage.

Additionally, replacing insoles or laces if damaged and cleaning your boots after each use will help prevent wear and tear, ensuring that your hiking boots last for many adventures to come.

Mileage Limit and Lifespan

The mileage limit for hiking boots varies by brand and quality, impacting their overall lifespan and durability on different terrains. Trail conditions and proper boot care play a significant role in how long your hiking boots will last. Here’s a breakdown of the mileage limit and lifespan based on brand and quality:

Brand and QualityMileage Limit
High Quality (e.g. Oboz, Merrell, Salomon)500-1,000 miles
Lower Quality350 miles

It’s essential to note that well-maintained boots can last longer, while budget options may wear out sooner. Consider your hiking frequency and the terrains you navigate, as this affects the overall lifespan of your boots. Proper care, such as regular cleaning, storing in a dry place, and applying waterproofing treatments, can also extend their lifespan.

Frequently Asked Questions

How Can I Properly Break in New Hiking Boots to Prevent Blisters and Sore Feet?

To properly break in new hiking boots and prevent blisters, start by wearing them around the house or on short walks. Use proper waterproofing to keep feet dry. Stick to a maintenance schedule, clean regularly, and replace damaged insoles or laces.

What Are Some Common Mistakes People Make When Storing Their Hiking Boots That Can Lead to Damage or Misshaping?

You might think it’s no big deal, but shoving those hiking boots in a damp, hot corner can ruin them. Proper storage and care, like keeping them dry and clean, will save you a lot of trouble.

Are There Any Specific Techniques for Applying Waterproofing Treatments to Hiking Boots to Ensure Maximum Protection From Water Damage?

To maximize protection from water damage, apply a waterproofing treatment evenly to your hiking boots. Use a specific product recommended by the manufacturer and follow the application techniques outlined in the instructions for proper care and longevity maintenance.

How Often Should I Replace the Insoles or Laces in My Hiking Boots to Maintain Their Performance and Comfort?

Replace insoles in your hiking boots every 6-12 months for optimal comfort and support. Regularly check laces for fraying and re-lace using appropriate techniques. Proper care extends the life and performance of your boots.

What Are Some Effective Methods for Cleaning Hiking Boots After Each Use to Ensure Their Longevity and Prevent Wear?

After each use, clean your hiking boots by removing rocks, dirt, and mud to prevent wear. Store them in a cool, dry place to maintain their shape. Apply waterproofing treatments and replace damaged insoles or laces for longevity.

Conclusion

So, now you know the 13 signs it’s time to say goodbye to your old hiking boots and find a new pair.

Don’t let worn treads or discomfort hold you back on the trails.

Are you ready to step into a new pair of boots and take on the great outdoors with confidence?

Happy hiking!

What Does Out and Back Trail Mean in Hiking

Curious hiker, the term ‘out and back trail’ holds the key to unlocking your outdoor journey.

An out and back trail, also known as a there-and-back trail, starts and ends at the same point, leading you to a destination before retracing your steps.

In this article, you’ll uncover the essence of out and back trails, empowering your hiking decisions.

Key Takeaways

  • Out and back trails start and end in the same place, with a turnaround point usually being a viewpoint or attraction.
  • Pros of an out and back trail include easy navigation, a scenic midpoint for resting, familiarity with the trail on the way back, and the convenience of being able to turn around if needed.
  • Cons of an out and back trail include having the same views in both directions, it may feel less interesting or monotonous, limited variety in scenery or terrain, and no opportunity for exploration or creating a loop.
  • Distance on out and back trails can be measured by doubling the distance from the trailhead to the destination, or by multiplying the one-way distance listed on trailhead signs by 2. Accuracy in distance measurement is important for trip planning.

Understanding Out and Back Trail

Understanding an out and back trail involves recognizing its distinct characteristics and benefits for hikers. These trails offer easy navigation, a scenic midpoint for resting, and familiarity on the way back. They also provide a convenient turnaround option and the possibility of easier elevation on the return trip.

However, out and back trails may present drawbacks such as repetitive views, limited variety in scenery, and no opportunity for exploration or creating a loop. It’s essential to consider these factors when choosing a trail based on your preferences and hiking goals.

Whether you seek the convenience of a familiar path or the excitement of new surroundings, understanding the pros and cons of out and back trails can help you make informed decisions for an enjoyable hiking experience.

Advantages of Out and Back Trails

When hiking an out and back trail, you can easily navigate the trail and have a convenient turnaround option. The advantages of out and back trails include:

  1. Easy Navigation: You’re less likely to get lost, making for a stress-free hike.

  2. Scenic Viewpoints: Enjoy a midpoint rest with breathtaking views, adding to the overall experience.

  3. Familiarity on the Return: You’ll know what to expect on the way back, which can be comforting.

  4. Convenient Turnaround: If needed, you can easily turn around at any point, providing flexibility for your hike.

These advantages make out and back trails a popular choice for hikers seeking a straightforward and enjoyable outdoor experience.

Disadvantages of Out and Back Trails

While out and back trails offer benefits such as easy navigation and scenic viewpoints, they also come with drawbacks that should be considered before embarking on your hike. One disadvantage is the potential for the trail to feel repetitive, as you’ll see the same views in both directions, which may make the hike less interesting or monotonous.

Additionally, there’s limited variety in scenery or terrain, and no opportunity for exploration or creating a loop. To maximize trail experiences, consider exploring alternatives like loop trails, lollipop trails, or point-to-point trails. These options offer unique experiences and scenery, providing a more diverse and engaging hiking experience compared to traditional out and back trails.

Navigating Out and Back Trails

To maximize your experience navigating out and back trails, be mindful of the trailhead and the landmarks along the way. Here are some tips to enhance your out and back trail experience:

  1. Study the Trail Map: Familiarize yourself with the trail map to identify key landmarks, elevation changes, and potential turnaround points.

  2. Use Landmarks: Take note of unique natural features or man-made structures along the trail to gauge your progress and guide your return journey.

  3. Stay Oriented: Periodically look back at the trail from different vantage points to imprint the landscape in your memory and aid in navigation.

  4. Time Management: Calculate your turnaround time based on your hiking pace and available daylight to ensure a safe return trip.

These tips will help you make the most of popular out and back trails while maintaining a sense of freedom and adventure.

Measuring Distance on Out and Back Trails

To accurately measure the distance on out and back trails, you should consider the roundtrip measurement that combines the distance from the trailhead to the destination and back. This ensures you have a clear understanding of the total distance you’ll cover. Here’s a table to help you understand the roundtrip distance calculation:

Trail InformationOne-Way DistanceRoundtrip Distance
Trailhead to Destination3 miles6 miles
Trailhead to Scenic Point2.5 miles5 miles
Trailhead to Summit4 miles8 miles

Calculating the roundtrip distance is crucial for trip planning and estimating the time needed. Additionally, remember to adhere to hiking safety tips such as being prepared, carrying enough water, and staying within your physical abilities to ensure a safe and enjoyable hiking experience.

Comparison With Other Trail Types

When hiking, it’s important to compare out and back trails with other trail types to understand the different experiences they offer. Remember to consider the various trail options and safety tips for a well-rounded hiking experience.

  1. Comparison with Loop Trails: Out and back trails start and end at the same point, offering a different experience from loop trails that form a complete circuit and provide varied scenery throughout the hike.

  2. Trailhead Parking Availability: Out and back trails usually offer parking at the trailhead, making it convenient for hikers to start and end their journey without the need for additional transportation arrangements.

  3. Unique Experiences: Exploring loop trails can provide a diverse range of scenery and terrain compared to the repetitive views of out and back trails.

  4. Trail Options: Considering different trail types allows hikers to choose experiences that best suit their preferences and abilities.

Roundtrip Distance Calculation

Calculating the roundtrip distance on an out and back trail involves adding the distance from the trailhead to the turnaround point and back using a hiking app or trailhead signage. Understanding trail navigation and accurately measuring the roundtrip distance is crucial for planning your hike. Here’s a simple guide to help you calculate the roundtrip distance:

Trailhead to Turnaround PointTurnaround Point back to Trailhead
3.5 miles3.5 miles

Total Roundtrip Distance: 7 miles

Ensuring you have the correct roundtrip distance will help you plan your time and pace accordingly. Remember, knowing the total distance will also assist in preparing the right amount of water and supplies for your hike. Happy trails!

Hiking Safety Tips

For a safe and enjoyable hiking experience, it’s essential to be prepared and stay within your physical abilities while also checking the weather forecast and using navigation tools.

Here are four hiking safety tips to keep in mind:

  1. Trailhead Preparation: Begin your hike with proper trailhead preparation, including checking for any trail updates, closures, or regulations. Ensure you have all necessary gear and supplies for the trek.

  2. Weather Conditions: Stay informed about the current and forecasted weather conditions for the area where you plan to hike. Dress accordingly and be prepared for any unexpected changes in weather.

  3. Hydration and Nutrition: Carry an ample supply of water and snacks to keep yourself hydrated and energized throughout the hike.

  4. Navigation Tools: Utilize navigation tools such as maps, compasses, or GPS devices to stay on track and avoid getting lost.

Unique Trail Experiences

To enhance your hiking adventures, explore unique trail experiences that offer diverse landscapes and captivating scenery.

Seek out trail exploration opportunities that go beyond the typical out and back trails. Look for loop trails that provide a variety of scenery and terrain, lollipop trails that offer a different perspective at the end of the hike, or point-to-point trails that allow you to cover new ground without retracing your steps.

Some trails even have shuttle systems, opening up new trailhead options and expanding your hiking possibilities.

Each type of trail offers its own distinct experience, providing you with the freedom to choose the adventure that best suits your preferences.

Embrace these unique trail experiences to elevate your hiking journey.

Trailhead Shuttle Systems

Utilize the shuttle system to streamline access to various trailheads, enhancing your hiking opportunities and expanding your exploration possibilities.

  1. Convenient Access: Enjoy easy access to remote trailheads, saving time and effort.

  2. Flexibility: Explore new trails without worrying about arranging transportation back to your starting point.

  3. Reduce Carbon Footprint: Contribute to environmental conservation by sharing transportation with other hikers.

  4. Trailhead Logistics: Gain a better understanding of trailhead logistics, including pick-up and drop-off times, to plan your hiking trips effectively.

Shuttle systems offer efficient transportation options, allowing you to focus on the adventure ahead. Whether embarking on a solo journey or hiking with friends, these systems simplify trailhead logistics, providing a hassle-free way to access a variety of hiking trails.

Trail Exploration and Loop Creation

Exploring various trails and creating loops allows you to expand your hiking experiences and discover new scenery while enjoying the benefits of efficient transportation options.

Trail exploration opens up opportunities to find hidden gems and unique natural features. By venturing off the beaten path, you can encounter diverse terrain, wildlife, and vegetation.

Creating loops by connecting different trails provides a sense of adventure and allows you to tailor your hiking experience to your preferences. It also offers the chance to enjoy changing scenery without retracing your steps.

Additionally, loop creation can maximize the use of your time and energy, providing a more fulfilling hiking experience.

Embrace the freedom to explore and create your own path, and make the most of your outdoor adventures.

Importance of Distance Accuracy

Ensure that you accurately measure the distance of an out and back trail to effectively plan your hiking trip. When navigating these trails, it’s crucial to have precise distance measurements to avoid any unexpected challenges or miscalculations.

Here are some important reasons why distance accuracy is key for your hiking adventure:

  1. Accurate Planning: Detailed distance measurements help in planning your trip effectively, ensuring you allocate the right amount of time and resources.

  2. Safety and Preparedness: Knowing the exact distance allows you to pack adequate supplies, plan for rest stops, and be better prepared for the hike.

  3. Efficient Navigation: Accurate distance tracking tools such as GPS devices or hiking apps help in staying on course and avoiding unnecessary detours.

  4. Maximizing Enjoyment: Understanding the exact distance enables you to pace yourself, appreciate the surroundings, and make the most of your hiking experience.

Precise distance measurements are essential for a successful and enjoyable out and back trail adventure.

Frequently Asked Questions

Can Out and Back Trails Be Suitable for Beginners or Families With Young Children?

Out and back trails can be beginner friendly and family friendly. They offer easy navigation, familiar surroundings, and convenient turnarounds. Consider trail difficulty and safety measures, and enjoy the experience. Happy hiking!

Are There Any Specific Tips for Finding the Turnaround Point on an Out and Back Trail?

When on an out and back trail, finding the turnaround point is key. Look for trail markers, use navigation tools, and consider safety precautions. Engage with the natural surroundings and enjoy the journey.

What Are Some Popular Out and Back Trails in Different Regions of the Country?

For popular, scenic trails, consider the Angels Landing Trail in Utah for a thrilling hike or the 5-Mile Out and Back Trail in California for a less challenging experience. Both offer diverse terrain and stunning views.

How Can Hikers Ensure They Have Enough Energy and Endurance to Complete an Out and Back Trail?

To ensure you have enough energy and endurance for an out and back trail, focus on ensuring proper nutrition and building stamina. Carry lightweight, high-energy snacks and stay hydrated. Gradually increase your hiking distance to build endurance.

Are There Any Specific Considerations for Hiking an Out and Back Trail in Different Seasons, Such as Winter or Summer?

When hiking in winter, be prepared for icy and snowy conditions. In summer, watch out for heat and dehydration. Adjust gear and clothing accordingly. Always check weather forecasts and trail conditions for safety.

Conclusion

As you venture into the world of hiking, remember that out and back trails are like a boomerang, leading you to incredible sights before bringing you back to where you started.

Embrace the advantages and plan for the challenges, knowing that each step is a part of the journey.

With the knowledge of distance measurement and trail exploration, you’re equipped to create your own unique hiking experiences.

So go forth and conquer the trails with confidence and curiosity!

What to Wear Hiking in Hot Weather

Hey there, hiker! When it comes to dressing for hot weather hiking, choosing the right gear is like picking the perfect trail – essential for a great adventure.

With these 9 top tips, you’ll be equipped to conquer the trails in style and comfort. From breathable materials to sun protection, we’ve got all the insider info you need.

So, get ready to ditch the sweat and embrace the freedom of the great outdoors. It’s time to gear up and hit the trails with confidence!

Key Takeaways

  • Choose breathable and lightweight materials like nylon or polyester for hot weather hiking.
  • Opt for light-colored clothes to reflect the sun’s rays.
  • Consider wearing lightweight long sleeves with UPF protection for added sun protection.
  • Invest in high-quality hiking socks made of merino wool for comfort and moisture-wicking abilities.

Choose Breathable and Lightweight Materials

Choose lightweight and breathable materials such as nylon or polyester for your hot weather hiking attire. These fabrics have numerous advantages for outdoor activities.

Nylon and polyester are moisture-wicking, meaning they pull sweat away from your skin, keeping you dry and comfortable. They’re also quick-drying, so you won’t stay wet for long, even if you encounter water on your hike. Additionally, these materials are durable and can withstand the rigors of hiking through rough terrain.

When it comes to color, opt for light-colored clothing. Light colors, like white or pastels, reflect the sun’s rays, helping to keep you cooler in the heat. By wearing clothing made of nylon or polyester in light colors, you’ll be taking advantage of the best options for staying comfortable and protected during your hot weather hike.

Opt for Light-Colored Clothing

When hiking in hot weather, opt for light-colored clothing to reflect the sun’s rays and help keep you cooler. Light colors, such as white, light grey, or pastel shades, are beneficial for several reasons when hitting the trails in scorching temperatures. First, they help in sun protection by reflecting the sunlight away from your body, reducing the absorption of heat. Second, light-colored clothing aids in maintaining a lower body temperature, preventing overheating during your hike. To make the most of this, consider the following clothing options:

Benefits of Light-Colored ClothingHow Light-Colored Clothing Helps in Sun Protection
Reflects sunlight away from bodyReduces heat absorption
Aids in maintaining lower body temperaturePrevents overheating

Opting for light-colored clothing is a simple yet effective way to stay cool and protected while embracing the freedom of the great outdoors.

Consider Lightweight Long Sleeves With UPF

To stay protected from the sun’s rays while hiking in hot weather, opt for lightweight long sleeves with UPF, which will help shield your skin from harmful UV radiation. UPF clothing offers several benefits, including protection from sunburn and long-term skin damage.

When choosing UPF clothing for hot weather hiking, look for lightweight, breathable fabrics like nylon or polyester that provide comfort and ventilation. Additionally, consider long sleeves with features such as moisture-wicking and quick-drying properties to keep you cool and dry.

Ensure the clothing has a UPF rating of 30 or higher for effective sun protection. By selecting the right UPF clothing, you can enjoy your hike without worrying about sun exposure and stay comfortable in the heat.

Explore Hiking Shorts and Pants

Considering lightweight long sleeves with UPF for sun protection, now focus on exploring suitable hiking shorts and pants for hot weather adventures. Hiking shorts offer breathability and freedom of movement, while hiking pants provide sun and insect protection.

Here are some benefits of each and how to choose the right size and fit:

  • Benefits of wearing hiking shorts vs. hiking pants

  • Shorts offer breathability and freedom of movement.

  • Pants provide sun and insect protection.

  • How to choose the right size and fit for hiking shorts and pants

  • Ensure the waistband is comfortable and secure.

  • Opt for a length that allows free movement without being too long.

When choosing between shorts and pants, consider the balance between breathability and protection and ensure the fit allows for comfortable movement.

Highlight Specific Hiking Apparel

Explore the advantages of specific hiking apparel designed to optimize comfort and protection during hot weather adventures. When choosing clothing for hot weather hiking, it’s essential to consider the materials’ breathability and moisture-wicking properties. Both nylon and polyester are great options, but each has its own benefits. Nylon is durable and resistant to abrasion, while polyester is known for its quick-drying capabilities. Additionally, deciding between hiking sandals and shoes involves weighing the pros and cons of each. Sandals offer breathability and are great for water crossings, but they may not provide enough support on rugged terrain. On the other hand, hiking shoes offer stability and protection for your feet, but they may be less ventilated. Consider the specifics of your hike and your personal preferences when making these gear choices.

NylonPolyester
DurableQuick-drying
Abrasion-resistantMoisture-wicking
Hiking SandalsHiking Shoes
BreathableStable and protective
Great for water crossingsSuitable for rugged terrain

Prioritize Footwear for Hiking

Choose durable and supportive footwear for hot weather hiking to ensure comfort and protection for your feet on rugged terrain.

When selecting the right hiking shoes, prioritize these features:

  • Look for breathable and quick-drying materials to keep your feet cool and dry.
  • Ensure a good fit with ample toe room and proper arch support to prevent discomfort and blisters.
  • Opt for sturdy outsoles with excellent traction for stability on uneven surfaces.
  • Consider the benefits of hiking in sandals like Tevas or Chacos, which offer breathability and freedom for your feet.

Hiking in hot weather demands the right footwear to keep you comfortable and safe on the trail. Whether you choose hiking shoes or sandals, prioritize support, breathability, and protection for an enjoyable and liberating hiking experience.

Invest in Quality Hiking Socks

When hiking in hot weather, prioritize investing in high-quality hiking socks to ensure comfort and protection for your feet on rugged terrain.

Merino wool hiking socks offer exceptional benefits, including moisture-wicking, temperature regulation, and odor resistance, keeping your feet dry and comfortable. Darn Tough and Smartwool are among the best hiking sock brands, known for their durability and support.

Merino wool also provides cushioning and reduces the risk of blisters, essential for long hikes in warm conditions. These socks are designed to offer breathability, making them ideal for hot weather adventures.

Ensure Adequate Sun Protection

Protect your skin from the sun’s harmful rays by applying sunscreen before your hike and making sure to reapply every 2 hours. Remember, the sun can be intense, so take these precautions seriously:

  • Sunscreen Application: Use a broad-spectrum sunscreen with at least SPF 30 and apply it generously all over your exposed skin.

  • Importance of Sun Hats: Wear a wide-brimmed hat to shield your face, neck, and ears from direct sunlight. Look for hats with UPF rating for added protection.

  • Sun-Protective Clothing: Consider wearing lightweight, long-sleeved shirts and pants with UPF protection for additional coverage.

  • Sunglasses: Protect your eyes from harmful UV rays by wearing sunglasses with UV protection.

Don’t let the sun ruin your hike – take these steps to enjoy the outdoors safely and comfortably.

Final Tips for Hot Weather Hiking

To ensure a comfortable and safe hiking experience in hot weather, prioritize staying hydrated and taking regular breaks in shaded areas. Hydration is crucial, so carry a sufficient amount of water and drink frequently. Additionally, consider layering options to manage your body temperature efficiently. Here’s a simple guide for layering:

LayerClothing
Base LayerMoisture-wicking fabric like polyester
Middle LayerLightweight insulating material
Outer LayerBreathable and waterproof shell

Frequently Asked Questions

How Can I Prevent Blisters and Discomfort While Hiking in Hot Weather?

To prevent blisters and discomfort while hiking in hot weather, prioritize foot care. Choose moisture-wicking fabrics and invest in high-quality hiking socks made of merino wool. These materials will help keep your feet dry and reduce friction.

Are There Any Specific Tips for Staying Cool and Comfortable While Hiking in Hot Weather?

Staying cool while hiking in hot weather is crucial. Hydration is key, so drink plenty of water and wear lightweight, breathable clothing. Opt for UPF-rated tops, sun protection, and comfortable footwear. Stay comfortable and enjoy the trail!

What Are Some Important Factors to Consider When Choosing the Right Hiking Shoes for Hot Weather?

When choosing lightweight, breathable hiking shoes for hot weather, prioritize comfort and durability. Look for shoes with good ventilation and moisture-wicking properties. Consider low-top hiking shoes or sandals for added breathability and freedom of movement.

Are There Any Special Considerations for Protecting My Skin and Eyes From the Sun While Hiking in Hot Weather?

When hiking in hot weather, protect your skin and eyes from the sun. Apply sunscreen every 2 hours, wear a UPF-rated sun hat, and don’t forget UV protection sunglasses. Prioritize your sun protection for a comfortable hike.

What Are Some Key Things to Keep in Mind for Staying Hydrated During Hot Weather Hikes?

To stay hydrated during hot weather hikes, it’s crucial to drink plenty of water and maintain electrolyte balance. Bring a reusable water bottle and consider packing electrolyte tablets or sports drinks to replenish essential minerals.

Conclusion

As you embark on your hot weather hiking adventure, remember that dressing appropriately is like choosing the right tools for a job. Just as a chef selects the finest ingredients for a delicious meal, you’ve carefully chosen the best clothing and gear for a comfortable and enjoyable hike.

So, lace up your boots, grab your hat and sunglasses, and hit the trails with confidence, knowing that you’re prepared for whatever the great outdoors has in store for you.

Happy hiking!

What NOT To Wear Hiking

Before you head out on your hike, it’s crucial to know what NOT to wear. You want to be comfortable and free, not weighed down by impractical clothing or gear. In this quick guide, we’ll cover 19 things to avoid when it comes to hiking attire.

From unsuitable materials like cotton to inappropriate footwear and accessories, we’ve got you covered. Stick with us for essential tips on staying comfortable and safe, including the importance of moisture-wicking fabrics and suitable footwear.

So, if you’re keen on enjoying a hassle-free hike, keep reading to learn what to leave out of your hiking gear.

Key Takeaways

  • Avoid wearing cotton, denim, sweatpants, and tight clothes as they can cause discomfort, chafing, and lack insulation or movement.
  • Choose footwear wisely by avoiding flip-flops, crocs, converse, slides, and brand new shoes, and opt for supportive, traction-sole hiking shoes or boots.
  • Consider avoiding regular bras, drawstring bags, jewelry, scented lotion, and cheap socks for comfort, organization, and safety reasons.
  • Opt for practical clothing choices like skorts instead of dresses, packable puffer jackets instead of heavy sweatshirts or winter coats, and avoid white clothing that easily shows dirt.

Unsuitable Clothing Materials

Avoid wearing clothing materials such as cotton, denim, sweatpants, and tight clothes when hiking as they can hinder your comfort and performance on the trail.

Instead, opt for moisture-wicking fabrics that draw sweat away from your body, such as merino wool or synthetic blends.

Utilize layering techniques with moisture-wicking base layers, insulating mid-layers, and weather-resistant outer layers to regulate body temperature and stay dry.

This combination allows for easy adjustments as you warm up during the hike or if the weather changes unexpectedly.

Inappropriate Footwear Choices

When it comes to inappropriate footwear choices for hiking, you should steer clear of options like flip-flops, Crocs, Converse, slides, and brand new shoes if you want to ensure comfort, support, and safety on the trails. These choices lack the necessary traction, support, and protection your feet need when navigating through different terrains. To help you make better choices, here are some common hiking shoe mistakes and their footwear alternatives:

Common Hiking Shoe MistakesFootwear Alternatives
Flip-FlopsHiking Sandals
CrocsTrail Shoes
ConverseHiking Boots
SlidesApproach Shoes
Brand New ShoesBroken-in Hiking Shoes

Accessories to Leave Behind

To ensure comfort, support, and safety on the trails, it’s important to also consider the accessories you bring along.

Accessories to Leave Behind

  1. Unnecessary Hygiene Products: Leave behind scented lotions, perfumes, and heavy makeup. They attract insects and disrupt the natural environment.

  2. Excessive Jewelry: Avoid unnecessary weight and the risk of loss or injury by leaving behind excessive jewelry.

  3. Bulky Bags: Opt for a lightweight, ergonomic backpack instead of uncomfortable drawstring bags that can cause shoulder discomfort.

  4. Non-Essential Hiking Gear: Avoid bringing unnecessary items that add weight and bulk to your pack, and stick to the essentials for a more enjoyable and freeing hiking experience.

Clothing Items to Skip

Consider ditching heavy sweatshirts and opting for more lightweight, packable layers to ensure comfort and mobility on the trails. When gearing up for extreme weather conditions, avoid winter coats, which can be heavy and unnecessary for most hiking situations.

Instead, go for a packable puffer jacket to stay warm without the bulk. Also, skip tight clothes that restrict movement and lack breathability, opting for performance-oriented brands like Patagonia, The North Face, or Arc’teryx for better comfort and functionality.

Keep in mind that white clothing easily shows dirt and may be difficult to clean on the trail. Choose suitable attire to ensure a pleasant and hassle-free hiking experience.

Important Hiking Etiquette

You should adhere to important hiking etiquette by avoiding bright colors that may attract insects or wildlife. When hitting the trails, it’s crucial to be mindful of hiking trail etiquette and minimizing environmental impact. Here are some key points to consider:

  1. Leave No Trace: Pack out all trash and minimize disruption to the natural environment.
  2. Yield to Others: Be courteous to fellow hikers and yield to those heading uphill.
  3. Stick to Designated Trails: Avoid damaging vegetation and wildlife habitats by staying on marked paths.
  4. Respect Wildlife: Keep a safe distance, refrain from feeding them, and observe without disturbing their natural behavior.

Moisture-Attracting Fabrics

Avoid wearing fabrics that don’t wick away moisture, such as silk or satin, as they can lead to discomfort and potential chafing during your hike. Opt for moisture-wicking fabrics like polyester or nylon, which draw moisture away from your skin and promote quick evaporation, keeping you dry and comfortable.

Choosing quick-drying materials offers the benefit of staying light and avoiding the discomfort of clammy, wet clothing. These fabrics also help regulate body temperature, preventing overheating or chilling.

Weather-Appropriate Dressing

When preparing for a hike, ensure your clothing and gear are suited to the current weather conditions to stay comfortable and safe on the trail. To achieve this, consider the following:

  1. Layering Techniques: Opt for moisture-wicking base layers, insulating mid-layers, and a weather-resistant outer layer to adapt to changing weather.

  2. Choosing the Right Outerwear: Select a waterproof and breathable jacket to protect against wind and rain, and a versatile hat and gloves for added warmth.

  3. Proper Footwear: Wear waterproof and sturdy hiking boots with good traction to navigate various terrains and weather conditions.

  4. Accessories: Pack a lightweight and packable backpack to carry extra layers, water, and snacks, and consider a buff or scarf for added warmth or protection.

Leggings and Footwear Options

Considering leggings for hiking? Make sure to try them on and walk around to ensure they hold up during your trek. Look for leggings with good breathability to keep you comfortable. Opt for moisture-wicking and quick-drying materials like nylon or polyester. Avoid cotton leggings as they retain moisture and can cause chafing.

When it comes to footwear, suitable options include hiking shoes or boots. Look for sturdy soles with good traction to handle various terrains. Sneakers can work for light trails, but for more challenging hikes, proper hiking footwear is recommended to provide ankle support and protect your feet.

Prioritize comfort and durability to keep you moving freely and confidently on the trail.

Considerations for Sneakers

For hiking, consider wearing sneakers that provide good traction and support for light trails. However, opt for proper hiking shoes or boots for more challenging terrain.

When it comes to choosing sneakers for beginners or casual hikes, keep these points in mind:

  1. Comfort is key: Look for sneakers with ample cushioning and support to keep your feet happy on the trail.

  2. Breathability matters: Select sneakers with mesh or breathable materials to keep your feet cool and dry.

  3. Traction is essential: Ensure the sneakers have a grippy outsole to provide stability on various terrains.

  4. Durability counts: Choose sneakers with sturdy construction to withstand the demands of hiking.

Final Hiking Attire Tips

You should always make sure to check your gear before heading out on a hike, especially your footwear and clothing. It’s essential to pack camping essentials and choose the right hiking gear recommendations for a comfortable and enjoyable experience.

Consider moisture-wicking clothing to keep you dry and comfortable, along with breathable and durable materials like nylon and polyester. Opt for moisture-wicking socks to reduce the risk of blisters and choose proper hiking shoes or boots for superior support and traction.

Additionally, a well-fitted backpack with padded straps and multiple compartments can ensure comfort and organization throughout your hike.

Frequently Asked Questions

Are There Any Specific Guidelines for Choosing the Right Sports Bra for Hiking?

When choosing the right sports bra for hiking, prioritize comfort and support. Look for moisture-wicking materials and consider layering clothing for versatility. Opt for comfortable footwear to keep you moving freely on the trail.

What Are Some Alternatives to Drawstring Bags for Carrying Hiking Essentials?

When hiking, consider alternatives to drawstring bags like backpacks, shoulder bags, waist packs, or hydration vests for carrying essentials. These options offer comfort, organization, and weight distribution, allowing you to move freely and enjoy the outdoors.

Is There a Specific Type of Jewelry That Is Safe and Practical to Wear While Hiking?

When hiking, opt for simple, durable jewelry like a sturdy watch or a minimalist necklace. Avoid excessive bling or dangling earrings to prevent damage and ensure safety. Choose practical accessories to enhance your outdoor experience.

How Can I Ensure That My Clothing Choices Are Suitable for Both Warm and Cold Weather Hiking?

When hiking in varying temperatures, layering is key. Choose moisture-wicking base layers, insulating mid-layers, and weatherproof outer layers. Opt for versatile clothing materials like merino wool and synthetic blends, and pack essentials like a hat, gloves, and extra socks.

Are There Any Specific Tips for Breaking in New Hiking Shoes Before Hitting the Trail?

Before hitting the trail, break in new hiking shoes by wearing them around the house or on short walks. Use waterproofing spray and quality socks for added protection. This ensures your comfort and prevents blisters during your hike.

Conclusion

Now that you know what not to wear on your hike, you’re ready to hit the trail with confidence. Remember, your hiking gear is like a suit of armor, protecting you from the elements and ensuring a comfortable journey.

So, leave behind the cotton and denim, opt for moisture-wicking fabrics and sturdy footwear, and embrace the symbol of the trail – the hiking boot.

With the right attire and mindset, you’re set for a successful outdoor adventure. Safe travels!

What To Use To Catch Crappie

Ready to step up your crappie fishing game? Discover the 7 best crappie baits and revolutionize your fishing experience.

From the classic grub lure to live minnows, the options are abundant, but choosing the right bait is crucial.

Dive into the world of crappie habitat and behavior, and uncover valuable tips and tricks to boost your catch rate.

Equip yourself with the perfect rod, light line, and essential tackle box items.

And remember to stay informed about fishing regulations.

Whether you’re a seasoned angler or just starting out, this article is your ticket to enhancing your crappie fishing adventure.

Get ready to reel in some impressive crappie with these expert insights.

Key Takeaways

  • Grub lure and tube lure are highly effective options for enticing crappie, with top color choices being chartreuse, white, and pink.
  • Crankbaits, such as lipless, square-billed, and deep-diving types, are an effective choice for targeting crappie. Varying the retrieve speed and using a stop-and-go technique can increase success.
  • Spinners are an effective lure for enticing crappie bites, with white, chartreuse, and pink being the best colors. Varying the retrieval speed can help create an enticing presentation.
  • Live minnows are a highly enticing bait for crappie, especially in less active or cold water conditions. Techniques such as lightly hooking through the back and adjusting bait depth can increase success.

Grub Lure

If you’re looking to entice crappie, a grub lure can be a highly effective option. These colors mimic the natural prey of crappie and can attract their attention effectively. When it comes to the best colors for grub lures, chartreuse, white, and pink are top choices. Techniques for fishing with grub lures include using a slow retrieve with occasional pauses to mimic the movement of natural prey. Additionally, utilizing a light jig head can enhance the lifelike action of the grub lure, making it more appealing to crappie. By incorporating these colors and fishing techniques, you can increase your chances of a successful crappie catch with a grub lure.

Crankbait

When fishing for crappie, you should consider using a crankbait to effectively attract and catch these fish.

Crankbait:

  1. Different types of crankbaits for crappie fishing: There are various types of crankbaits, including lipless, square-billed, and deep-diving crankbaits, each designed to dive to different depths and mimic different types of prey.

  2. Tips for selecting and using crankbaits effectively for crappie: Choose crankbaits that mimic the size and color of the predominant forage in the crappie’s environment. Vary your retrieve speed to find the most effective presentation, and consider using a stop-and-go technique to entice strikes.

Crankbaits can be an excellent choice for targeting crappie, as they allow you to cover a lot of water and find actively feeding fish.

Spinner

Consider using a spinner when targeting crappie, as it can be an effective lure for enticing bites from these fish. When it comes to spinner colors, the best choices for crappie are typically white, chartreuse, and pink. These colors mimic the small baitfish that crappie feed on and are highly visible in various water conditions.

To effectively use a spinner for crappie fishing, vary your retrieval speed to find the most enticing presentation. Slow and steady retrieves can work well, but don’t be afraid to experiment with faster or erratic retrieves to trigger strikes.

Additionally, consider using small spinners in the 1/16 to 1/32 ounce range to match the size of natural forage. By incorporating these techniques and color choices, you can increase your chances of landing more crappie when using a spinner.

Tube Lure

You should try using a tube lure when targeting crappie, as it can be highly effective in enticing bites from these fish.

When it comes to tube lure fishing techniques, consider using a slow and steady retrieve, allowing the tube to mimic the movement of natural prey.

Best colors for tube lures include chartreuse, white, and pink, as these colors tend to attract crappie due to their visibility in various water conditions.

Additionally, incorporating a slight jigging motion while retrieving the tube lure can create an enticing action that appeals to crappie.

Experiment with different colors and retrieval speeds to find what works best in your specific fishing location and conditions.

Live Minnow

To effectively catch crappie, use live minnows as they are highly enticing baits for these fish. Live minnows offer a natural presentation that can be very appealing to crappie. They are especially effective when the fish are less active or in cold water conditions. However, they can be challenging to keep alive and require special care and equipment. Despite this, the advantages of using live minnows outweigh the drawbacks. When using live minnows as crappie bait, effective techniques include hooking the minnow lightly through the back to allow it to swim freely, and adjusting the depth of your bait to match the crappie’s location. Here’s a breakdown of the pros and cons of using live minnows for crappie fishing:

ProsCons
Natural presentationNeed for special care
Highly enticing to crappieChallenging to keep alive
Effective in cold waterEquipment requirements

Live Bait

One effective option for catching crappie is using live bait, which can be highly enticing to these fish. When using live bait, there are both pros and cons to consider.

On the positive side, live bait can attract crappie with natural movement and scent, increasing your chances of a successful catch. However, using live bait also requires proper handling and storage to keep it alive and fresh, which can be time-consuming.

To effectively fish with live bait, consider the following techniques:

  1. Keep the bait lively: Ensure your live bait remains active and lively in the water to attract crappie effectively.

  2. Proper presentation: Use a light hook and adjust your setup to present the live bait naturally in the water.

  3. Stay patient: Give the crappie time to approach and take the live bait, as they may be cautious at first.

Using live bait can be rewarding when employed with the right techniques but requires patience and care.

Frequently Asked Questions

Are There Any Specific Techniques for Using a Grub Lure to Catch Crappie?

When using a grub lure for crappie, focus on slow, steady retrieves near submerged vegetation or brush piles. Vary your retrieval speed to find what works best. Remember, crappie are attracted to natural colors like chartreuse and white.

What Are the Best Colors for Crankbaits When Fishing for Crappie?

When fishing for crappie, choose crankbaits in colors like chartreuse, white, and pink. Vary your retrieval speeds and depths to find what works best. Experimenting with different techniques can help you catch more fish.

What Are Some Tips for Using a Spinner to Attract Crappie?

To attract crappie with a spinner, vary your presentation to match their feeding habits. Experiment with different speeds and depths to entice strikes. Remember, crappie are often found near structure and submerged vegetation.

How Can I Effectively Use a Tube Lure to Catch Crappie in Different Water Conditions?

To effectively use a tube lure for catching crappie in different water conditions, vary your retrieve speed and adjust the weight of the jig head based on the depth and current. Experiment with different colors to find what works best.

What Are Some Best Practices for Using Live Minnows and Live Bait to Target Crappie?

When targeting crappie with live bait, select the right hooks to match the size of your minnows. Use jigs for crappie to effectively present live bait. Vary your retrieves and experiment with different colors for successful crappie fishing.

Conclusion

Now that you’re armed with the top crappie baits and techniques, it’s time to hit the water and put your new knowledge to the test.

Remember to stay patient and persistent, as success often comes with time and practice.

With the right gear and tactics, you’re bound to reel in some impressive crappie.

So, grab your rod, pack your tackle box, and get ready for an exciting and successful fishing adventure!

Waterfalls Near Bend, Oregon

Looking for an adventure that’s as invigorating as a breath of fresh mountain air? Get ready to be captivated by the 13 must-see waterfalls near Bend, Oregon.

Embrace the freedom of exploring lush forests and scenic trails as you encounter these natural wonders. Whether you’re craving an easy stroll or a more exhilarating trek, each waterfall offers a unique and awe-inspiring experience.

From the cascading beauty of Koosah Falls to the tranquil allure of Sahalie Falls, these destinations promise to leave you in awe of their natural grandeur.

So, lace up your hiking boots, pack a sense of wonder, and prepare to immerse yourself in the enchanting waterfalls just a short distance from Bend.

Key Takeaways

  • Tumalo Falls, Steelhead Falls, Koosah Falls, Sahalie Falls, Proxy Falls, Paulina Creek Falls, Watson Falls, Marion Falls, Salt Creek Falls, White River Falls, Dillon Falls, Benham Falls, and Toketee Falls are some of the must-see waterfalls near Bend, Oregon.
  • The difficulty level of the trails to these waterfalls ranges from easy to moderate.
  • The distances from Bend to these waterfalls vary, with the closest being 15 minutes away and the farthest being 2 hours and 15 minutes away.
  • Some waterfalls require passes, such as the Northwest Forest Pass or the National Parks Pass, while others do not require any passes.

Tumalo Falls

Tumalo Falls’ trail offers an easy 0.25-mile hike with no elevation gain, making it an accessible and enjoyable experience for all hikers near Bend, Oregon.

The best time to visit is in the late spring or early summer when the flow is at its peak, creating a stunning sight. For photography, consider visiting during the golden hours of the day, just after sunrise or before sunset, to capture the falls in the most flattering light. Utilize a tripod to stabilize your camera and experiment with longer exposures to give the water a silky, ethereal appearance.

Additionally, don’t forget to explore different vantage points along the trail to capture unique perspectives of the falls.

Tumalo Falls is a true gem, offering a picturesque scene that’s sure to satisfy your wanderlust and photography aspirations.

Steelhead Falls

To reach Steelhead Falls, drive 46 minutes from Bend and embark on a moderate 2-mile hike with a 250-foot elevation gain.

This is a prime spot for anglers, offering fantastic fishing opportunities for steelhead trout and Chinook salmon.

The best time of year to visit Steelhead Falls for optimal views is during the spring and early summer when the flow of the Deschutes River is strong, creating a spectacular cascade over the rugged basalt cliffs.

The surrounding natural beauty and the refreshing mist from the falls make this an awe-inspiring experience.

Whether you’re an avid angler or just seeking a breathtaking adventure, Steelhead Falls is an ideal destination for those who crave outdoor freedom and stunning scenery.

Koosah Falls

Koosah Falls’ trail offers an easy 0.25-mile hike with a 50-foot elevation gain, providing a picturesque view of the cascading water. As you make your way to this stunning waterfall, consider the best time to visit Koosah Falls. The spring and early summer months are ideal, as the water flow is at its peak, creating a dramatic and powerful display. In autumn, the surrounding foliage adds vibrant colors to your photographs. For photography tips for Koosah Falls, plan to visit during the early morning or late afternoon for the best lighting. Consider using a tripod to capture the beauty of the waterfall with a slower shutter speed. Don’t forget to experiment with different angles to capture the perfect shot of this mesmerizing natural wonder.

Best Time to VisitPhotography Tips
Spring and SummerVisit in golden hours for the best light
AutumnUse a tripod and experiment with angles

Sahalie Falls

When visiting Sahalie Falls near Bend, Oregon, you’ll experience a breathtaking 0.15-mile easy hike with a 20-foot elevation gain, offering a stunning view of the cascading water.

To capture the beauty of Sahalie Falls, make sure to bring a wide-angle lens to encompass the entirety of the waterfall in your shot. The best time to visit Sahalie Falls is during the spring and early summer when the flow is at its peak, creating a powerful and mesmerizing display.

To photograph the falls, consider visiting in the late afternoon when the sunlight beautifully illuminates the water. The area around the falls can be slippery, so wear appropriate footwear for better traction and be cautious when setting up your shots.

Embrace the freedom to explore and find the perfect angle to capture the grandeur of Sahalie Falls.

Proxy Falls

If you’re looking for a picturesque waterfall near Bend, Oregon, Proxy Falls is a must-see destination. This stunning waterfall is surrounded by lush greenery and offers a tranquil atmosphere that’s perfect for nature lovers and adventure seekers alike. When planning your visit, the best time to experience the full beauty of Proxy Falls is during the spring and early summer months when the snowmelt feeds the cascading waters, creating a breathtaking sight. For photography enthusiasts, consider visiting during the early morning or late afternoon to capture the soft, warm light that enhances the natural beauty of the falls. Additionally, using a slower shutter speed can create a dreamy effect on the flowing water, resulting in captivating images. Make sure to bring your camera and capture the magic of Proxy Falls during your visit.

Best Time to VisitPhotography TipsNearby Attractions
Spring and early summerVisit during early morning or late afternoon for soft lightThree Sisters Wilderness

Paulina Creek Falls

As you begin your journey to Paulina Creek Falls, marvel at the natural beauty surrounding you. This hidden gem is a breathtaking sight to behold, tucked away in the Newberry National Volcanic Monument.

Here, you’ll find:

  1. A serene half-mile hike through a lush forest, leading to the stunning two-tiered waterfall.

  2. The best time to visit is during spring when the snowmelt feeds the falls, creating a powerful and picturesque display of nature’s force.

  3. The cascading waters and the surrounding canyon walls create a sense of tranquility, making it an ideal spot for a peaceful escape or a refreshing dip in the cool waters.

Paulina Creek Falls is a true oasis, offering an opportunity to reconnect with nature and find freedom in its unspoiled beauty.

Watson Falls

Nestled in the scenic landscape near Bend, Oregon, Watson Falls offers a captivating display of natural beauty and a refreshing escape into the unspoiled wilderness. As you continue your exploration of the waterfalls in the region, the journey to Watson Falls promises a rewarding and awe-inspiring experience. Here’s a comparison to pique your interest:

WaterfallHeight (feet)Flow Rate (gal/min)Difficulty Level
Watson Falls272N/AModerate
Proxy Falls226N/AModerate
Tumalo Falls89N/AEasy

At 272 feet, Watson Falls stands taller than Proxy Falls, which reaches 226 feet. Both offer moderate hiking challenges, unlike the easy Tumalo Falls. The roaring flow and moderate hike make Watson Falls a thrilling adventure.

Marion Falls

When you visit the waterfalls near Bend, Oregon, you’ll discover the captivating beauty of Marion Falls. This stunning waterfall offers a unique experience, different from others in the area. Here’s what sets Marion Falls apart:

  1. Comparing Marion Falls with Tumalo Falls: Marion Falls offers a longer hike and a more challenging terrain compared to the short and easy hike of Tumalo Falls. The lush, serene surroundings of Marion Falls provide a more immersive experience.

  2. Exploring the difficulty level of Marion Falls: With a length of 4.1 miles and an elevation gain of 900 feet, Marion Falls presents a moderately challenging hike. The trail’s terrain may require moderate fitness levels and sturdy footwear.

  3. Comparing the difficulty with Steelhead Falls: While Steelhead Falls is shorter in length, Marion Falls offers a more strenuous hike with a significant elevation gain, making it a rewarding adventure for those seeking a bit more challenge.

Salt Creek Falls

Discover just how breathtaking Salt Creek Falls is with its 0.3-mile easy hike and a mere 30 feet elevation gain, making it a quick and accessible adventure just a short drive from Bend.

The hiking trail takes you through the stunning forest, leading to a dramatic viewpoint overlooking the impressive 286-foot waterfall. As you follow the well-maintained path, the sound of rushing water grows louder, building anticipation for the breathtaking sight that awaits.

Once you reach the scenic viewpoints, you’ll be greeted by the powerful cascade, surrounded by lush greenery and the refreshing mist from the falls. Take in the awe-inspiring natural beauty, snap some photos, and immerse yourself in the tranquility of this remarkable spot.

Salt Creek Falls promises a rewarding outdoor experience without a strenuous journey.

White River Falls

Have you ever visited White River Falls, located just 2 hours and 15 minutes from Bend, Oregon? Here are three things you should know about this stunning waterfall:

  1. Exploring the geological features at White River Falls offers a unique look into the area’s fascinating rock formations and the powerful forces that have shaped the landscape over time.

  2. Photography tips for capturing the beauty of White River Falls include experimenting with different shutter speeds to create a sense of motion in the falling water, finding unique angles to showcase the surrounding cliffs, and utilizing the natural light to enhance the colors and textures of the scene.

  3. The panoramic views from the top provide a breathtaking perspective of the cascading water and the rugged terrain, making it a perfect spot for a picnic or simply to take in the natural beauty.

Dillon Falls

If you’re looking for a scenic and easily accessible waterfall near Bend, Oregon, Dillon Falls is a must-see destination.

Aside from the breathtaking waterfall, the Deschutes River at Dillon Falls offers an array of activities. You can enjoy kayaking, stand-up paddleboarding, or simply relaxing by the river.

The unique geological features of Dillon Falls are equally captivating. The falls are formed by a dramatic lava flow, creating a series of cascades and rapids that make for a mesmerizing sight. As the river crashes over the rugged rocks, it creates a symphony of natural sounds that add to the overall experience.

Whether you’re seeking adventure or a peaceful retreat, Dillon Falls offers a perfect blend of natural beauty and outdoor recreation.

Benham Falls

You’ll find Benham Falls just a 20-minute drive from Bend, Oregon, making it a convenient and rewarding destination for nature enthusiasts.

Benham Falls: History and Conservation

  1. Rich History: Benham Falls played a significant role in the region’s logging history, and remnants of old logging activities can still be seen in the area.

  2. Conservation Efforts: The surrounding area is part of the Newberry National Volcanic Monument, ensuring the preservation of its natural beauty and ecological significance.

  3. Restoration Projects: Ongoing conservation projects aim to restore the habitat and protect the wildlife in the area, providing visitors with a chance to witness environmental restoration efforts firsthand.

Benham Falls: Wildlife and Plant Species

  1. Diverse Wildlife: The area is home to a variety of wildlife, including deer, otters, and various bird species, offering excellent opportunities for wildlife observation.

  2. Unique Flora: Visitors can explore the diverse plant life, including ponderosa pines, aspens, and wildflowers, adding to the scenic beauty of the falls.

  3. Riparian Habitat: The Deschutes River, near Benham Falls, supports a rich riparian habitat, contributing to the biodiversity of the area.

Toketee Falls

To reach Toketee Falls from Bend, Oregon, drive for approximately 2 hours, following the Northwest Forest pass requirements. Once you arrive, prepare to be captivated by the stunning beauty of Toketee Falls. The upper viewpoint offers a breathtaking view of the falls as they cascade into a mesmerizing teal-colored pool. For the best experience, venture down the moderately difficult trail to the shore of the North Umpqua River. Exercise caution as the trail can be slippery and challenging, but the reward is a spectacular view of the falls from below. To capture the perfect shot, consider using a wide-angle lens to encompass the grandeur of the falls and the lush surroundings. Combining a visit to Toketee Falls with Watson Falls allows you to experience two of Oregon’s most remarkable waterfalls in one trip.

Best ViewpointsPhotography Tips
Upper Viewpoint for aerial view of the fallsUse a wide-angle lens
Trail to the shore of North Umpqua RiverCapture the falls from below

Frequently Asked Questions

Are There Any Picnic Areas or Facilities Available at the Waterfall Locations?

Yes, some of the waterfall locations have picnic areas and amenities. Be sure to check visitor guidelines and swimming regulations. Remember to bring your own supplies and be respectful of the natural surroundings.

Are Pets Allowed at the Waterfall Locations?

Yes, pets are allowed at most of the waterfall locations. Remember to keep them on a leash, clean up after them, and be mindful of other visitors. Enjoy the stunning waterfalls while practicing good waterfall etiquette!

Can Visitors Swim at the Waterfalls?

You can’t swim at most waterfalls near Bend. Waterfall safety is crucial, and swimming can be dangerous. It also has an environmental impact, disrupting ecosystems. Consider enjoying the falls from a safe distance instead.

Are There Any Guided Tours or Organized Activities Available at the Waterfall Locations?

You won’t believe the breathtaking outdoor activities available at these falls! Guided tours aren’t offered, but you can enjoy hiking, photography, and nature exploration at each location. The adventure is yours to create!

Are the Waterfall Locations Accessible for People With Disabilities?

Yes, most of the waterfall locations have accessibility accommodations, disability-friendly paths, and inclusive facilities. Wheelchair access is available at some falls. A few may have challenging terrain, so use caution.

Conclusion

So what’re you waiting for? Lace up your hiking boots and prepare to be swept off your feet by the majestic waterfalls near Bend, Oregon.

These natural wonders are like a symphony of nature, each one a unique melody that will leave you spellbound.

Whether you’re a seasoned hiker or just looking for a leisurely stroll, these falls offer an unforgettable experience that will leave you breathless.

Don’t miss out on the opportunity to witness their awe-inspiring beauty firsthand.

Spirit Falls, Washington

Ready for an adventure? Brace yourself for a challenging hike to Spirit Falls in Washington.

Get ready to navigate through a 0.8-mile trail with a 500-foot elevation gain, tackling steep descents, slippery dirt paths, and small stream crossings.

Starting near the overlook into the Columbia River Gorge, you’ll venture through a boulder field and the untamed wilderness.

The sound of the roaring waterfall will guide you as you approach the mesmerizing turquoise waters spilling over moss-covered cliffs.

With caution and a sense of adventure, you’ll find yourself captivated by the raw power and beauty of Spirit Falls.

It’s time to experience nature in its most untamed and captivating form.

Key Takeaways

  • The Spirit Falls trail spans 0.8 miles and has an elevation gain of 500 feet.
  • The trail is rated as hard and is suitable for those seeking a thrilling outdoor adventure.
  • The terrain includes uneven surfaces with rocks and roots, as well as small streams to cross.
  • Hikers should be cautious of slippery areas near the falls and consider bringing trekking poles for added stability.

Hike Details

If you’re considering tackling the Spirit Falls hike, be prepared for a challenging trek that spans 0.8 miles with an elevation gain of 500 feet. The trail difficulty is hard, and the terrain is rugged, making it suitable for those seeking a thrilling outdoor adventure.

The hike is an out-and-back type, starting at the trailhead near the overlook into the Columbia River Gorge. You’ll traverse a short boulder field before joining the trail, and then encounter a steep descent with no rope assistance. The path is slippery with treacherous sections, and you’ll need to cross small streams, being cautious of slippery areas near the falls.

This challenging hike promises an exhilarating experience for those who crave the freedom of exploring rugged terrain and conquering demanding trails.

What to Expect on the Hike

As you begin the challenging Spirit Falls hike, prepare to traverse a short boulder field before joining the trail, navigating a steep descent with no rope assistance. The trail conditions can be rugged and may include slippery dirt paths with treacherous sections.

Here’s what to expect as you venture through the trail:

  1. Uneven terrain with rocks and roots
  2. Cross small streams and be cautious of slippery areas near the falls
  3. Roaring sound of the waterfall indicating its proximity

To tackle this demanding hike, it’s recommended to bring trekking poles for added stability on the slippery sections. Additionally, sturdy hiking boots with good traction are essential for navigating the rugged terrain.

Stay mindful of your surroundings and enjoy the freedom of exploring this challenging yet rewarding trail.

The Start

Upon beginning the hike, you will start at the trailhead near the overlook into the Columbia River Gorge. To navigate the start of the trail, you will follow these footpath directions:

Footpath Directions
1. Near the overlookStart at the trailhead near the overlook into
the Columbia River Gorge.
2. Boulder fieldTake a left to cross a short boulder field.
3. TrailContinue further and take another left onto
the trail.
4. ViewpointA straight path leads to a viewpoint over the
gorge. Return to the trail to proceed.

These directions will guide you seamlessly through the start of the trail, ensuring a smooth transition from the trailhead to the captivating viewpoints that lie ahead. As you navigate the boulder field crossing, take in the freedom of the rugged terrain under your feet, and embrace the adventure that awaits.

The Descent

Begin your descent by carefully navigating the steep trail with no rope assistance, using trees, stumps, and rocks for footing. As you make your way down, keep in mind the following:

  1. Mind the Slippery Sections: The dirt path can be treacherous in places, so watch your step and consider using trekking poles for stability.

  2. Utilize Natural Elements: Look for sturdy trees, stable stumps, and reliable rocks to support your descent.

  3. Stay Alert for the Roaring Waterfall: As you descend, the sound of the waterfall will grow louder, indicating its proximity.

The steep descent requires your full attention, but the reward of witnessing the majestic Spirit Falls makes the challenging trek worthwhile.

The Waterfall

From the viewpoint, you’ll see the turquoise waters of Spirit Falls spilling over a moss-covered cliff, offering a breathtaking sight.

As you make the left turn along the rim of the river, a narrow, unmaintained path with steep drop-offs leads you to an up-close view of the majestic waterfall. The roar of the cascading water grows louder, adding to the anticipation.

As you approach, the mesmerizing turquoise waters become even more vivid, contrasting beautifully against the lush greenery and dark rocks. Caution is necessary as you navigate the steep edges, but the opportunity to witness the raw power and beauty of the falls up close is truly unforgettable.

Don’t forget to stop at viewpoints further from the falls for a different perspective, offering a unique experience of this natural wonder.

Safety Precautions

To ensure your safety on the challenging hike to Spirit Falls, Washington, stay mindful of the rugged terrain and the slippery, treacherous sections along the trail. Be prepared for the following trail hazards and equip yourself with the necessary equipment:

  1. Treacherous Terrain: The trail features steep descents with no rope assistance, slippery dirt paths, and small streams to cross. Use caution and trekking poles for stability on the rugged terrain.

  2. Slippery Sections: Be mindful of the slippery areas near the falls and the narrow, unmaintained path with steep drop-offs. Wear sturdy, waterproof hiking boots with good traction to navigate these sections safely.

  3. Necessary Equipment: Consider bringing trekking poles for stability, sturdy hiking boots with good traction, and appropriate clothing for the rugged and potentially wet terrain. Stay alert and prepared for the challenging conditions to ensure a safe and enjoyable hike.

Trail Conclusion

After completing the challenging hike to Spirit Falls, Washington, you’ll have experienced a rugged and exhilarating trail that rewards hikers with breathtaking views and a sense of accomplishment.

The trail difficulty, with its steep descent and treacherous sections, offers an invigorating challenge for seasoned hikers.

The scenic views along the trail, especially at the viewpoints over the gorge and near the turquoise waters of the falls, make every step worthwhile.

The trail conclusion brings a feeling of triumph as you reflect on the demanding terrain you conquered and the awe-inspiring natural beauty you encountered.

As you finish the hike, take a moment to soak in the stunning surroundings and appreciate the sense of achievement that comes with navigating such a demanding yet gratifying trail.

Frequently Asked Questions

Are There Any Restrictions or Permits Required for Hiking to Spirit Falls?

You don’t need a permit to hike to Spirit Falls, but parking may be limited. Arrive early to secure a spot. Keep in mind that parking restrictions may vary, so it’s best to check local regulations before your visit.

What Is the Best Time of Year to Visit Spirit Falls?

The best time to visit Spirit Falls is during spring and early summer when the weather is mild, and the waterfall is at its fullest. Visitor numbers are lower, and the trail is well-maintained for a more enjoyable hike.

Are There Any Facilities or Amenities at the Trailhead or Along the Hike?

At the trailhead, you’ll find limited facilities, like parking and trail information. There are no amenities or services along the hike, and no restrooms are available, so be sure to prepare accordingly.

Can You Swim in the Pool at the Base of Spirit Falls?

You can’t swim in the pool at the base of Spirit Falls. The water safety is crucial due to strong currents. However, you can admire the natural beauty and take stunning photographs of the turquoise waters from a safe distance.

Are There Any Guided Tours or Ranger-Led Activities Available for This Hike?

Unfortunately, there are no guided tours or ranger-led activities available for this hike. However, you have the freedom to explore the trail at your own pace and immerse yourself in the challenging yet rewarding experience.

Conclusion

As you make your way back from Spirit Falls, take a moment to appreciate the rugged terrain you conquered and the raw beauty you witnessed.

Just as the waterfall flows with untamed power, let the spirit of the falls inspire you to embrace the challenges and beauty of life.

With each step, carry the memory of Spirit Falls with you, a symbol of your strength and the awe-inspiring wonders of nature.

The Complete Trout Fishing Guide

So, you think you’ve got what it takes to conquer the art of trout fishing? Well, get ready to dive into the ultimate guide that will equip you with all the knowledge and skills you need to reel in those prized trout.

From understanding their habitat and behavior to selecting the perfect gear and mastering casting techniques, this comprehensive guide has got you covered.

Whether you’re an experienced angler looking to elevate your trout fishing game or a newcomer eager to embark on this thrilling journey, this guide will empower you to become a true trout fishing aficionado.

So, grab your gear, prepare to explore the most effective strategies, and let’s embark on a trout fishing adventure like no other.

Key Takeaways

  • Trout can be found in a variety of locations such as streams, rivers, creeks, ponds, and lakes.
  • Trout prefer cool, clear waters with temperatures ranging from 10-16°C and tend to stay around cover, such as rocks.
  • Choosing a medium-weight fishing rod and spinning reel combination is suitable for trout fishing.
  • The choice of line depends on the size and species of trout being targeted, with options ranging from 4-pound test lines for regular-sized trout to 8-10 pound test lines for larger trout species.

Trout Habitat and Behavior

Trout prefer to inhabit cool, clear waters with ample cover such as rocks, where they can find protection and access to their prey. Understanding their habitat is crucial for successful fishing.

Trout spawning habits vary by species, but it generally occurs in the spring when water temperatures rise. This is also the best time to fish for trout, as they’re more active during spawning season. Look for gravel areas in rivers and streams, where trout often spawn.

It’s important to handle caught trout with care during this time to ensure the protection of their spawning grounds. Knowing the best time to fish for trout and understanding their spawning habits allows you to make the most of your fishing experience while respecting the natural behavior of these incredible fish.

Selecting the Right Fishing Gear

When selecting the right fishing gear for trout, you’ll want to consider the specific requirements for catching these elusive fish in their preferred habitats.

  1. Invest in Quality Gear: Opt for reliable fishing gear that’s durable and well-maintained to ensure a successful fishing experience.

  2. Accessorize Wisely: Equip yourself with the right fishing gear accessories such as polarized sunglasses, a fishing vest, and a waterproof tackle box to enhance your efficiency and enjoyment on the water.

  3. Regular Maintenance: Keep your fishing gear in top condition by regularly cleaning and lubricating reels, checking and replacing worn-out lines, and organizing your tackle box to ensure everything is easily accessible when needed.

Choosing the Ideal Fishing Line

Investing in quality fishing gear and maintaining it regularly will ensure you’re well-prepared for trout fishing. Additionally, understanding the ideal fishing line to use is crucial for increasing your chances of a successful catch.

When it comes to trout fishing line types, there are several options to consider. Monofilament lines are popular due to their stretch and forgiving nature, making them ideal for beginners. Fluorocarbon lines are virtually invisible underwater, making them perfect for clear water conditions. Braided lines offer strength and sensitivity, making them suitable for targeting larger trout.

For most trout fishing situations, a 4-pound test line is a versatile choice. However, adapting the line weight based on the size and species of trout targeted will ensure you have the best fishing line for trout.

Effective Bait and Lure Options

To effectively attract trout, select the right bait and lures that cater to their feeding preferences and the fishing conditions. Here are some effective options to consider:

  1. PowerBait: This synthetic bait is known for its effectiveness in attracting trout, especially for beginners. It comes in various colors and scents to entice trout in different conditions.

  2. Spinnerbaits: These lures work well in streams and rivers, creating vibrations and flashes that grab the attention of trout. They’re versatile and can be used in various fishing techniques.

  3. Spoons: These lures imitate the flash and movement of injured fish, making them a great choice for targeting aggressive trout. They’re particularly effective when fishing for trout in lakes during the best times, such as early morning or late evening.

Utilizing Sinkers and Bobbers

Sinkers and bobbers play a crucial role in controlling the depth and presentation of your bait when targeting trout, allowing for a more effective fishing experience.

There are various types of sinkers to choose from, including split shot, egg sinkers, and bullet sinkers. Split shot sinkers are versatile and can be easily added or removed to adjust the bait’s depth. Egg sinkers are ideal for fishing in currents, while bullet sinkers are great for casting long distances.

When it comes to bobbers, there are different types such as slip bobbers, fixed bobbers, and weighted bobbers. Slip bobbers are excellent for fishing at various depths, while fixed bobbers are suitable for shallower waters. Weighted bobbers help in casting longer distances and can handle windy conditions.

Understanding the uses of different sinkers and bobbers will significantly enhance your trout fishing skills.

Understanding Trout Feeding Habits

Understanding trout feeding habits is crucial when targeting these fish. You’ll want to consider their natural diet and feeding patterns. Here are three crucial tips to help you understand the feeding habits of trout and improve your fishing success:

  1. Trout are most active during dawn and dusk, so early morning or late evening can be the best times to catch them.

  2. Their diet includes insects, small fish, and crustaceans, so using bait that mimics these natural prey can be highly effective.

  3. Trout are opportunistic feeders, meaning they’ll often be found in areas where food is plentiful, such as near underwater structures or along the edges of currents.

Understanding trout feeding patterns and knowing the best fishing times can greatly increase your chances of a successful trout fishing expedition.

Mastering Casting Techniques

Master your casting techniques to accurately place your bait in the targeted trout feeding zones, maximizing your chances of a successful catch.

When it comes to casting for trout, mastering different techniques is essential. For instance, in fly fishing, the roll cast is effective for tight spaces, while the overhead cast allows for longer distances. Practice the sidearm cast for accuracy near obstacles.

Timing and rhythm are crucial in executing a successful cast, especially in fly fishing. Pay attention to your backcast to prevent tangles. In addition, consider the wind direction and adjust your technique accordingly.

Tips for Catch and Release

When releasing a trout, gently support its body and keep it in the water to minimize stress on the fish. Here are three essential tips for catch and release that will contribute to trout conservation and ensure proper handling techniques:

  1. Minimize Handling: Limit the time you handle the trout and avoid touching its gills or squeezing its body. This will help reduce stress and potential injury to the fish.

  2. Use Barbless Hooks: Consider using barbless hooks, as they’re easier to remove and cause less harm to the fish. This small adjustment can greatly benefit the trout during catch and release.

  3. Revive the Trout: If the trout appears lethargic after release, gently hold it in the water, facing the current, until it regains strength and swims away on its own. This step is crucial for the trout’s survival post-release.

Safety Tips for Trout Fishing

When catching trout, it’s important to prioritize safety to ensure an enjoyable and incident-free fishing experience.

Proper maintenance of trout fishing gear is essential for safety. Regularly check your fishing rod, reel, and line for any signs of wear and tear, ensuring they’re in good condition.

Additionally, always handle your trout catches with care. Wet your hands before holding the fish to protect its delicate skin and scales. Avoid squeezing the fish tightly, which can cause injury.

When releasing the trout, gently place it back into the water, supporting it until it swims away on its own.

Frequently Asked Questions

What Are the Best Times of Day to Go Trout Fishing?

For the best trout fishing, head out early in the morning or just before dusk. Ideal locations include cool, clear streams and rivers. The best baits to use are nightcrawlers, power eggs, and artificial lures like PowerBait.

How Do Weather Conditions Affect Trout Behavior and Feeding Habits?

When it comes to trout fishing, water temperature and barometric pressure play a crucial role in their behavior and feeding habits. Understanding these factors can help you anticipate when and where to fish for a successful catch.

Are There Any Specific Regulations or Restrictions for Trout Fishing in Certain Locations?

Before heading out, check for local trout fishing regulations and restrictions. Familiarize yourself with trout fishing seasons and locations. Ensure you have the right equipment and techniques for the destination. Enjoy your trout fishing adventure responsibly.

What Are Some Common Mistakes That Beginner Trout Anglers Make?

When starting out with trout fishing, avoid common mistakes by using proper bait and correct equipment. Testing different baits and lures will help determine what works best for your fishing location. Remember, the right gear makes a difference.

Are There Any Special Techniques for Fishing in Fast-Moving Streams or Rivers?

When fishing in fast-moving streams or rivers, try fly fishing and nymphing techniques. Use streamside casting and reading currents to your advantage. It’s a dynamic and engaging approach to trout fishing in these environments.

Conclusion

Now that you’ve got all the knowledge and skills to reel in some beautiful trout, it’s time to cast your line and let the fun begin!

With this guide as your compass, you’ll navigate the waters like a seasoned captain, hooking those elusive trout like a pro angler.

So, grab your gear and get ready to dive into the world of trout fishing – it’s a journey full of excitement and adventure that you won’t want to miss!

Hiking Backpacks

Getting ready for a hike is like preparing for a journey into the unknown – you want the right gear to give you freedom and comfort.

Unsure whether to go for a travel backpack or a hiking backpack? Understanding the key differences is crucial for a successful and comfortable hiking experience.

In this article, we’ll delve into the seven distinct contrasts between travel and hiking backpacks, providing you with the essential knowledge to make an informed decision.

From support features and organizational pockets to water reservoir storage and versatility, we’ll explore how each type of backpack caters to the unique demands of hiking.

So, before you embark on your next adventure, equip yourself with the insights needed to choose the perfect backpack for your hiking escapades.

Key Takeaways

  • Hiking backpacks are specifically designed for trail use and offer support systems and organizational pockets, making hiking easier and more enjoyable.
  • Travel backpacks are designed for traveling, flying, and backpacking, and are fairly large to store belongings for travel. They may have smaller pockets for organization but typically lack frame or support features.
  • Hiking backpacks come in different sizes (liters) and may have framed options for back support, hip belt, and sternum straps.
  • Hiking backpacks often have dedicated space for storing a water bladder and offer a wide range of sizes, while travel backpacks may have laptop pockets but lack separate storage for a water bladder.

Design and Purpose

When choosing between a travel backpack and a hiking backpack, it’s important to consider their design and purpose for your hiking needs.

Hiking backpacks are specifically designed with comfort and support features to make your hiking experience more enjoyable. They often come with framed options for back support, hip belts, sternum straps, and organizational pockets. However, they may require a significant investment.

On the other hand, travel backpacks are versatile and can be used for various purposes, but they typically lack the same level of support and comfort features as hiking backpacks. While they may be a more budget-friendly option, they mightn’t provide the necessary support for long hikes.

Therefore, it’s essential to weigh the investment considerations and prioritize your comfort and support needs when choosing between the two.

Support and Comfort Features

You’ll need to carefully evaluate the support and comfort features of both travel backpacks and hiking backpacks to ensure a comfortable and enjoyable hiking experience. When it comes to back support and organizational pockets, hiking backpacks tend to offer more advanced features compared to travel backpacks. Take a look at the table below to understand the differences:

Support and Comfort FeaturesTravel BackpackHiking Backpack
Back SupportTypically no frame or support featuresFramed options for back support, hip belt, sternum straps
Organizational PocketsLimited organization optionsMultiple pockets for optimal organization

Choosing a hiking backpack with proper back support and organizational pockets is crucial for maintaining comfort and accessibility during your hike. These features will help ensure that you are well-prepared and comfortable throughout your journey.

Organizational Options

Evaluating the organizational options is essential for choosing the right backpack for your hiking needs.

When comparing pocket organization in travel backpacks and hiking backpacks, it’s clear that hiking backpacks offer more pockets for optimal organization.

The multiple pockets found on hiking backpacks, including those on the hip belt, top of the pack, inside the brain, and in a stuff pouch, provide convenient access to your gear while on the trail.

The importance of organizational features in backpacks for hiking trips can’t be overstated. Easy access to essentials like water, snacks, and navigation tools can make or break a hiking experience.

Therefore, considering the level of organization offered by the backpack is crucial for a successful and enjoyable adventure.

Water Reservoir Storage

Hiking backpacks often feature dedicated space for storing a water bladder, providing convenient access to hydration while on the trail. Having a designated pocket for a water reservoir offers several benefits for hikers. Below is a comparison of water bladder storage options in hiking and travel backpacks:

AspectsHiking BackpackTravel Backpack
StorageDedicated space for water bladder, often with a port for a strawLimited options, water bladder may be stored in the main compartment or laptop pocket
ConvenienceEasy access to hydration while hikingMay require digging deeper into the bag for the water bladder
VersatilitySpecifically designed for hiking, offering optimal water reservoir storageLess suitable for hiking, with limited storage options for water bladder

Water reservoir storage in hiking backpacks is designed to enhance the hiking experience by providing easy access to hydration, making it a crucial feature for avid hikers.

Size Range and Versatility

When choosing between a travel backpack and a hiking backpack, consider the size range and versatility to ensure the right fit for your needs. Here’s what you need to know:

  • Hiking backpacks offer a wide range of sizes, from 10 liters to 80 liters, catering to different adventure durations.

  • Travel backpacks typically range from 30-40 liters, but larger or smaller options can be found.

  • Hiking backpacks are less versatile and are best suited for the trail, while travel backpacks can be used for various purposes like school, work, or travel.

  • Hiking backpacks are less suitable for other uses due to their specific features, while travel backpacks offer more versatility for different situations.

Consider your specific needs and the duration of your adventures to make the right choice.

Suitability for Hiking

You need a backpack that provides proper support and organization for your hiking adventures. When considering suitability for hiking, durability and weather resistance are crucial factors to keep in mind. Hiking backpacks are specifically designed to withstand different terrains and weather conditions, making them more suitable for outdoor adventures compared to travel backpacks. To illustrate the differences, take a look at the table below:

AspectHiking BackpackTravel Backpack
DurabilityHighModerate
Weather ResistanceExcellentLimited
SuitabilityVaried terrainsUrban settings
Support FeaturesFramed options availableFrameless design

Hiking backpacks are built for rugged outdoor use, offering superior durability and weather resistance, making them the ideal choice for hiking across different terrains.

Investment and Recommendations

Consider investing in a hiking backpack if you plan to hike frequently, as it can enhance your hiking experience with its support and organizational features. When making an investment, keep in mind the following considerations:

  • Durability: Look for a backpack constructed with high-quality, sturdy materials to ensure longevity.
  • Comfort: Choose a backpack with adjustable straps, breathable padding, and a supportive frame for a comfortable fit.
  • Capacity: Consider the size you need based on the length of your hikes and the gear you typically carry.
  • Brand reputation: Research and invest in reputable brands known for their durable, well-designed hiking backpacks.

Top recommended backpacks include:

  • Osprey Atmos AG 65: Known for its exceptional comfort and ventilation system
  • Gregory Baltoro 65: Offers ample storage and customizable fit
  • Deuter Aircontact Lite 65+10: Provides excellent load-carrying comfort and ventilation
  • Arc’teryx Bora AR 63: Features a customizable hip belt and durable construction

Frequently Asked Questions

Can I Use a Travel Backpack for Long-Distance Hikes?

You can use a travel backpack for long-distance hikes, but it may have drawbacks. Benefits include versatility and size options, while drawbacks include less support and organization. For optimal comfort and features, a hiking backpack is recommended.

What Are the Key Differences in Design Between a Travel Backpack and a Hiking Backpack?

When choosing between a travel backpack and a hiking backpack, consider material differences for durability, comfort, and weight distribution. Hiking backpacks offer superior support and organization, making long hikes more enjoyable and manageable.

Are There Any Specific Features of a Hiking Backpack That Make It More Suitable for Hiking Than a Travel Backpack?

Hiking backpacks offer specific features like durability, comfort, and accessibility for the trail. Supportive frames, organizational pockets, water reservoir storage, and versatile sizes make them more suitable for hiking than travel backpacks.

Can a Travel Backpack Be Used for Other Outdoor Activities Besides Hiking?

Yes, a travel backpack can be used for other outdoor activities besides hiking. It offers versatility for activities such as backpacking, camping, and day trips. Its adaptability makes it suitable for various outdoor adventures.

How Do the Sizes of Travel Backpacks and Hiking Backpacks Compare, and How Does This Affect Their Suitability for Different Types of Adventures?

When comparing hiking backpack sizes to travel backpack sizes, consider the material differences and comfort levels. Hiking packs offer a wider range of sizes, crucial for varying adventure durations, while travel packs are typically more limited in size options.

Conclusion

So, next time you’re gearing up for a hike, remember that the right backpack can make all the difference.

While travel backpacks are great for urban adventures, hiking backpacks are designed specifically for the demands of the trail.

But if you’re worried about the cost, remember that investing in a high-quality hiking backpack is an investment in your comfort and safety on the trail.

Don’t let the price tag deter you from choosing the right gear for your next hiking escapade.